Buy Blink Mini 2 Camera on Amazon
Buy USB Drive For Sync Module 2 on Amazon
Please note that some of the links in my video descriptions are affiliate links where I earn from qualifying purchases. As an Amazon Associate I earn from qualifying purchases.
Intro
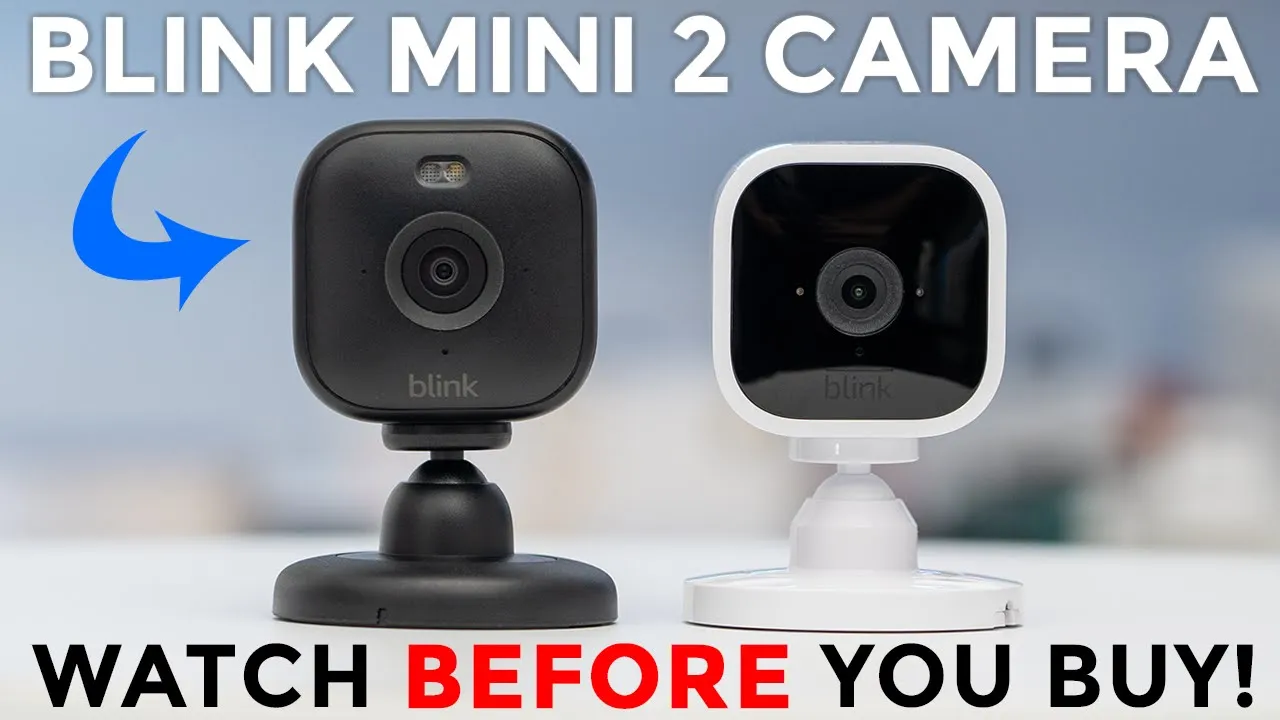
hey it’s Adrian and today I have the brand new blink Mini 2 camera I also have the previous generation or the blink mini 1 camera now you may be wondering what is new with the blink Mini 2 camera and there’s a couple of notable changes so the first is that we now have a 143° field of view compared to 110° on the blink mini 1 so a much wider field of view there’s also a LED spotlight at the top here and on the blink mini1 there is no Spotlight so because of that we now have the option to have color night vision on here but the biggest change is that the blink Mini 2 allows you to use it both indoors or Outdoors whereas with the blink mini 1 it’s only for indoor use now with all of those changes is it worth upgrading to the blink Mini 2 and ditching your blink mini one well let’s find out in
Package Contents

the box we have the brand new blink Mini 2 camera we also have a base for charging brick USB type-c to type a cable manual and mounting screws if you choose to buy the optional weather resistant power adapter for outdoor use it well it comes with a 13 ft power adapter we also have a manual and then we have wire anchors to secure this along your wall along with some screws to secure the actual power pack against the wall as well and when you buy the bundle pack that I have this is everything that comes with it the design
Design

on the new blink Mini 2 is a definite Improvement so it’s a pretty much matte finish all the way around compared to this glossy finish on the first generation of the blink mini by the way this also comes in white now the other notable change is that there’s now an LED spotlight whereas on the blink mini 1 there is no Spotlight but everything else looks looks pretty much the same in terms of the camera lens now if we take a look at the back there is a USB type-c port for charging and powering this up and on the blink mini 1 it was a micro USB cable which was really annoying to use now there’s a speaker located at the back of the blink Mini 2 but on the first generation or the blink mini that speakers located at the top and if we take a look at the bottom there’s a huge reset button that we can press here and on the blink mini one there’s just this really small reset button there now you can also snap in the included bases as well right here both of the bases look very similar but the blink Mini 2 base definitely feels a little bit more premium in the hand now what you can do to mount this is to just pop out this protective plastic cover at the top here giving you access to these two screw holes and then you could screw this into a wall or ceiling mounted and then just cover this back up to keep everything looking nice and clean and of course this is an articulating head so once you snap the camera on there you have a lot of angulation we now have 143° field of
Specs

view 1080p video resolution at up to 30 frames per second it comes in at around 65 G it operates on the 2.4 GHz Wi-Fi there’s 2-a audio the operating temperature is from -20 C to 45° C and it is Alexa compatible I’ve connected
App Setup

the blink Mini 2 to the power cable and the lights are flashing so I’ve opened up the blink app and I’m going to click on plus to add the camera now tap on Mini cameras and then it asks to scan the QR code located at the rear of the camera right there I’m going to use my my phone’s camera to do that and it already picked the camera up now it says to add it to my existing home network or you can create a new home network but I have one I’ll click on the existing one and I see the flashing lights I’ll click on Discover and I’m going to let it connect temporarily to the Wi-Fi now this part is really important pick your Wi-Fi network that has a 2.4 GHz SSID so I’m going to click on this one here put in my password now if you’re not sure you may have to go into your router or modem settings and split it so you can pick between a 5 GHz band and a 2.4 GHz band because this can only connect to a 2.4 GHz band so now we’re just going to wait for it to be added to the blink app all right so the blink Mini 2 is added to the blink app very easily so the blink Mini 2 has been added to the blink app and it is offering a 30-day trial to the blink plus plan trial so it says any new video clips will be available from the cloud tab if you go ahead and choose this and then you’ll also get person detection using the built-in computer vision chip that’s on the camera you’ll also get longer live view with the mini and wir FL Eye camera so you can stream up to 90 minutes of live view if you get the monthly plan and then lastly you know it’s just going to save everything to the cloud so you don’t need to worry so I’ll click on done and I’ll go ahead and it’s already automatically activated so we’re going to try that I’ll show you all of the the features how it works with the cloud plan then I will disable the cloud plan and show you how the camera Works without it and you can decide if you want to pay for that or not let’s take a
App Settings

look at the settings for the mini 2 so before we jump into the full settings you can tap on the icon of the guy running here and from here you can turn motion detection on or off so if you’re going to be coming in going a lot you may not want this on you can turn it off now if we go to notification snooze you can snooze notifications from as little as 30 minutes to 4 hours by default now now if you want to snooze anything outside of that you do require the monthly pay plan and this is why I have the option here that says custom and I could set as low as a minute of snooze all the way up to 24 hours now this is something I don’t agree with I don’t think we should have to have a plan to just set a custom option but hey it’s blink once you’re in there you can also refresh the thumbnail turn the lights on or off right from here or jump into the full device settings which we’ll do now and once we’re in here we’ll go into general settings you could change the name of the blink 22 take a look at the firmware see if you want this status LED on while it’s actively recording and then you can take a look at the network strength as well let’s go into motion settings and from here you could turn that on or off here as well and you can adjust the motion sensitivity if you notice it’s picking up too much motion or it’s not detecting motion enough now you can also set the re-trigger time and what this is is this is a coold down time before the camera starts recording next so the minimum is 10 seconds and you can go all the way up to a minute of re-trigger time obviously if you don’t want to lose a lot of repeat action it’s best to keep that at 10 seconds under motion zones you could see that this is what my living room area looks like and I could just say hey I only want to be notified of motion if it occurs kind of in this area and if I wanted a bit more fine control I could tap on advance and you can see it breaks each of these squares or rectangles into four quadrants so you could have a bit more fine control but you know basic is probably going to be good enough now you can also go into privacy Zone and if I wanted to you know completely block out recording anytime I’m watching TV well I could just draw that in and then it’s going to block out both detection and recording under video and photo settings so we could set the motion clip length from as low as 5 Seconds long all the way up to 30 seconds long so obviously if you want as much surveillance as possible keep it at 30 seconds now for video quality go ahead switch out from standard where you’re only getting HD video to best you know you’re going to get a little bit better video quality and since this is plugged in all the time you don’t have to worry about battery life you can also enable this option to end the clip early if the camera stops detecting motion I prefer to leave this off because someone may enter the frame leave temporarily and re-enter the frame so I like to keep this uh deactivated or inactivated now you can also flip the video depending on if you mount the camera from the ceiling and then for night vision you could set that to Auto on where the LED will always be on and clips will always be black and white or just completely off so it’s best to leave it on auto and then you can also go into the IR intensity and change it from low medium to high and then you can also have the camera capture photos once an hour now the photo capture resolution is quite abysmal not really a feature I find Handy but you know you can just leave it on if you like under audio settings you can adjust the speaker volume for two-way talk which I’ll demo later and then you can change the chime volume if you’re going to use this as a chime unit for your blink video doorbell and check out my video on that if you’re interested under lighting settings we could change the light brightness and I recommend just cranking it to the max because it is very weak to start with and then you could set how long until it automatically turns off after you manually activate it from 30 seconds to 10 minutes now I’m also going to enable this option motion activation so whenever it senses motion it will turn the lights on and I’ll just say hey anytime you sense motion leave the light on for at least a minute and if you’re going to be using the camera indoors and you require a bit of temporary privacy you could go into privacy settings and then just turn off recording and turn off audio streaming and then if we go into privacy zones is the same area that I showed earlier let’s go ahead and
Cloud Video Playback

review the recorded video clip so far now keep in mind that I do have this plus plan trial active for 30 days so I’m going to click on clips and notice at the bottom left it says local storage and that’s because I generally do not pay for the monthly Cloud plan it’s not a practice I agree with so I currently have the sync module 2 with a USB drive attached it and this is how my blink mini first generation will will record it it records to a USB driver attached to the sync module 2 and because of that I don’t have any thumbnails so I don’t know what I’m clicking into but let’s go into cloud storage since we do have the trial active and you can see with that we do have thumbnails which is very handy to have but I just don’t think we should have to pay for that but let me click into this clip it says it’s a motion clip and I’m going to tap into that that loads fairly quickly and I have a couple options I could delete the clip from the cloud I could download it to my phone I can share it and what I can also do is launch live view right from here now another thing to note is that some of these clips say live view some say motion and then some say person now you will only know if it’s a person in the clip if you get the monthly Cloud plan because it uses an embedded chip in the camera to identify if it’s a person this is another practice I don’t agree with because the functionality is already in the camera but they hide it behind a pay wall let’s take a look at another benefit of having the cloud plan so if I go into live view right now you can see I have an option to save live view so if I tap on that it says live view session will be saved and what that means is that if I pull up live view the camera is actively saving whatever I’m looking at however if you get the local storage plan with the sync module to an USB drive you can’t save Whatever video you’re looking at when you have live view activated that is a huge downfall and oversight with this type of system because what that means is if I don’t pay for a monthly Cloud plan and I’m looking at a lurker inside inside my home inside or my backyard or in the front of my home while I’m actively looking at this suspicious person the camera is not actually recording anything and the only workaround really would be for me to just start a screen recording on my phone which I may not always remember to do so that’s another benefit if you pay for the cloud plan but let’s go into more and you can see there’s an option that says here extended live view off so I can tap on that and what it says is I can watch up to 90 minutes of continuous live view however I’m going to lose the functionality to save Clips if I do that so you’ll see if I enable this I can now watch for an hour and a half or 90 minutes just in this one scene which could be handy if I want to take a look at you know my child at home a baby elderly parent a pet or whatnot but I now cannot save any clip so if something was to transpired it was suspicious on here it would not be saved I would have to be actively monitoring it and if I see something suspicious I’d have to pull down here and start a screen recording on my phone so again another limitation I don’t understand why I need to pay for a monthly Cloud plan to even have the option to look it for 90 minutes at a time the camera is continuously powered that should not have any bearing on anything the only reason I can think is maybe for heat generation purposes but I just don’t buy it with blink if you use live view video and you don’t have the cloud plan every minute the system is going to pull up a prompt that asks you if you want to continue and if you don’t tap on continue it’s just going to exit you out of there and it does this every single minute let’s go ahead and pull up live
Live View Video

view on the blink app and you can do this while you’re at home or while you’re at work or on vacation it doesn’t really matter now once you pull it up you have the option to manually turn on the spotlight or turn it off it’s not going to make much of a difference because this is such a bright room already so I’ll just leave that off but let’s go into full screen mode and whenever you’re in full screen mode in live view you know you can just go ahead and zoom in as you see fit and this is the maximum Zoom that you could go of course it’s digital so it’s not very sharp and then here it is again fully zoomed out if you’re planning on
Outdoor Install

installing the blink mini two Outdoors what you’ll have to do is secure this power brick area here there’s four holes two at the top two at the bottom you just secure it into break wood or wherever you’re going to have it mounted and then you can use these clips you can see on the right side here there’s metal Clips blink has plastic clips and then you could just secure the wire and then connect this USB type-c connector and into the rear of the blink Mini 2 now pay attention this USB type-c clip is a special weather sealed type of clip to prevent moisture from getting in so you must use this exact type of setup if you want to ensure you know good weather resistance you can see the benefit of
Video Quality
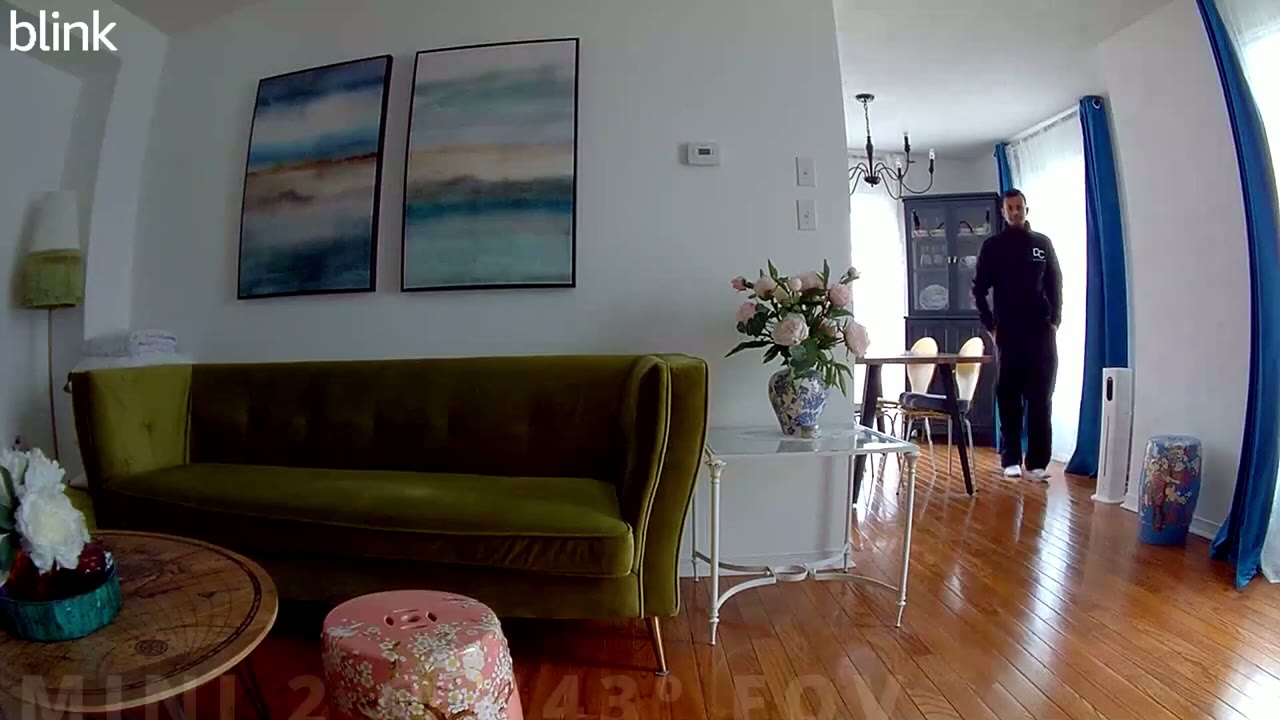
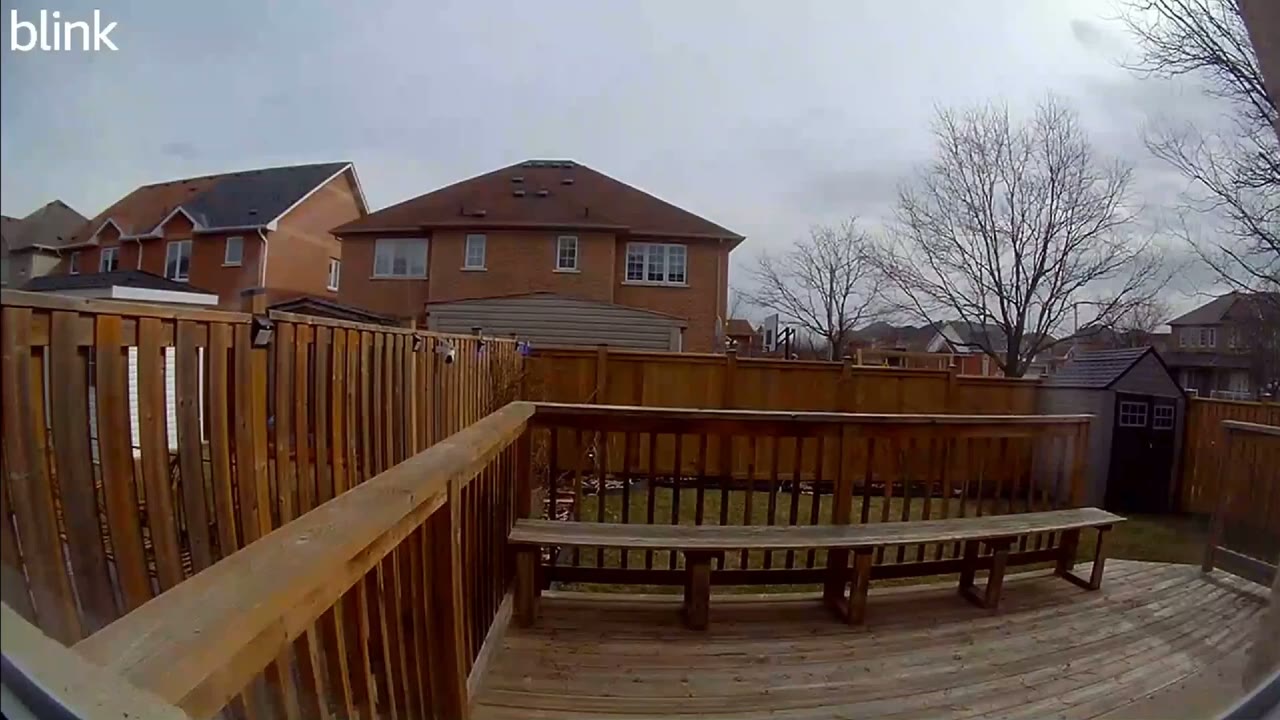
having 143° field of view on the blink Mini 2 compared to the 110° field of view on the first generation of the blink mini and that is a massive difference that allows you to capture way more of a room a backyard a front for your house or a driveway however I’m still disappointed that the best that blink can offer is 1080p video when a lot of their competitors offer 2K video or better now if the camera is placed indoors and there’s enough sunlight in the room or enough adequate Lighting in the room the camera does a decent job of exposing the image there are still some blown out areas and it’s still relatively easy to make out faces when it’s used indoors if it’s used outdoors and there’s enough light it’s the same you know type of video quality how ever anytime the camera is used at night things quickly go downhill it’s very pixelated it’s very difficult to make out faces and details unless it’s very close up so I don’t think there’s a noticeably enough difference in video quality to consider upgrading from the blink mini one to the blink Mini 2 however if you do require a wider field of view it’s definitely a worthwhile upgrade all right so here is my living
LED Spotlight

room and I do have some lights on and this is where the blink Mini 2 is situated I’ve made the living room pitch black and I’m going to turn the LED spotlight on and you can see that it’s actually doing a fairly decent job considering how small that Spotlight really is so off on yeah not too bad considering the size but this is not going to do much for an outdoor setup there’s not going to be much light illumination range by
Window Setup
the way if you’re planning on putting any of these cameras up against a window or any type of glass because you don’t want to mount it outside it’s not a good idea because at night all you’re going to see is a reflection or glare and especially if there’s any type of light on in the room it’s going to have pretty much unusable video here’s an example of
Two Way Talk

what sounds like so the camera is positioned about 6t away from the mhone and it does get very loud this is where
Motion Detection

the blink mini2 is and you could see there’s a little wall here so I’m going to pop out from that and test the motion detection something to keep in mind is that it shows that there’s a person at your mini too however if you don’t have a cloud plan it’s not going to say there’s a person at your mini to it’s just going to say motion detected so the motion could be a person it could be a car going by it could be the tree swaying in the wind only if you get the cloud plan can it identify if it’s a person or not
No Cloud Plan

now that we’ve experienced what the trial plan has to offer if you pay monthly let’s go ahead and cancel it and you’ll see just how crippled the blink system becomes so I’ll go ahead cancel my trial it says I can’t restart once I cancel sure I’m going to end the trial and now when I go back into my blink options here let’s just refresh the app so if I go into snooze notifications remember that when I tapped on this I could go ahead and click custom but now this option is gr out so I can only pick from the default which is a really silly limitation for not having a cloud plan let’s go into live view now and okay it’s loaded up now you can see the option to save live view is now locked and it says I have to subscribe to a blink plan to save Clips so what that means is if I’m looking at live view and something interesting happens I can’t record live view it’s locked unless I get a monthly Cloud plan a workaround for that is to just start screen recording on your phone so your phone will record everything on the screen it’s not an ideal solution you may forget to do it now the other thing is if I go into more I can no longer view extended live view so I can’t watch for up to 90 minutes next let’s go into the device settings let’s go into motion settings and motion recording types and you’ll see that it just says all motion now so person detection is now now unavailable let’s go into clips and you can see that it’s set to local storage and these are the clips I can see now there’s no thumbnails anytime you don’t pay for the cloud plan you just have to just randomly guess at what you’re clicking into also everything is tagged as motion you don’t know which of these contains a person again because we don’t have the blink Cloud plane so there really is a lot of limitation and blink really wants you to pay for that monthly plan if you decide to use the sync module instead of using the blink cloud plan well you’re going to have to attach a USB drive to it and I’ll link one of those below if you want to check it out
Cloud Plan Benefits

so I discussed the benefits of paying for the blink monthly Cloud plan but I still want to recap everything so with this camera you really do get full functionality only once you pay for the cloud plan you have extended live view which is up to 90 minutes you also have the option to save live view video while you’re looking at it however if you enable The 90minut Continuous streaming you don’t have that option but if you are only looking for short periods of the time the system can record it the other thing is that you get thumbnail previews whenever you’re reviewing video clips that way you can see what you’re clicking into and you can also see if motion is just general motion from a car from a tree from a pet or if it is a person so paying $3 us may not be a big deal for you to get full functionality out of this camera and depending on where you live that could even be the price of a cup of coffee what my main issue is is that we shouldn’t have to pay $3 for a lot of the functionality on this camera because there’s other brands out there where you can pay zero monthly fees and you get full functionality out of their cameras and even more functionality than what’s present in the blink Mini 2 now I’m going to go into a bit of a rant here but I don’t think I should have to pay anything to be able to stream for 90 minutes continuously the camera is continuously powered it’s plugged in if there’s any concerns about heat or heat buildup in the camera then let me stream as long as I can without me paying and I’m sure I can get about an hour I mean this is only a 1080p camera it’s not like it’s conducting or you know resolving high resolution video the other thing is that I could only get thumbnail previews on video clips before I click into them with the cloud plan so that means that if I have the sync module 2 why can’t it process thumbnails while there’s downtime and the system isn’t actively recording any type of movement but one of the biggest limitations and what I consider to be a huge deal breaker is that without a cloud plan if I receed the notification on my phone I tap the notification because it detected motion and I see someone lurking outside my house I can’t record that video while I’m looking at this person so how could I get evidence to present to the authorities if I can’t actively record what I’m looking at without a cloud playay the only work around is to start screen recording on my phone which is not something everyone knows how to do or will remember how to do especially if you’re not very proficient with technology so that is one of the hugest limitations to this camera system that while you’re actively watching some suspicious activity the camera is not actually recording it another thing that really irks me is that blink says there’s a CV chip on here that helps it identify whether motion is General motion or a person but for me to know if it’s a person I have to pay for a monthly Cloud plan well the chip is already on the camera if it’s doing the processing why would I have to pay for that functionality now if you
Recommended?

already own a lot of other blink cameras and you’re heavily invested in the blink ecosystem this is a worthwhile upgrade over the blink mini one you know we do have the ability to use this Outdoors we do have color night vision now and we do have a much wider field of view and I would say the wider field of view is actually you know worth the price over the blink mini one so the difference in price between both of these units is about $10 us and is it worth paying $10 for color night vision with the LED and a wider field of view and for me that is an actually worthwhile upgrade to make because if you’re getting a wider field of view then you can just capture more things you need less of these cameras in your home or around your property because you’re seeing more at once so so if you’re interested in picking up the blink Mini 2 because you already own blink cameras and you’re in the blink ecosystem I’m going to leave some links down below and if you don’t want to pay for the cloud plan after it expires I’m going to leave links down below also for the sync module to and a compatible USB drive to use with it and I’ll also link another video up here just so that you can see exactly what you get when you go with local storage and what you lose out with if you don’t have a coud plan if it wasn’t clear enough in this video if you found this video helpful please consider checking out some of my other blink related content and other security camera videos as well please also consider liking and subscribing it truly does help me out as a growing Channel and if you have any questions that I didn’t cover please feel free to leave them down below and I’ll see you in the next one soon
Buy Blink Mini 2 Camera on Amazon
Buy USB Drive For Sync Module 2 on Amazon
Please note that some of the links in my video descriptions are affiliate links where I earn from qualifying purchases. As an Amazon Associate I earn from qualifying purchases.