


Buy Neewer Magnet Mount for DJI Pocket 3 on Amazon
Buy Neewer Cage for DJI Pocket 3 on Amazon
Buy Neewer Phone & Camera Metal Cage on Amazon
Buy Neewer Cold Shoe Adapter on Amazon
Please note that some of the links in my video descriptions are affiliate links where I earn from qualifying purchases. As an Amazon Associate I earn from qualifying purchases.
Intro

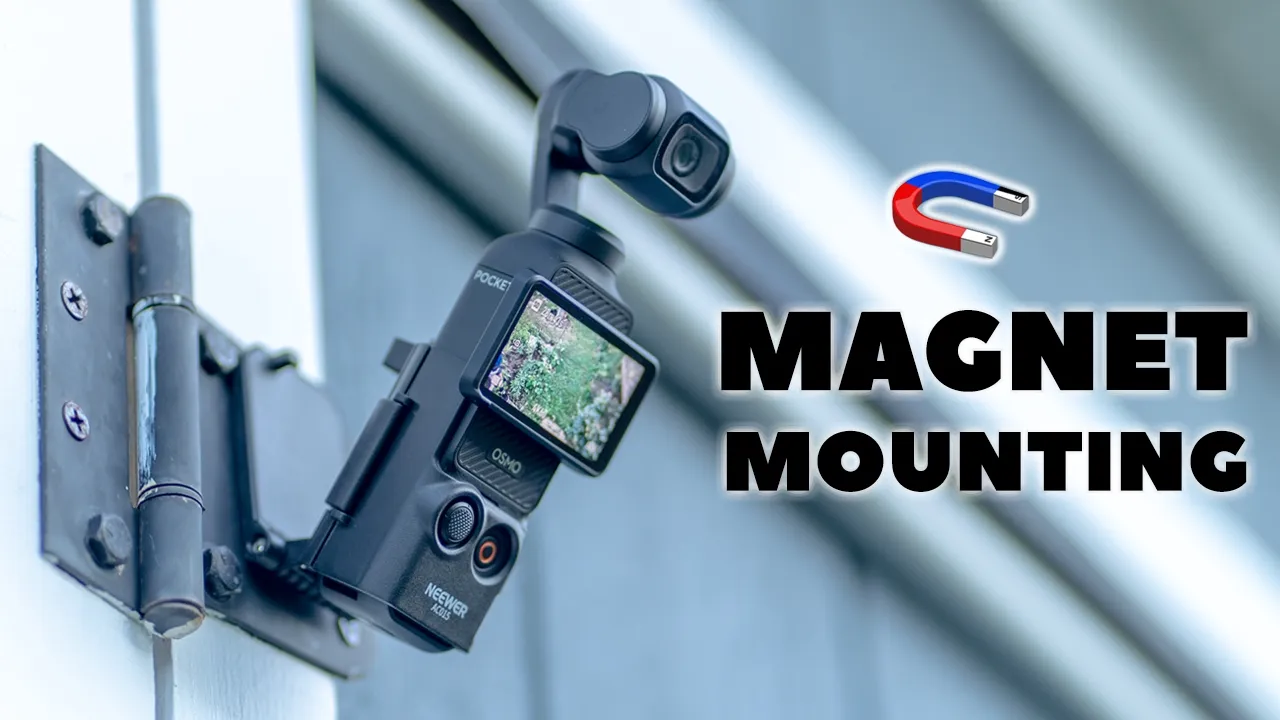
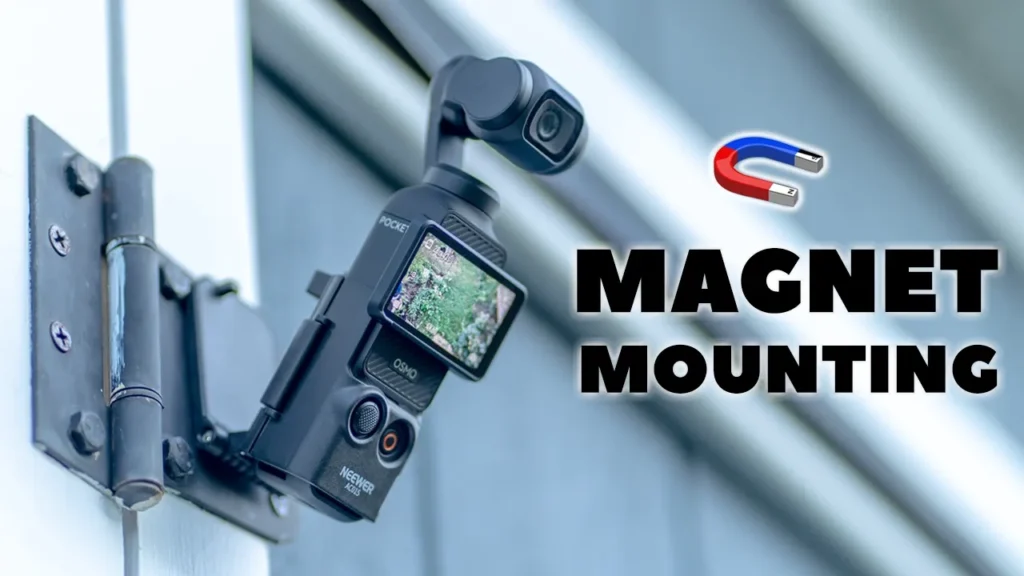
Hey, it’s Adrian and if you want some unique magnetic mounting options for your DJI Osmo Pocket 3, you’re going to want to check out this newer magnetic mount. The newer magnetic mount is fairly lightweight at around 53 g and you also have reliable magnetic mounting thanks to six high strength magnets. It’s quick and easy to insert your Osmo Pocket 3 into it and you still retain full access to all buttons and controls. And once inserted, you can angulate it basically any way you see fit to get really cool video shots or time-lapse videos. It also pulls double duty as a tabletop tripod or as an extended grip. So, let’s take a closer look at just how well the newer magnetic mount for the DJI Osmo Pocket 3 performs. And a big thanks to Newer for setting this up for
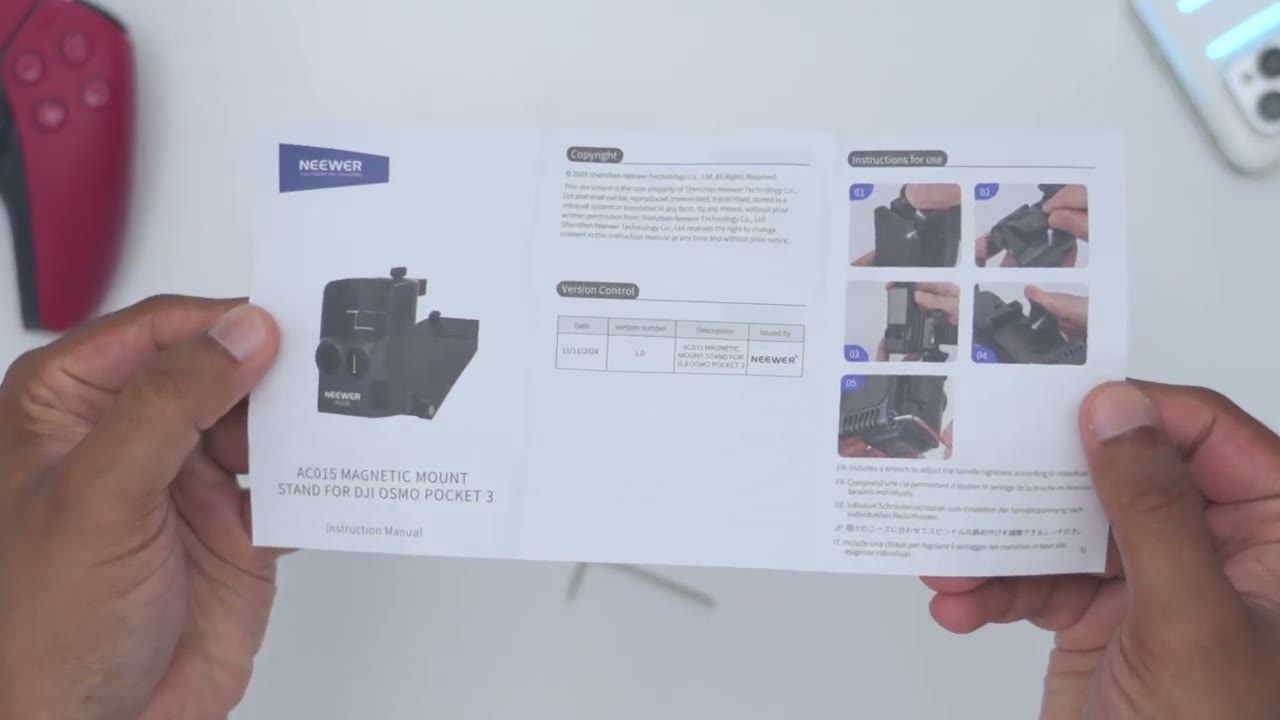
Package Contents
review. In the box, we have the newer AC015 magnetic mount, an Allen key to tighten the hinge, and a manual. Let’s
Design
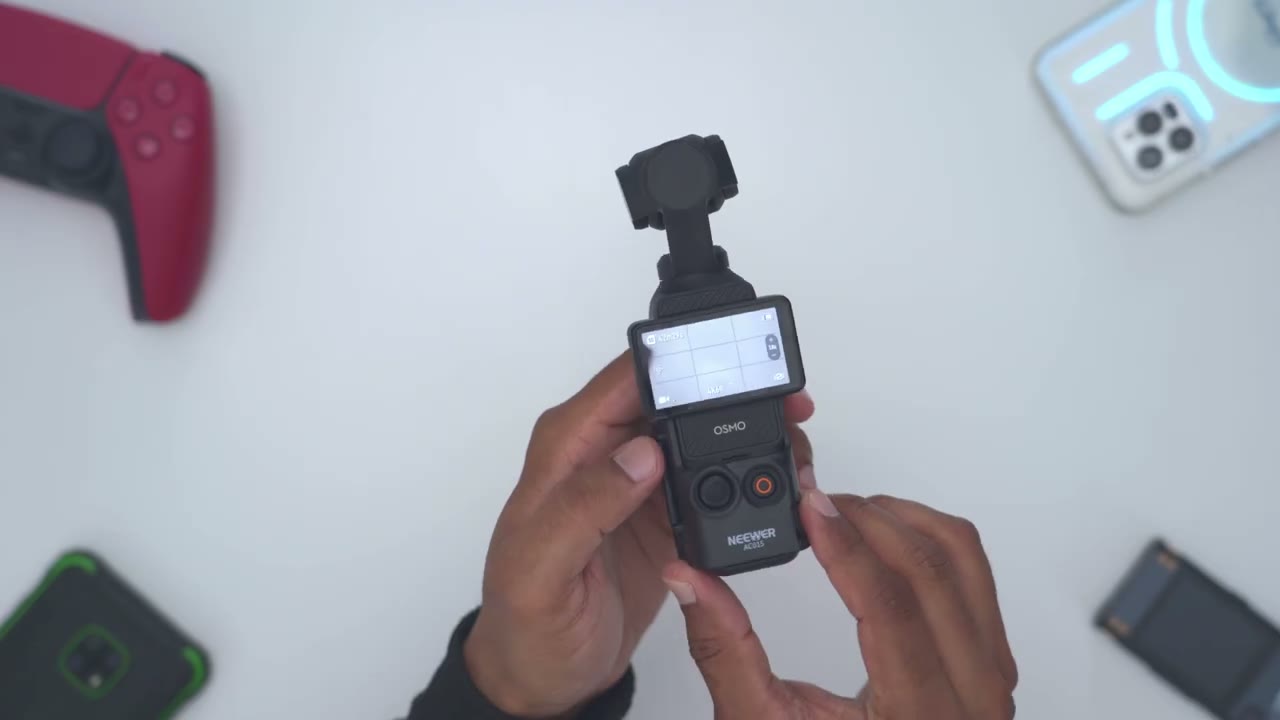
take a look at the design. really quickly. So, this is very lightweight, coming in at around 53 g. Now, it’s a mostly all plastic build, but it’s a very hard and durable plastic. And then on the very rear, this is where we have the magnetic mounting plate. And this has six high shrink magnets on here. There’s also this very soft touch type of material here, so that whenever you kind of mount it anywhere um metallic, it’s not going to get scratched. Now, you are going to have to open this area up to put the DJI Osmo Pocket 3 in here. And the way to do that is you can see on the top here there’s this little type of latch. So you’re just going to slide that there. And then you can go ahead and pull the magnetic mounting plate down. You can see it has a little hook here.
Um and that’s how it kind of clicks into place like so. You can hear that. So that’s not going anywhere. So you’ll just slide the notch here or latch. And then you can angulate it down. And you can see you have a bunch of levels of angulation all the way past 180° if you really wanted to. Once the mounting plate is angled down, we now have this area open up here with the arrow showing that we can actually lift that up. And you can see once I lift that up, that will disengage this little clip here and I could swing open this front arm. And then we also have this cushioned area here to just keep the Osmo Pocket 3 in place and to protect it. So the easiest way to actually install this is to take your Pocket 3, overlay this front part, you could see the button controls and joystick.
And then once you do that, go ahead, swing the arm right back into place. You’re just going to lift up here. Make sure that this is hooked right here. And then snap it down into place. And you can see that’s very uh secure in there. That’s not going anywhere. And then after you’re done that, you can go ahead clip the mounting plate back into place and then just, you know, magnetically attach this wherever you like on a wall or, you know, a car or any type of surface. So very easy to just pop this in. And now if you want to get it back out, you would just swing it open again, lift up this arrow here. That’s going to undo this little uh latch right here. And then boom, your Pocket 3 is out of the way.
So once you get the hang of it, you can see literally within a matter of seconds, you’re basically good to go. You also retain access to the lanyard port here if you wanted to attach a lanyard. However, you won’t have access to insert a micro SD card. So you will have to remove it every time you want to do that. Now, one thing I want to point out, you can see at the very bottom, we still have access to the USB type-C port here. So, you can go ahead and attach, you know, a power bank, the extension, uh, power grip there, or the additional extension here. So, you can kind of use it as a tabletop tripod. So, you still retain full functionality. And taking a
Ease Of Use
look at a side view, you could see that the joystick controls extends just slightly here. But if we take a look at where the recording button, it’s recessed. And that’s to prevent any type of accidental presses. So, I could just go ahead, you know, hit the record here. And you can see it’s really easy for me to just go ahead and use the gimbal, you know, just kind of angulate it around as I see fit. You know, really no issues with operation there. However, if you don’t have that extension piece I just showed, this actually lets you just kind of put it flat on a table and it actually acts as a tabletop tripod. You can see I’m hitting it. This is not going anywhere.
Now, what you can also do to make this even more stable is you can actually kind of like extend this down and have the camera actually, you know, have a larger surface area on the table and then you can take, you know, time-lapse video or record yourself eating or whatever you want to do. So, really a ton of versatility here. And another additional bonus or benefit of this is you can see it actually widens the entire grip. So it actually makes this much more ergonomic to hold in the hand instead of holding the very thin pocket 3. And an even additional benefit to that is if you open up this latch, you can angulate this down kind of kind of like, you know, 180° and you can actually hold it like this.
So you can see, you know, instead of attaching the grip, you’re just using this and you, like I showed earlier, you can actually tighten this hinge to make this, you know, really stiff and just hold it like that. So you can have really a very minimal and slim setup with a ton of functionality and of course the magnetic mounting options. And you can see if I open up the magnetic mounting plate. So I do have to place a bit of pressure to get this to come down. It’s sufficiently tensioned in the hinge. But you can even make that, you know, tighter using the supplied Allen key or make it a bit looser. And you can see in terms of angulation, so it can be straight up like this or you can have it kind of anywhere in between.
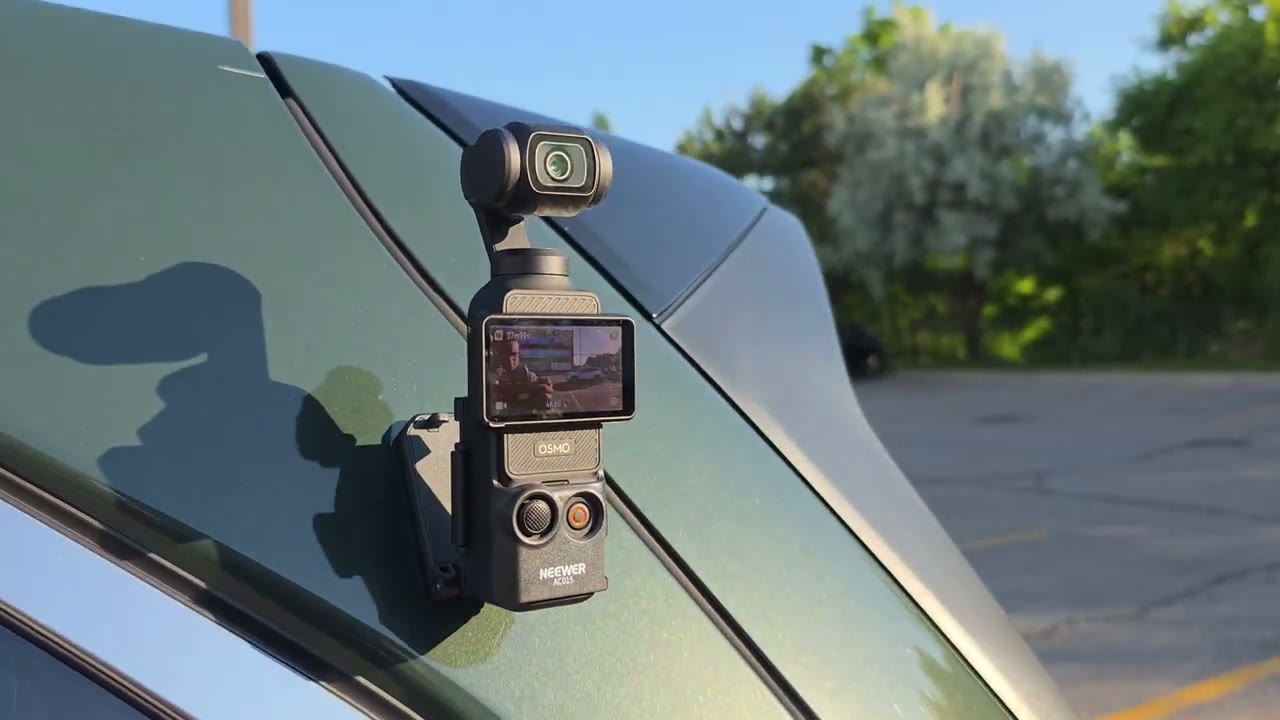
So, you can get really unique shots, you know, kind of straight on shots, you know, overhead shots. Really, the sky’s is the limit as long as you can magnetically uh mount this to a metallic surface. And here are some examples of different places you could mount your Pocket 3 using the metallic mount. And you could see it’s very stable, and I was able to get, you know, a bunch of different type of video shots and time-lapse video. So, the
Recommended?
newer magnetic mount for the DJI Osmo Pocket 3 lets you magnetically mount your Osmo Pocket 3 for very unique shots and time-lapse video. I’ll leave links down below in the video description and pin comments for you to get your very own earth to learn more. And if you need a metal cage for your Osmo Pocket 3, you could check out my review of Neura’s metal cage here. It has way more mounting options, especially for GoPro accessories and for various camera accessories, and it also makes a great rig as well. I have a huge favor to ask. If you found this video helpful, would you please mind liking and subscribing? It truly does help me out as a smaller growing channel. And stay tuned for more videos like this where I review accessories for the Pocket 3 and the upcoming Pocket 4.
And maybe check out some of my other tech reviews. Aside from accessories, I also review, you know, laptops, monitors, gaming keyboards, headphones. Really something for everyone. And I really hope you’ll join me in my next video
Buy Neewer Magnet Mount for DJI Pocket 3 on Amazon
Buy Neewer Cage for DJI Pocket 3 on Amazon
Buy Neewer Phone & Camera Metal Cage on Amazon
Buy Neewer Cold Shoe Adapter on Amazon
Please note that some of the links in my video descriptions are affiliate links where I earn from qualifying purchases. As an Amazon Associate I earn from qualifying purchases.