


Please note that some of the links in my video descriptions are affiliate links where I earn from qualifying purchases. As an Amazon Associate I earn from qualifying purchases.
– Intro

hey it’s adrian from them crumbly’s tech and today i’m going to be showing you how to make custom youtube thumbnails now just a quick warning this is a really long video and it’s really long because i’ve made it very detailed and i’m explaining all the steps that way if you get stuck or you forget you can always come back to this video and refresh your memory so this is going to be 100 free we’re not using any type of software so you don’t need to buy photoshop or anything like that we’re going to just be using your browser and we’re using a free website called pixlr.com to make the thumbnails so i’m going to be using um like the professional stock photos that they have on the site but you know anytime you’re making a youtube thumbnail it’s always best to have like your own custom image so if you’re following along and you have your custom images just substitute your images instead of what i’m doing all right so let’s get started
Make Up Thumbnail Tutorial
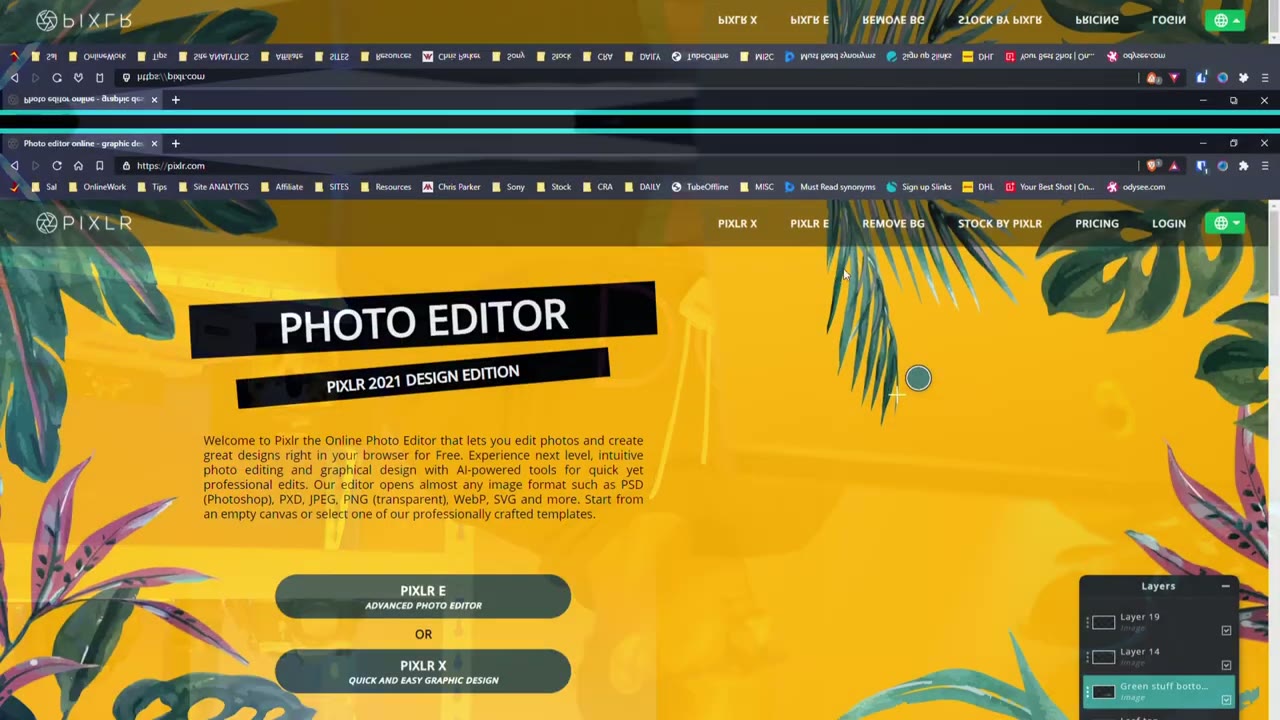
okay guys so let’s get started by making our first thumbnail so what we’re going to do is go to a website it’s called pixlr.com so it’s p i x lr.com now once you get there you’re going to click on advanced photo editor now there is an option for quick and easy but we’re going to start on advanced because it’s going to give us a bunch more control so go ahead and click that so once you’re here you’re going to see it’s going to give you some options like templates collages and we’re not interested in that so what we’re going to do is pick create new and anytime you’re making a youtube thumbnail youtube prefers if you use a 1280×720 design so that’s what we’re going to pick here so you can see this web 720 it’s 1280 pixels wide by 720.
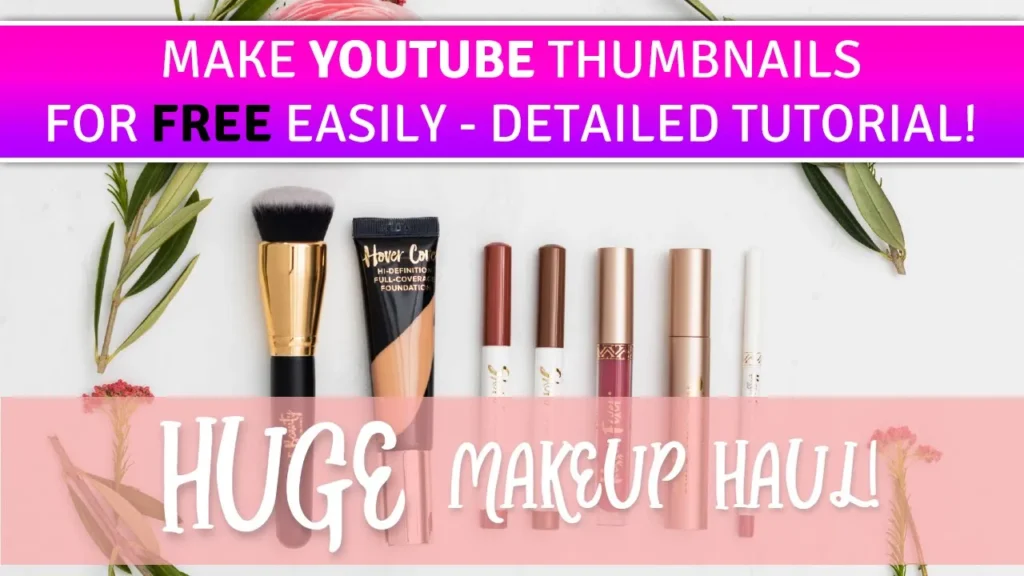
so make sure you pick this option we’re gonna give it a name so the first thumbnail i’m gonna make like a makeup haul so i’m gonna just call it makeup then i’m gonna click create once we do that um it’s gonna take you to this screen and this is your main work screen so you can see there’s some tools on the left side which we’re going to use there’s a layers history and navigation tab on the right side and the tab we’re going to use the most is the layers tab you’ll see the importance of that later now the last part is just these options up here and that’s pretty much the three areas we’re going to be focusing on so i’m going to be using like stock photos for my thumbnails but if you’ve taken photos with your phone or your camera feel free to use those images instead as you follow along so if you did have an image you want to use you would click on file click open image and you would pick you know whatever jpeg or you know image you have and then you click open i’m not going to do that just for simplicity i’m going to be using a stock photo so i’m going to click on stock search and i’m going to type in cosmetic because we said we’re going to do a makeup thumbnail so because youtube prefers like a wide screen thumbnail which is 100 1280 pixels wide it’s better if you pick a thumbnail that’s wide right versus vertical but um you can also pick a square one and crop it so i’m gonna pick this image here um it’s square but i mean we could crop it so that we’re only using a white part of it when you use a vertical image like one of these it’s much harder to work with so i’m going to go ahead and click this image here and now it’s saying the image is very large 4823 by 4823 and we know we only need 1280 by 720 but i’m going to pick it at the full size and i’m going to adjust it later so i’m going to just pick max 1920p click apply and when it loads the image it loads it in a tab up here but if you look to the left this is our original tab the makeup tab so this is the tab we’re going to be working in so let me go back to this image tab and what i’m going to do is i’m going to click edit and copy and then i’m going to go to the makeup tab and i’m going to click edit paste that way we’re always in this makeup tab work area now when i have the image here i can move it around as long as i have this arrow selected here and you can see it when i move my mouse over it says arrange so this is the tool you want to arrange the positioning of your image and you can see i can move it you know up down left right and that looks good but i did like this rose in the image and i want to have the rose in the thumbnail so how do i do that well i have to resize the image now when you resize an image you always want to resize the image diagonally versus just up and down left and right and the reason you want to resize it diagonally is because it’s going to maintain the proportion of the image the aspect ratio sometimes if you resize it without maintaining that aspect ratio the image is going to look really squished or really it so to resize it make sure you’re on this arrange icon i’m going to move the image around wherever i want it it doesn’t really matter at this point make sure the aspect is set to fixed fix is what we want and i’m going to give it a size of say 1400 remember we need 1280 and if i put that in you can see i can move this image and it fits exactly to the workspace 1280 which is what youtube wants now i don’t want it this small i kind of want these elements to be a bit bigger so i’m going to make it 1400 so i’m going to type in 1400 and then then it’s a bit bigger and from here you know i can resize it left right up down or sorry i could position it left right up down i’m going to move it so that everything is about here i can see the rows a bit of this red element here and um that looks good to me i think maybe actually maybe i’ll move it up a bit so i’m happy with where this image is so now that i’ve not now that i’ve selected the positioning i’m going to click these three tabs on the layers icon and i’m going to click locked once i click locked i can’t move it around it’s locked in place and i want it there for now if i want to move it later i would just go here and put it to unlock notice when it’s locked it has a padlock so the next thing i want to do now is i want to add some text and i want that text to say huge makeup haul so to do that i’m going to click the text icon on the left here and i’m going to click somewhere on the image do you want to add a text there yes i do so i’m going to click add and there we go it’s added a box for me to add my text so i’m going to type in makeup haul and what i want to do now is i want to change the font and the color and the size because i’m not happy with any of it so i’m going to click font click this drop down and we’re presented with a bunch of options you could see all the options in yellow these are for paid um paid fonts we we didn’t pick that option we’re using the free version so we’re going to pick one that’s in gray now i like this font called bro brodetto so i’m going to click browdetto and you can see it’s changed the font style now i don’t want it to be black i want it to be white so i’m going to click white or i could just play around with this selector up here and move it to white so that’s good and next thing i want to do is i’m going to increase the size so i want it to be maybe around say 120 i’m happy with 120.
so i’m done that i’m going to click away and notice these ads keep coming up because we don’t have the paid version so just close that if it’s getting in the way now i have makeup haul and what i’m going to do is i’m just going to resize this text box to about there because we don’t need all the space and i’m just going to move this down here this is kind of where i want it to be later now i also want to add the word huge but i want to make the word huge actually huge so and i wanted to keep it the same font style so what i’m going to do is i’m just going to make a copy of this text layer then modify so while the text layer is selected you can see there’s the selection box and it’s selected in this layers tab it’s highlighted here i’m going to click edit go to copy now i’m going to click edit click paste and now you can see i have two layers and you can see on the side here two layers as well so let’s double click into this layer and i’m gonna type in the word huge now i want to keep it you know the same font style but i actually want to make it larger so from 120 i’m going to push this up to maybe 200 and then i’m going to position it and so i’m going to click this posit this arrange icon and i’m going to position it over here so it’s going to be huge let’s click this one and move it in huge makeup haul so that’s kind of where i want it to be i’m happy with that now the only issue now is it’s very hard to see the word huge makeup against the cosmetics and against the background because this is kind of white and this is white so to solve that what i’m going to do is i’m going to put a box behind this text or underneath it so to do that i’m going to click this shape icon and you can see it’s picked a box here so i’m good with the box so i’m just going to draw so i’m going to click here and draw and i’m just going to draw all the way outside of the document just so i can move it around later so i’m happy with that i’m going to let go and you can see it’s created a text sorry a shape box for me shape rectangle and i don’t like this color i want to make it a color that’s similar to the rose here so i’m going to click fill and i’m going to just move this around until i can kind of match it to the rose i’m not going to do it exact guys just just doing it really quick here but let’s say i leave it kind of like here maybe so i’m good with that now i want the box to be underneath or below the text so if you look at our layer section here you could see the box or the shape layer is on top and if i click it and i move my mouse down i can move the positioning so i want to move it behind huge behind makeup or underneath and let go so there you go now you can see the box is below and the text is on top so that’s already looking much better to me the next thing i want to do is i still want to see the cosmetics under the box but the box is blocking it so what we’re going to do is we’re going to click these three dots here and we’re going to go to transparency and instead of 100 i’m going to move it down down and you can see as i move it down you could see more of the cosmetic spine so i’m going to leave it maybe at about 70 say that looks good to me and i know i’m done playing around with this box now so i’m going to click locked so this is locked in position i don’t need to worry about it now the text huge and makeup it is standing out a bit more but we could do a couple more things to make it pop even more so let’s start with huge i’m going to click huge then i’m going to click on the text icon and you can see once i do that i’m presented with these options notice if i’m in a range and i click huge there’s no options up here but once i click the text icon down here i get my options again so i’m happy with it at 200 but what i want to do is i want to click on styles and i want to give it a shadow okay so i’m going to click shadow i’m going to turn that on and what i’m going to do is i’m going to give it a color i like black so i’m gonna go down to black click okay and i’m going to give it a blur of maybe seven and do you see now there’s a blur under here seven now it’s too far away so i want to reduce the distance i’m gonna put that to about seven as well so you can see now that the blur is under there actually i’m happy with five that now you can see with the that shadow under it the huge is standing up much more um the direction i’ll leave that alone and the opacity i can make this a really dark shadow or a really light shadow so i’m going to go maybe for about 24 so 7 5 24.
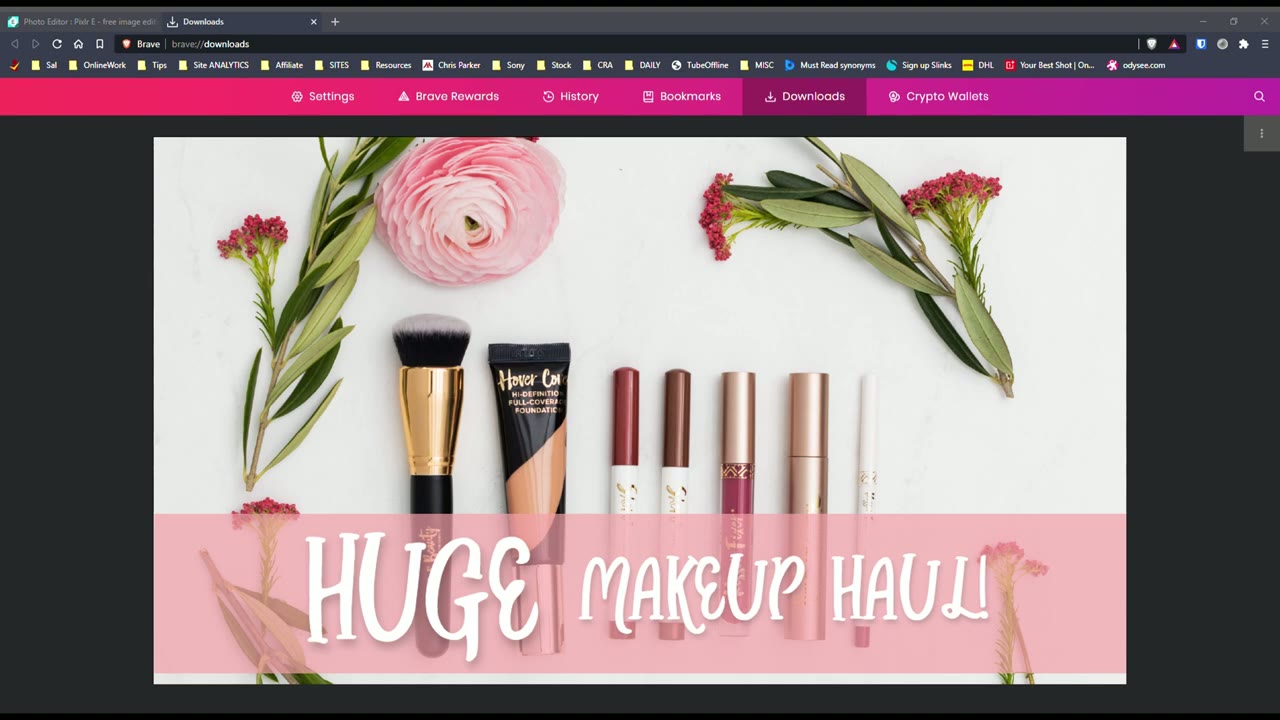
i’m happy with that and because i want to match these settings now i’m going to click the make up haul layer it’s already set to text i’m going to go to styles turn on the shadow here and let’s just mimic those settings so this was seven this was five and then this was 24 and there we go so now they’re both matching i think i can move make up a little bit lower so it’s about there i’m happy with that and if i look at this the space between the exclamation mark to the space between the h there’s more space on the left side so it’s not centered so let me click huge click the arrange tool let me close this ad and i’m going to move huge over a bit then i’m going to click makeup move that in a bit more and i think i’m good like that guys if i really want to make this pop a bit more i could actually change the color of huge so let me go to a huge click the text icon click the fill and i can now click like say red or black so it really stands out right so you could play around so it contrasts well the other thing i want to show you is you can also do gradient colors or patterns so let’s do gradients so i can start this color at black right and end it at say not exactly black but say dark red and you can see it fades from dark red to black now i don’t really like that so let’s go let’s go from white go from a white to like a kind of a pinkish color maybe like that so you know there’s a lot of options to play around i’m not fond of that i actually liked it better with just straight white so i’m going to leave it with white and that’s really it we’re done now if you want to play around even more what you can do is you can play around with this background um layer actually so let’s click the background layer i’m going to click these three dots and i’m going to put it to unlocked now i’m going to click the three tabs again and notice there’s a blend mode here and on the blend mode you have different options here okay now these options are not going to work unless you add a layer underneath so let’s leave that locked again let’s go to this image layer below here and what i’m going to do is i’m going to pick the paint bucket and i’m going to fill it with white so it’s filled with white i know you can’t see it because this layer is turned on but i could show it to you by clicking hidden and now you can see the layer underneath here is white so let’s turn this back on to visible and let’s change the blend mode so let’s go to hue difference you can see that’s a really really big difference now let’s just go back to let’s go back to none i’m going to move this white layer on top of the background layer and i’m going to change the blend mode on the white layer so let’s go to overlay and let’s just drop the overlay down so see as i play around with the transparency it changes the effect let’s go to darken and you can see i can crank this all the way up or move it lower let’s go to color dodge again you could see as you play around here it changes how the bottom layer is affected so you know feel free to play around with these options of course you could change the fill color of this layer i could you know change it to say black maybe okay change it to black and then i can play around with the options again so let’s go to color dodge change the transparency go to overlay change the transparency and you can see it’s adding you know like a lot more contrast to the image so just play around with however you like it with these options here the blend modes but if you want to keep it really simple you could just follow on what i did and you don’t have to play with blending modes or anything like that so that’s our first thumbnail created the next thing we’re going to do is we’re going to go to save this thumbnail so we can upload it to youtube so to do that we’re going to click on file go to save and the default has a jpeg that’s okay just make sure you set it to 100 because we want the maximum image quality and then go to download and i’m just gonna click show all your browser may be different i’ll click show in folder that’s the image here if i double click it i can see this is my completed image 1280 pixels wide by 720 high and when i go to edit my youtube video i can click upload custom thumbnail and pick this thumbnail so that’s our first thumbnail done next i’ll make a different theme of thumbnail and i’ll see you in the next part
Recipe Thumbnail Tutorial
okay so let’s get started with our second thumbnail so you’re gonna go back to this website pixlr.com pixlr.com and then when you’re here you’re going to click on the advanced photo editor once there ignore everything it’s showing you and click on create new and youtube likes thumbnails that are 1280 sorry 1 280 pixels wide by 720 pixels high so we’re going to pick this option web 720p we’re going to give it a title so i’m going to make a recipe thumbnail i’m going to click create now that we’re in our workspace again these are the tools we’re going to be using the tools on the left here the layers tab on the right and then these options up here now if you have a finished image or an image of you know whatever recipe you’ve created cookies a smoothie cake whatever it is what you’re going to do is you’re going to click file click open image and you’re going to pick the image from wherever it is on your computer of that finished recipe i’m going to be using a stock photo so i’m going to click on file stock search and i’m going to type in cookie i’m going to pretend i’m making a thumbnail for cookies so again going back to what i was saying youtube likes widescreen thumbnails so it’s going to make our life a whole lot easier to pick a wide thumbnail like any of these so let me just scroll around till i see something i like um this christmas theme this can work but i prefer something else let’s get here i kind of want something a bit colorful to work with instead of just like you know white white cookies or brown cookies say these are colorful but because it’s vertical it’s going to be a bit tricky to fill our workspace let me play around a bit more sorry browser on a bit more actually you know what i kind of like this image it’s dark um it’s actually but it’s a i noticed not a lot of people pick dark actually this one looks good um it’s a wide screen there’s a lot of white it’s a very fresh shimmer so i’m going to pick this image and now it’s saying the image is very large i’m going to say that i want this image at 1920 i’m going to click apply and now i have the image it’s a very nice looking image and you can see it’s put the image on a separate tab here but i want it in this tab which is our recipe tab so let me go back here i’m going to click edit copy then i’m going to go to my recipe tab or my recipe work area and click edit paste now i have the image on here now notice it’s put the image as a layer and the image is quite big i want it much smaller so what i’m going to do is i’m going to make sure my mouse is on this tool which is the arrange tool i’m going to make sure the aspect is fixed you want it on fixed and i’m going to change the width so instead of 1920 i’m going to type in maybe say 1400 and you can see it’s resized the image now i’m going to just click the image and then i’m going to just drag it around and position it where i want it and you want to make sure you you never have any of this empty area here so just position it where you want i kind of like it maybe maybe around here and i’ll put the text down here or somewhere around here so let’s see um that looks good to me i think for now so what i’m going to do is i’m going to lock this in this layer in place so i’m going to click these three tabs here click locked and now i can’t move it around so that’s where i want it now one thing i don’t like about this image it’s it’s kind of dull kind of bland i’d like to increase the colors on here so what i can do to do that is i believe yes so let me unlock it i can go to adjustment and let me try this auto address and see what happens so you know that’s a bit aggressive for me so let me click edit undo and let me go and i want to play with the the saturation actually the hue and saturation so i’m going to click colorize actually bad idea let’s go to saturation let me crank that higher so see as i crank that higher it gets a bit more pink which is what i want i want it to really pop but you know still be a bit realistic so i kind of like it there and i’m going to click apply now i’m happy with the color i will lock this image again so that’s done next thing i want to do is i want to add some text to describe what this thumbnail is about or what it’s going to do for the viewer so i’m going to click the text icon and i’m going to click anywhere on here and it says do you want to add a new text layer i want to add it and it’s automatically added this text box and now i want to think of what this recipe is going to be so i’m going to say um let’s say quick quick or let’s just say easy macaron macaroon uh recipe so that’s the going to be the title or just the title of my thumbnail so i’m happy with that but i don’t like the font so i’m going to click this font area up here and notice that’s only um shown when you’re in the text tool if i click arrange those options are gone once i click text and i’m on the text layer then i have these options here so i’m going to click here again the yellow options are if you’re paying to use the service we’re not paying so i’m just going to scroll till i see something i like and you know you guys go ahead play around till you see something you like i’m not going to spend a lot of time here um it’s going to be a really long video but let me see and it’s it’s best to pick a font that’s not too difficult to read you know you want to be very clear as soon as someone sees your thumbnail so i’m going to pick this one here and i’m going to increase the size so it’s much bigger so let’s see i’m going to put it at maybe what’s up 120.
now i’m going to make this box a bit wider so to do that i’m going to go back to a range and i’m going to stretch it out stretch it out then i’m going to go back to text and i’m going to increase the size here so it looks like 150 is as much as it’s going to let me go so i’m at 150 and i want to move this text to the top so i’m going to click the arrange icon and move it up here so easy macaroon recipe so now i’m going to close this area this ad here is getting in my way so i’m happy with that the only thing is now because it’s a light background and the text is light it’s getting lost up here so what i want to do is maybe i want to change the text color so let me click back texture click white and let me just play around with these colors here so let’s go to green see let’s try to pick a color that kind of complements the pink that’s there and i don’t have it off the top of my head which color would complement it so you know what i’m just going to pick i’m going to pick a color like in between green and blue so let’s try this color here that looks good to me may not look good to you but whatever you can change it as you want so we have that now let me see if there’s a way i can bold this so see if i click on the format area click b for bold now it’s much thicker but it may be a bit harder to read so let’s undo that and the next thing i want to do is i want to go to styles and i want to put an outline so i’m going to turn on outline and i’m going to give it an outline of maybe let’s try black something really aggressive so it’s black and the size is a bit much for me i want it a bit lighter and you know i’m really not a fan of black so i’m going to go to white instead and let’s let’s expand the size of that and you know what i think i’m happy with it there and like i like i’m showing you guys you know this is something where you have to really experiment around you’re not going to get it right the first time so really play around till you find something you like now let me go to shadow i’ll turn the shadow on and i’m going to give it a shadow of black and i want to give it a blur of i would say 10.
the distance i’m gonna put it at five and the opacity i’m gonna put it at around ten so actually let’s do ten five ten that looks good to me so i’m done with that and you can see now the text it really stands out against the background image now we have a white outline this green font here and then we have a shadow and you’re i’m not really happy with the green so let me click that again let me see you know maybe i’ll stick with the purple that looks okay to me i’ll move it more to the top now there’s a there’s another thing we can do to really make this text pop which is to add a a box layer or rectangular layer under it so let’s try to do that now so what i’m going to do is i’m going to lock this text layer and i’m going to create a shape layer this is the shape sorry this is the shape tool i’m going to click that and it’s on this box sorry the rectangle so i’m just going to click and i’m going to create a really large box and i’m going outside of the artwork on purpose there’s a reason for that so let me see if i leave it as a white box so i’m going to position it back into the work area let me go all the way to the top sorry right there and the issue now is that the shape layer is on top of the text let’s fix that so let’s go over to layers click it and then drag it under under the text layer and let go so now we don’t have the issue where the text has not shown now it’s being shown so let’s click my arrange tool move this up a bit and that looks good to me so now i can see the text stands out much easier but i can’t see the background if i want to see the background what i’m going to do is i’m going to click the shape layer click these three dots here and i’m going to adjust the transparency and you can see as i adjust the transparency i can see the background below or beneath so i’m going to leave it maybe at around say 40 39 looks good to me 39 so i can see the font easily i can still see the background and that looks good to me so once i’m happy with my thumbnail i’m going to click file save i’m gonna make sure the quality is at a hundred percent you could pick you know jpeg or uh png i’m gonna just leave it as jpeg to keep it simple click download and once it downloads in your browser just go ahead and click it and you can see there’s our completed thumbnail so in youtube you would just go to edit your video like normal and pick custom thumbnail and you would upload this thumbnail and that’s it so if there’s any thumbnails that you guys have seen that you’d like to replicate um you know leave a message in the comment below let me know the title or leave a link to the video i’ll take a look at the thumbnail and i’ll see if it’s something that’s easily easy to replicate or duplicate in pixlr obviously if it’s a very complicated thumbnail you might need to go to professional editing programs like photoshop and things like that but um you know there’s much more in pixlr that i haven’t looked at so if you see a thumbnail and you’d really like to know how to create something like that uh leave a link to the video i’ll take a look at the thumbnail and i’ll see if it is something that you can do here now if you guys found this video helpful please consider liking and subscribing if you have any other ideas for videos that you know would be helpful for you um please also leave that in the comment and i’ll take a look if it’s something that’s easy to teach all right so i hope that
Summary

tutorial or walkthrough is helpful for you if it was please consider liking and subscribing i’m always doing these type of like um tips videos and things like that also if there’s any part that was unclear or if there’s anything you’d like to learn that i didn’t cover let me know in the comments below like i said this is like a really basic um introduction to making youtube thumbnails with free software however for those of you who want something a bit more advanced let me know i can see if it’s possible through pixlr if not then it may be something where you have to invest in software like photoshop or or something like that and i can look into doing tutorials for those type of softwares as well so again if the video was helpful please like and subscribe and i’ll see you in the next one bye you
Please note that some of the links in my video descriptions are affiliate links where I earn from qualifying purchases. As an Amazon Associate I earn from qualifying purchases.