


Buy NEW Blink Video Doorbell on Amazon
Please note that some of the links in my video descriptions are affiliate links where I earn from qualifying purchases. As an Amazon Associate I earn from qualifying purchases.
Intro

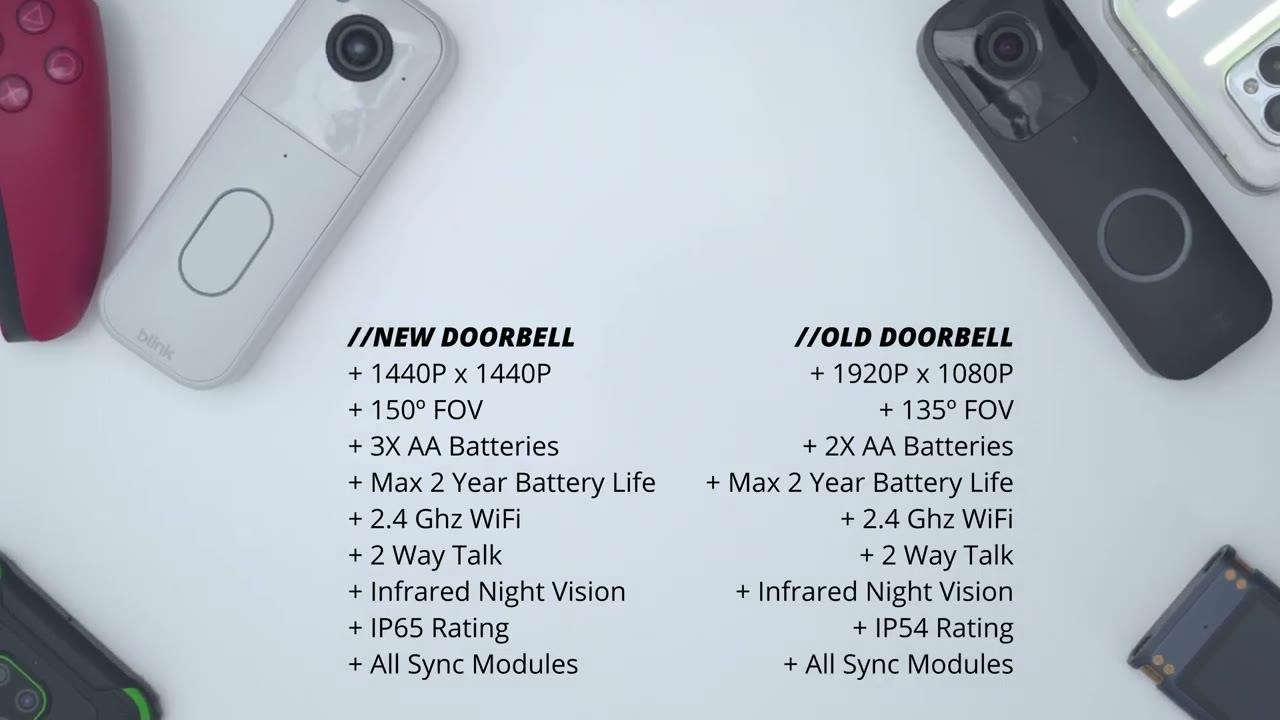
Hey guys, it’s Adrian and Blink has just released their brand new video doorbell. This is the second generation of it and is the upgrade from the first generation which I have here. Now, is it actually worth upgrading from the first generation, if you have it, to the brand new second generation? Well, there’s a couple of notable changes on the second generation. One is that we now have a 150° field of view, giving us headto toe coverage. Live view also pulls up a little bit quicker, and there’s also an official IP65 rating. However, in other areas, not much has changed. So, let’s take a closer look to see how well the brand new Blink Video Dobbell compares against the previous generation, and you can decide if it’s worth the upgrade for
Package Contents
you. If you purchase the brand new second generation Blink Video Doorbell in the complete package with the Sync module, instead of just the add-on package, you get the second generation Blink Video Dobbell. I have it in white. It also comes in black. There’s a rear mounting plate, an optional wedge you could use to angulate the video doorbell. We also have the sync module, a USB type A to type-C cable and power brick to just permanently power this in the wall. We have hardware screws, a detach tool to remove the video doorbell, quick start guide, three aoublea batteries, and extension wiring to wire the video doorbell to your home’s existing chime. In terms of
Design
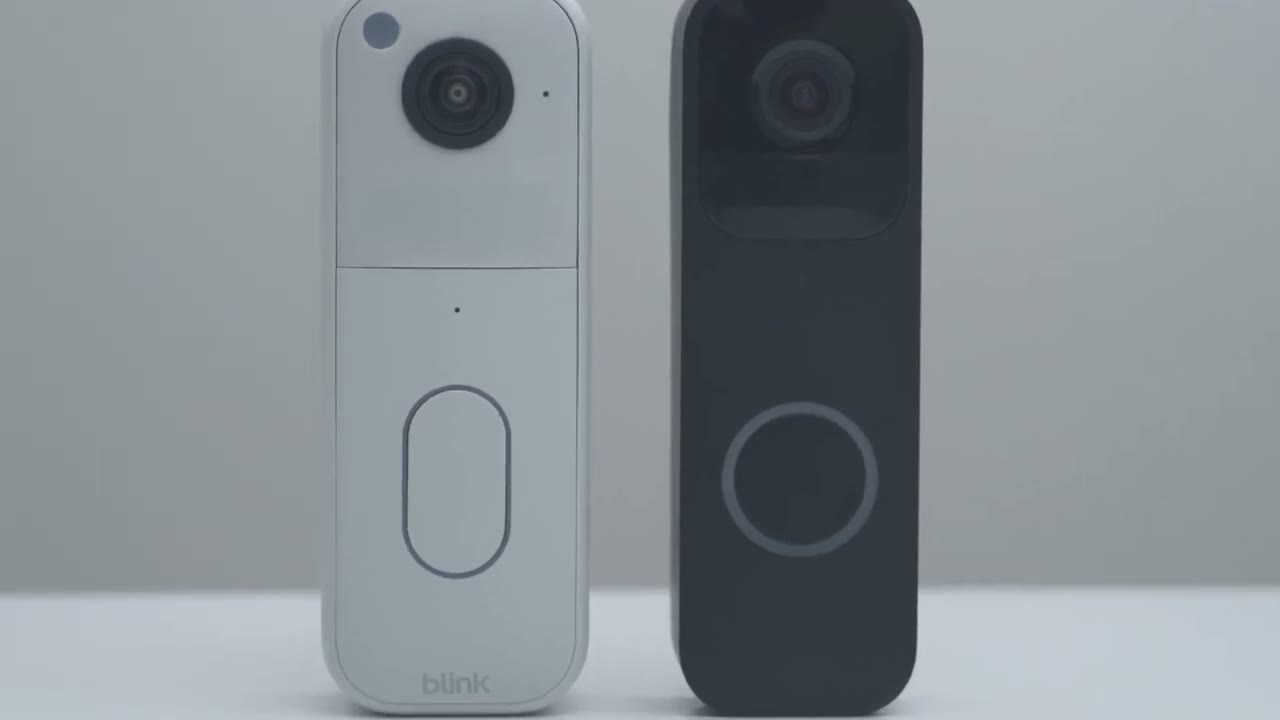
design, so I would say the second generation of the video doorbell looks much better and, you know, a little bit more modern in design compared to the previous first generation. So here’s what they look like from the front. So we have the lens at the front there along with various sensors and then the ringer. So we have this type of vertical ringer instead of the round uh button ringer here with this uh large LED ring light. Now we just have this kind of ovalshaped ring light. And then taking a look at the side. So it’s a little bit um deeper on the second generation versus the first generation. And this is what it looks like from the back. So both of them allow you to wire them to your home’s existing chime. However, you do need to keep the batteries in here.
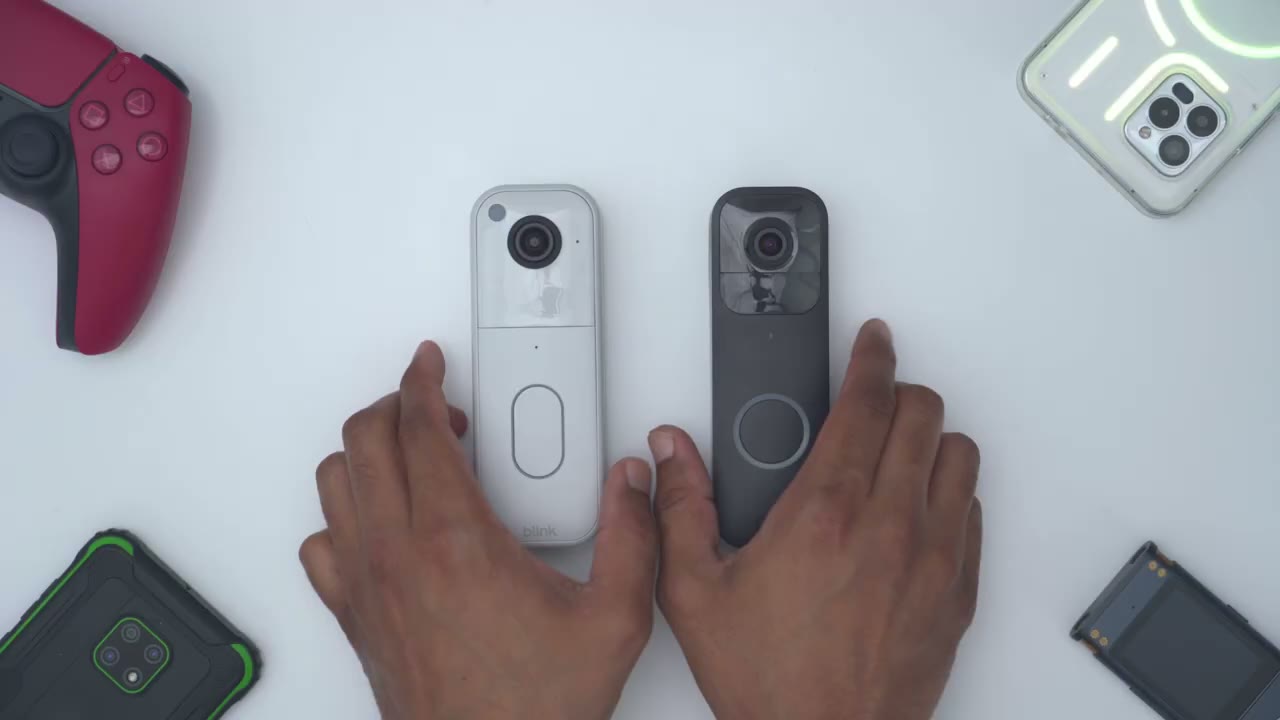
Now, another thing to note is that on the first generation of this, it just uses two AA batteries. You could see right there, there’s just room for two AA batteries. And on the newer generation, this actually houses three AA batteries, but the battery life is still the same at around 2 years for both. The second generation of the video doorbell is also a little bit heavier. So, without batteries, it’s about 116 g compared to 80 g on the previous model. So about a 36 g difference. And once we add in the three AAA batteries, this jumps up to 161 g. And when we add in the two AA batteries on this, it’s around 128 g. So about a 33 g difference. Now, if we take a look at the bottom, this is where we have the speaker grill used for two-way talk.
And then we also have the wire terminals if you want to hook this up to your home’s existing chime. And we also have an IP65 rating. So this is going to do well in any type of weather condition. Here’s a
Specs
quick look at the specs. Feel free to pause and review or jump ahead to the
Sync Modules
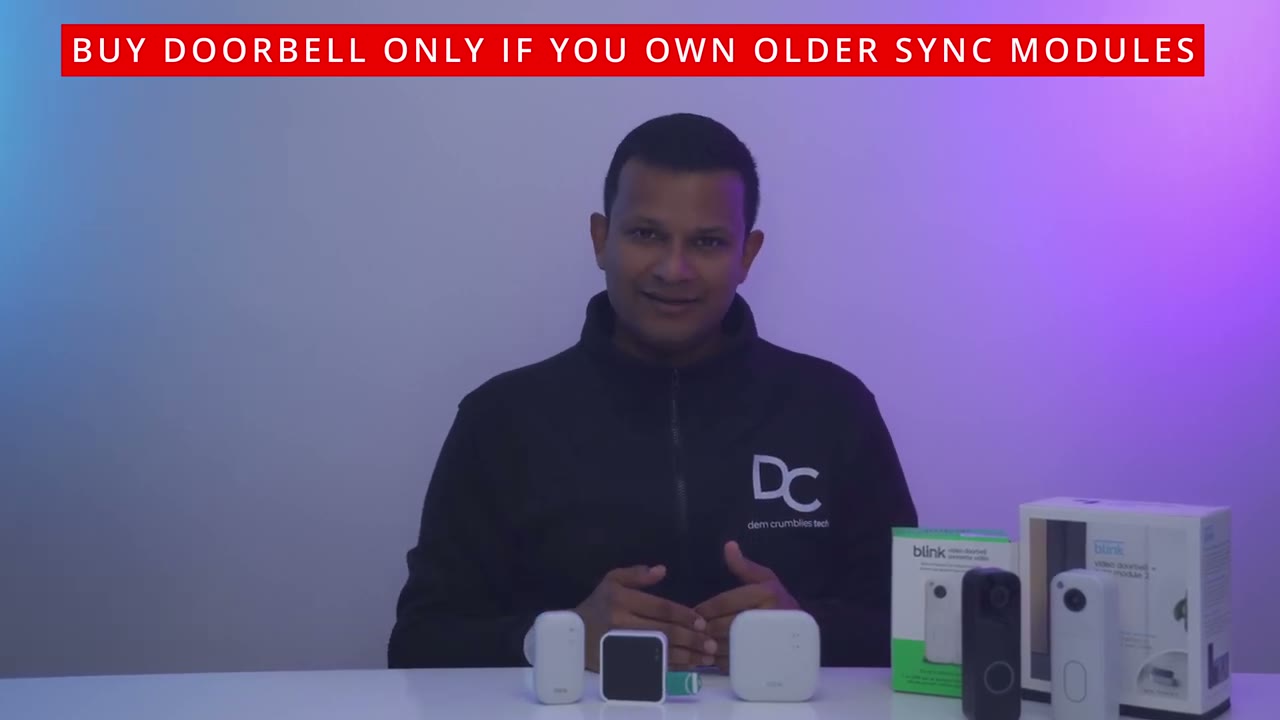
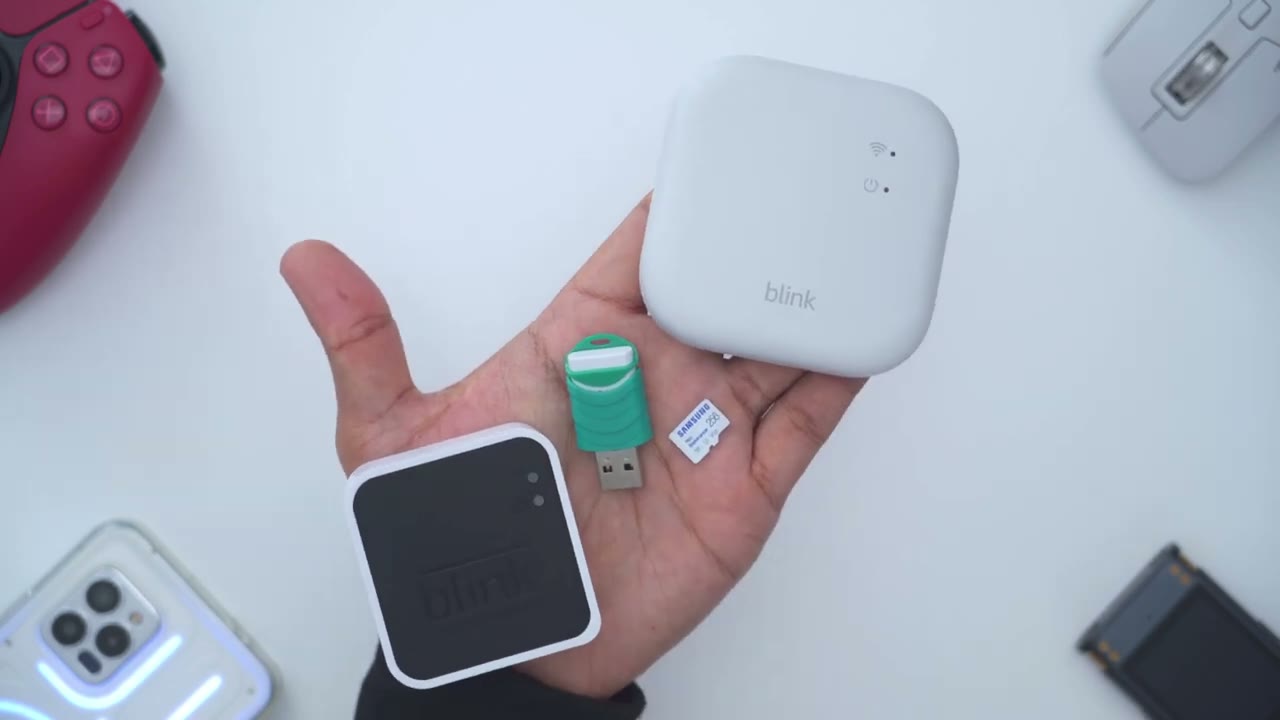
next section. Now, let’s talk about the various sync modules. So, if you own any of Blink’s other products or the first generation of the video doorbell, some of these are going to look familiar to you. So, this is the sync module 2, and you could see this has a USB drive plugged into it because this can record clips locally. Now, they released the Sync Module XR, which is this unit here. And on the side, there’s a slot to insert a micro SD card, because this can also record clips locally, just like the Sync Module 2. However, if you go ahead and you buy this package, which I have here, it comes with both the new video doorbell plus what they call the sync module core, and this is a kind of like mini small version.
And all the way around here, there’s no places to insert any type of storage. There’s only a USB type-C port to power this up. Now, what that means is if you buy this package with the sync module core, you will not be able to record clips unless you pay for a monthly cloud plan. And if you’re opposed to that, just go ahead and buy the video doorbell, the brand new one, by itself. They call it the add-on, and then just pair it with either the Sync Module 2 or the Sync Module XR. That way, you can record clips if you don’t want to have a monthly cloud plan. to
Installation
install the Bling Video Doorbell. You have a couple of options. So, one is to just use the flat mounting plate instead of using the optional wedge. So, I’ll show both right now. So, you can see there’s an up arrow here. What you’re going to do is you’re just going to line this up with your door frame or wherever you’re going to mount the doorbell and drill in three of the screws right here. And you could use the mounting positioning guide that comes in the box. Now, once you have this affixed to your door frame, you’re just going to make sure you take this little corner here with the little notch and then just line it right into the doorbell here. So, I’ll just notch that in. And then I can just press in till you hear that satisfying click. And this is nicely retained in there.
The only way to get the video doorbell separate is to use the tool that comes in the box. Press in on the retention clips and you could just remove that rear bracket. again. Now, if you were going to use the optional wedge, what you would do is you would first use screws and drill in right in these slots here or these slots or cutouts. Once this optional wedge is attached to your door frame, again, you’re just going to take the flat portion of the mounting bracket, line it up just like so, and then use the three screws again. And you could see these holes interface with the holes at the top and bottom here. So, you’ll just pop in these three holes once the wedge is attached to your door frame and then just do the same step where you just click in the video doorbell.
And then you can have your wedge set this way or this way. It’s completely interchangeable. You can also use the extension wiring to wire the video doorbell to your home’s existing chime so it triggers it. But I’ll probably just stick both video doorbells on my doorframe just for testing purposes.
Blink App Setup
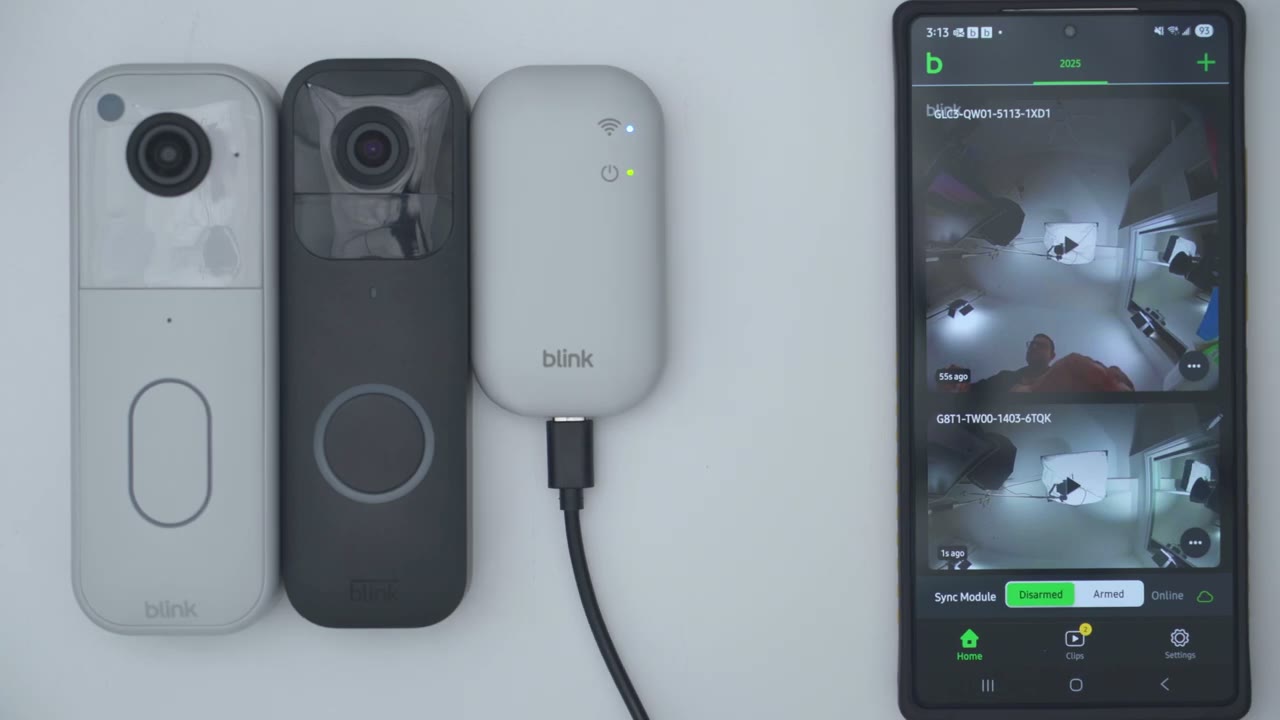
Now, let’s add the video doorbell in the sync module to the Blink app. So, I’ll open up the Blink app. So, just download this from your Apple Store or Google Play Store. And again, like I mentioned, if you already have a previous sync module, you can skip this step, but this is for those of you who are setting it up for the first time. So, what you’ll do is you’ll plug in the sync module using the supplied USBC cable. And you can see right now it shows the Wi-Fi signal strength and it’s waiting for a connection. So, we can see it’s ready to go. So, let’s go ahead tap the plus icon in the top right corner. Tap on sync module and it says to scan the QR code. So there is a QR code at the back here. So you can see if I lift my phone up, I can use the camera right here.
I’m just going to scan that QR code. And it’s automatically found the sync module. So it says um create a new system. Go ahead and do that if you don’t already uh use Blink Products. And I’m just going to call this let’s say um you know 20 25. And I’ll just say done. And it shows that we need a blinking blue light steady green, which is what we see. Click on discover device. And it says it’s going to temporarily create a Wi-Fi network called Blink U0 GB. So, let’s click on connect to connect to that. And I can see it says connected. So, right now, we’re going to pick our Wi-Fi in our home. So, mine is this one at the top. Now, very important, input your Wi-Fi password, but make sure that you’re using a 2.4 GHz band, not a 5 GHz Wi-Fi band, or else it won’t work.
All right, so the sync module has been successfully added. And like I said, you don’t have to add this one. You could use the one that’s already in your Blink app if you already use a sync module. Now that the sync module is added as the first step, the second thing we’re going to do is to add in the second generation of the Bling Video Doorbell or the new model. So, what you’re going to do is you’re just going to open up the rear battery compartment here. And we’re going to pop in the three batteries, just like so. I’m not going to close it up yet. And now, what I’m going to do is because I can see the flashing light, I’m going to tap in the top right corner here. And we’re going to tap in Blink Video Doorbell. And again, we’re going to scan the QR code.
And that’s why I didn’t close the back there. I do need to scan this QR code right there. There we go. And we’re just going to add it to the home system that we created, which is 2025. And it just shows, you know, push a tab up. Uh do the battery. We’ve already done all of this, so we’ll click continue. And it says, wait until the LED light blinks red. And I can see it is blinking red. So I’ll click on discover device. All right. So, the video doorbell has been added successfully. We’ll hit continue. And I’ll just skip the uh doorbell setup or mounting since I already know what I’m doing. So, I’ll just say maybe later. I’ve added the older video doorbell. And just take a look at the preview of the thumbnail. Like, look how small the field of view is here.
And look how much more you can see compared to the new Blink Video Doorbell. It’s very impressive. Let’s
Blink App Settings
take a look at the Blink app settings. So, right away you could see it says plus plan trial and I have 30 days left. Now, if I tap to explore the benefits, it’s saying unlimited cloud storage. So, you can review video up to 60 days before it’s overwritten. You also have person detection. So, verse, you know, it giving you a motion detection just saying, hey, motion was detected. That could be an animal, a tree. Um, but it’s actually going to tell you if it’s a person, so you know if you want to check on it. It’s also going to do blink moments. So, it’s just going to stitch together similar clips um in a sequence for you. And then you have extended live view. So, you can watch up to 90 minutes of uh live view before it ends. And then you have to start it again. And it says more.
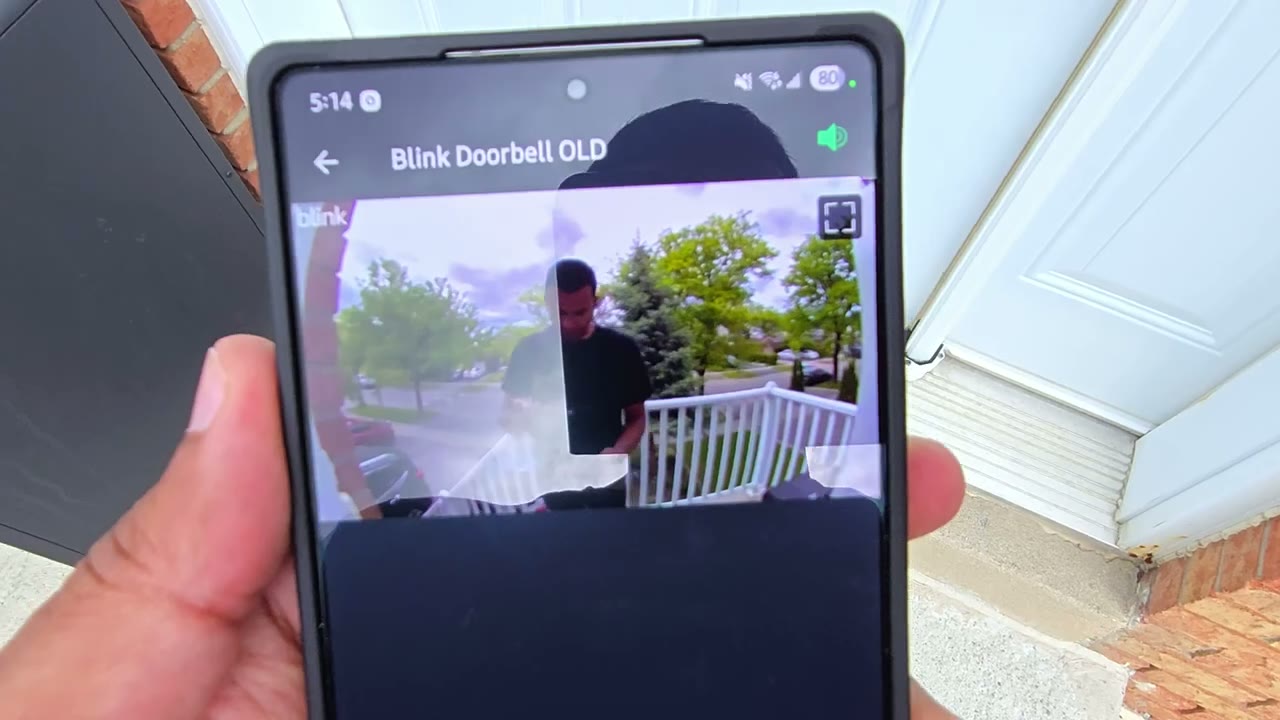
But anyway, while we’re on her, you could just tap into her. You could snooze notifications if you don’t want to be bothered. Say you’re coming and going cuz you’re moving or you’re having a party. You could turn motion detection off. You can refresh a thumbnail or you could jump into device settings. Let’s jump into live view. And it really only takes a matter of seconds to load up. So it’s much quicker than with the older version. So let’s do a comparison here. So that was within seconds. Let’s do it on the old video doorbell. And you could see it’s already taken, you know, longer than it has on the new one. So I would say maybe it’s, you know, twice as quick as on the old version. But let’s jump back into live view. Within a matter of seconds, it’s up and running.
And you could see at the bottom I could see, you know, everything under my door. So, if a package was placed there, I would see it. I could see, you know, the entire length of my driveway, my neighbor’s driveway on either side, you know, the sky, even the solar kind of light I have on the top. Now, if we jump into the previous generation, the first generation of the video doorbell, you’re going to see that I can’t really see anything at the bottom of my door. So, if a package was placed under my door, there’s no way I would know that it’s there. Now, I can see the driveway um right and left side, but of course I’m not seeing, you know, vertically high or vertically low.
So, definitely, you know, for some of you, the upgrade to the new second generation is probably already worth it based on the larger field of view. Of course, it’s a more distorted view as well. Now, from here, I could just go ahead and save this live view session since the uh plus plan trial is active. Now, the other thing I could do is I could just go and activate to a talk and you can hear this is the microphone pickup outside. So, the microphone pickup is pretty good as well. Of course, we can go into more and look at uh other device settings. So, let’s do that now. And under general settings, this is where you can give it a name. You can take a look at the battery level, the firmware, and the uh network strength and connection to the sync module.
So, you can see I have everything green. So, um it’s the strongest connection possible. That’s why it loads quickly. If you have an issue loading, you know, it may be due to placement. Now, motion detection is on. You can turn that on or off. And then motion recording types, you can set it to record all motion or to detect all motion or person detection only. And notice that this is a beta feature and it’s only available on the free trial or if you get the uh plus plan. So, something to keep in mind, you will have to pay monthly if you want that feature. Um, in addition to that, we can adjust the motion sensitivity. I’ve left it on six, which is the default, but you can crank it all the way to 9.
Um, you know, if you find that it’s missing things, just note that the battery life will be affected. You can also set motion detection zones. Um, so, you know, you can just, uh, rule out, say, trees swaying, like say, I don’t want to be notified anything on my neighbor’s side. I could just color those out. And right from here, you could jump into privacy zones if you need to block out your neighbors area to comply with local regulations. Um, so you have all those options there. And then the re-trigger time. So it’s set to the lowest, which is 10 seconds. What that means is that after motion is detected or a clip is recorded, the camera will cool down for at least 10 seconds before it records again. And that’s a save battery life.
So, you can set the re-trigger or cool down time from as high as 60 seconds all the way down to 10 seconds. If we jump into video and photo settings, so you could set the video clip length as high as 30 seconds long or as low as 5 seconds long. Again, if you want to balance battery life, I like to leave it on 30 seconds so I’m recording as much, you know, kind of activity as I can for each event. And then you could set the video quality to best. So you’re going to get the best possible video quality. Um standard video quality if you’re, you know, trying to preserve battery life again or saver. Um which is going to extend battery life. I highly recommend just leaving it on best. I don’t find that the video quality is, you know, excellent for 2025.
Um there’s other cameras with 2K, 3K, uh 4K. So just leave it on best. Now you can also disable or sorry um end the clip early if motion stops. This is also to preserve battery life. I’m going to disable that because, you know, people may leave the frame and come back and I don’t want the system to just end the clip if that happens. Now, under night vision, leave it on automatic. It’s automatically going to determine when to switch to black and white night vision. Um, so just leave it on auto. And then IR sensitivity, you could switch it from high, uh, medium, or low depending on if you’re noticing any type of glare or things like that. You can also enable photo capture. It’s going to take a photo once per hour. And you can also auto update the thumbnail that you see in the blink app.
Now, under audio settings, you can independently set the volume for the speaker volume for 2-way talk or for the chime, you know, anytime someone presses it or rings it. And I’ll demo what that sounds like for both. Now, under doorbell and chime settings. So, if you tap on the first option, it shows you how to actually set this up to trigger your home’s existing chime. I didn’t do that because I’m constantly reviewing these doorbells, so I don’t like to hard wire them. But you also have the option to use the Blink Mini as an indoor chime. So, I did make a video. I’ll link that, you know, up somewhere if you want to follow along. But basically, if you have the Blink Mini 2, you can set it to act as an indoor chime. And this is the Blink Mini 2 right there.
Now, you can also set the privacy zones. You can turn off video recording or audio streaming if you like for further um kind of privacy. Now, the
Video Playback

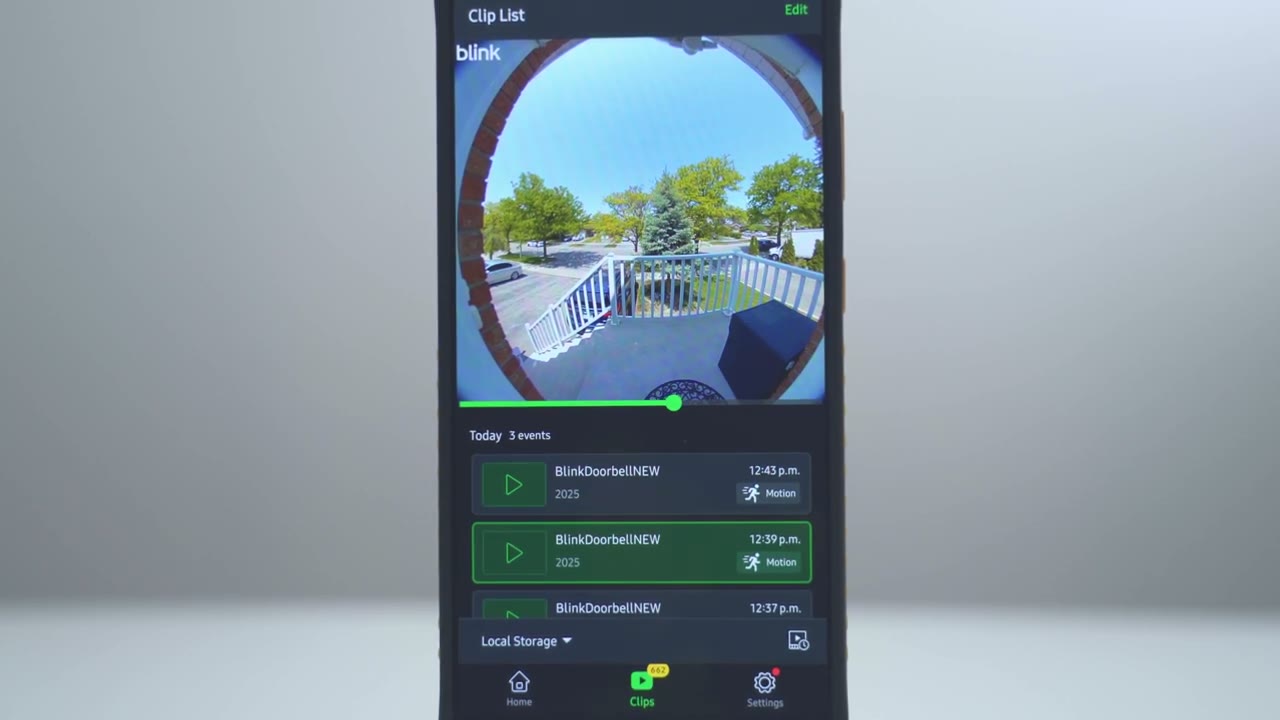
next area you’re probably going to want to take a look at is clips. And this is just, you know, everything that has been recorded. Now, one thing that’s really important to note, not at the bottom that it says cloud storage. It doesn’t show local storage. And the reason for that is that because I’m using the sync module core. That’s what came in the box when I bought this. And the sync module core doesn’t have an area to insert a micro SD card or a USB drive, meaning you must use the Blink uh paid cloud plan or monthly plan to have your clips recorded. Let’s review the clips, though. So, if we scroll down, you can see some of these are broken down into two events, two events, and some have more than two events, such as four events, etc.
And that’s only because I have, you know, a series of clips thanks to the Bling Plus plan feature. So, I’ll jump into this one with four events. And you’re going to see it’s going to load up the old uh video doorbell clip. Just because I have both installed, you won’t. But um you can see at the bottom here, there’s white lines and these indicate different video segments. So, if I jump to the second segment, so this is from the second generation video doorbell. Again, you can see that impressive field of view. And from here, I could just go ahead delete the clip. I can export the clip out or share it. And then I can also go ahead and download the clip. You can also go ahead and view this in full screen if you like. And of course, you could crank the volume to hear what was going on outside.
And note that if I click on here and I go into moment details on the old Blink Video Doorbell, it just shows everything as motion. However, on the new one, because this does have the plus plan trial, it does identify that it is a person and
Video Quality
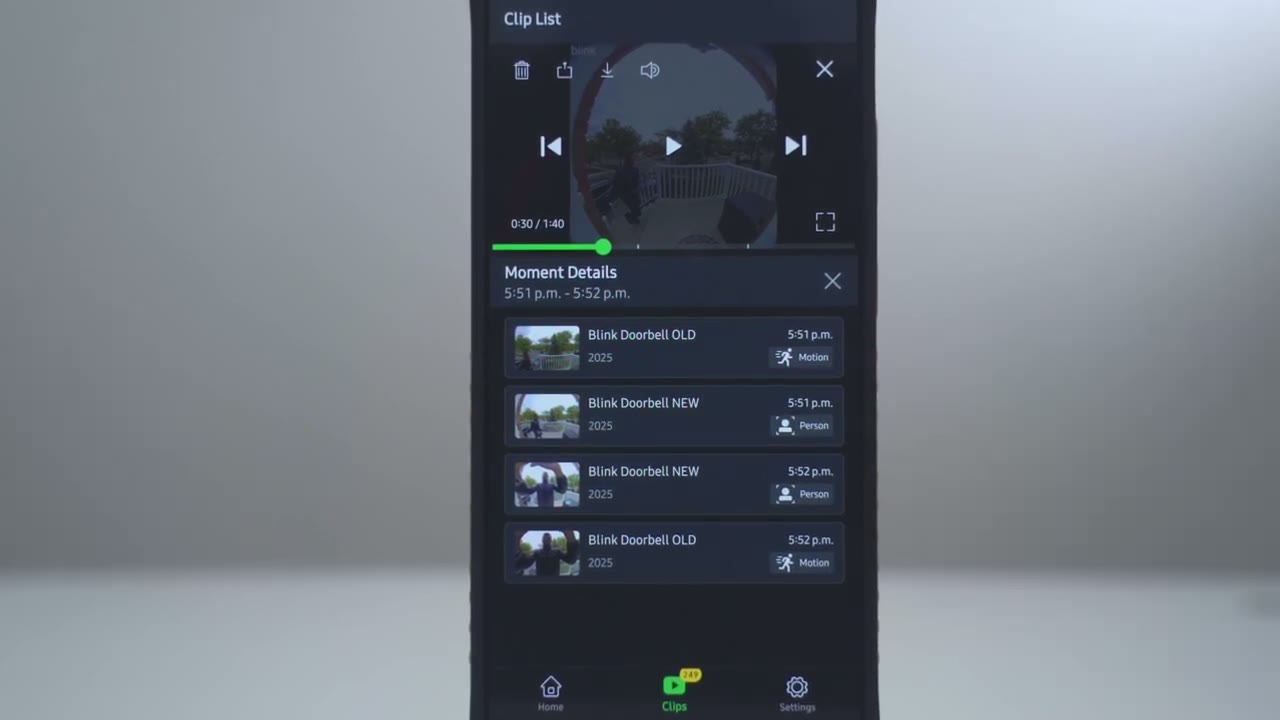
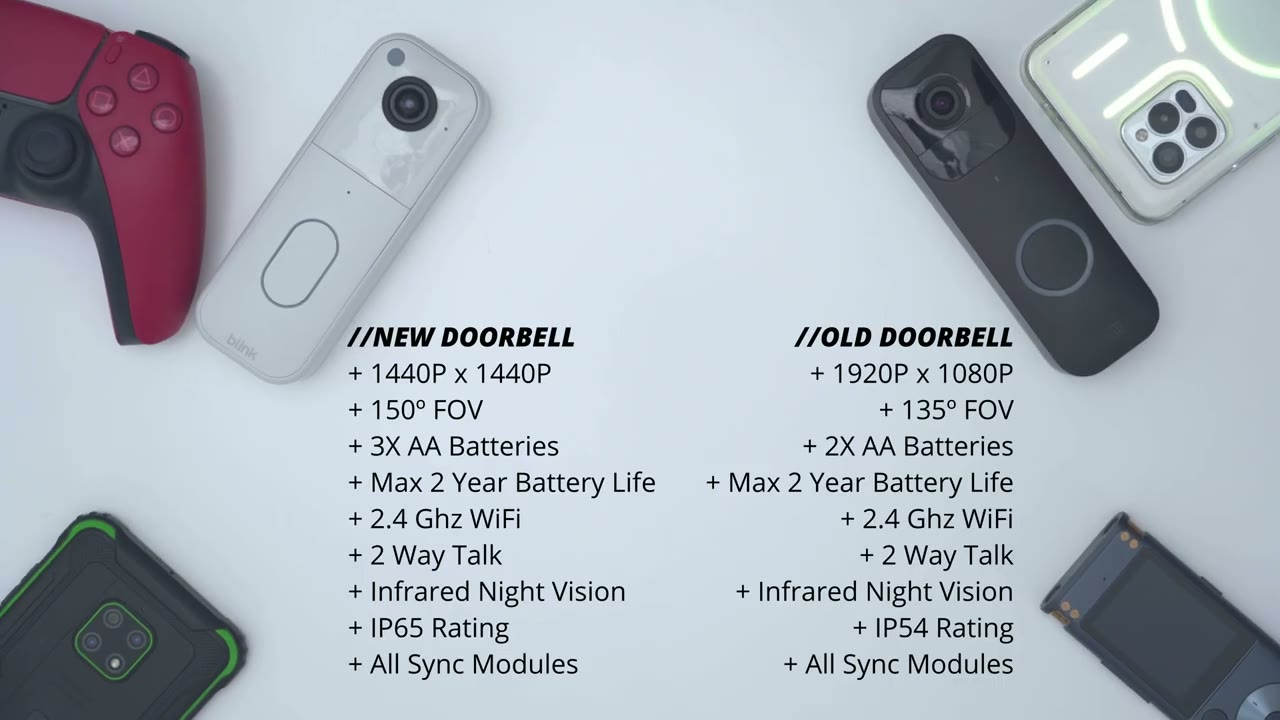
not just motion. In terms of video quality, I really didn’t notice a market improvement with the brand new Bling Video Doorbell 2 compared to the previous generation. Now, even though this is recording in 1440p and this is recording in 1080p, the video bit rate is so low that video still doesn’t look really good even at the best setting set in the Blink app. Now, when it came to night vision quality, there definitely wasn’t an improvement on the new generation of the Blink video doorbell. there was less video artifacts, so it was a little bit, you know, easier to make out details. Now, keep in mind that because we have a wide 150 degree field of view, everything is a little bit more distorted. We have kind of a fisheye angle look.
However, the benefit of that wide field of view is that you can see head to toe anyone who’s standing outside your door, which is very handy. And you can also see anytime packages are placed on the ground, you know, below your door or right in front of your door. That’s something you just cannot do with the previous generation. And you can see in these sample clips, you’re not seeing like really much of anything right below the door. I’m happy
Motion Detection
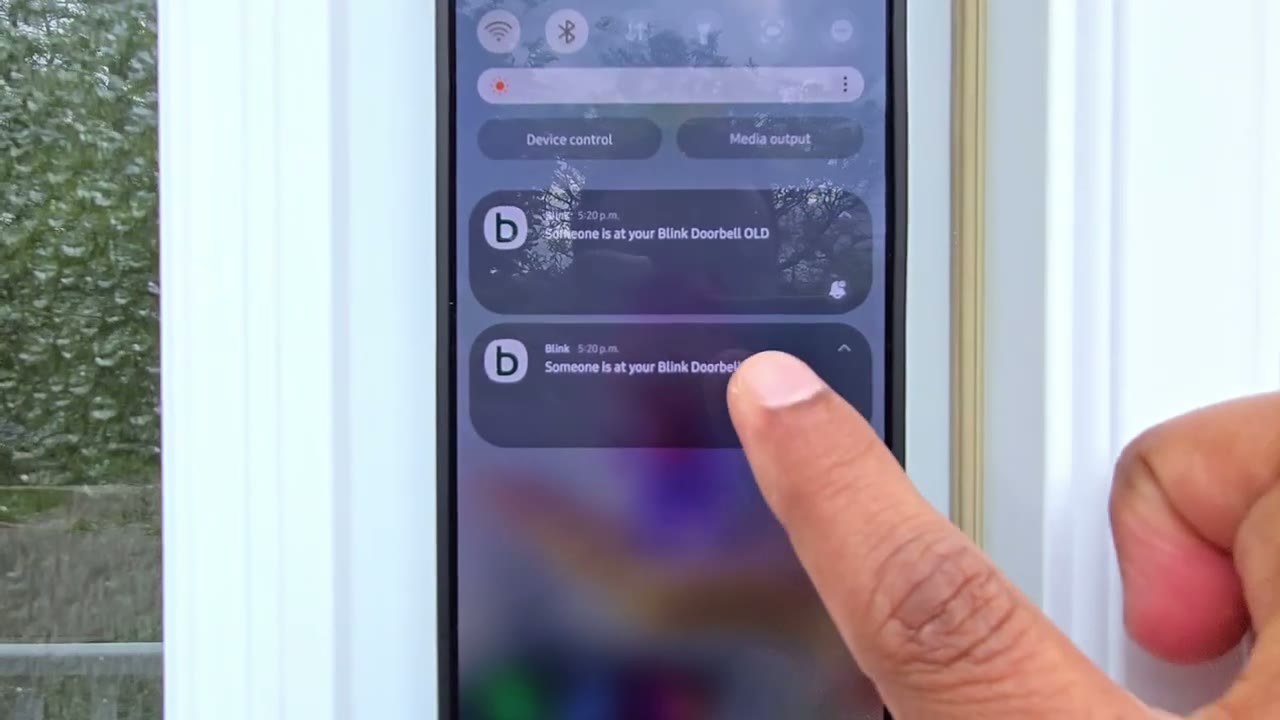
to report that the motion detection speed is really quick on both of the video doorbells. I had it set to level six and it easily detected me. Now, once you get the Blink app alert and you tap into it, it was noticeably faster to pull up live view on the new Blink Video Doorbell. I would say it was at least, you know, twice as fast as on the previous model. So, if that’s an issue you always had with the previous model, it’s definitely worth the upgrade. Now, one thing to keep in mind is that my Wi-Fi signal strength was really strong and same with the signal strength for the sync module. And the motion detection was also really sensitive that it actually picked up cars coming and going all the way on the road.
Also note that when you get motion detection alerts from the Blink app, it’ll let you know if there’s a person if you have the monthly paid plan. If you don’t have the monthly paid plan, it’s just going to say motion was detected, but that could be from an animal, from a tree, from a car passing by. Whenever someone presses the ringer button on both of the doorbells, you get the app alert really quick. However, when you tap the app alert, it definitely opens up faster on the second generation of the Blink Video
Chime
Doorbell. In terms of chime functionality, so if you do hard wire this with the extension cables, it can trigger your home’s existing chime. There’s no plug-in chime in the box, which means that anytime someone presses this, you’re going to get an app alert on your phone. Now, there is a workaround where you could use a Blink Mini 2 camera to actually act as an indoor chime. And I’ll link up above here how you can set that up. But this is what the Blink Mini 2 sounds like as an indoor [Applause] [Music] [Applause] [Music]
2 Way Talk

chime. The two-way talk also sounds slightly improved on the newer generation. And here’s a demo and you could decide for yourself. Here’s an example of what 2A talk sounds like on the brand new Blink video doorbell generation 2. Here’s an example of what 2A talk sounds like on the first generation Blink video doorbell. So
Monthly Plan Needed?

without the Blink monthly plan, you don’t have the 90minute extended live view, which means that if you try to look at live view, it’s going to keep bugging you like every 10 to 15 seconds to hit continue on the screen. And if you don’t hit continue, it’s going to kick you out of live view. This is really pathetic, I think, on Blink Spark because the batteries are always in the doorbells to use. There’s no reason to have the user click continue all the time. So, you lose the 90minute um extended live view. You also don’t get thumbnail previews. So, whenever you’re reviewing clips, you won’t see a thumbnail preview. You just see kind of a blank box. So, you have no clue what you’re clicking into. Was there a person in front of your door? Was there a package delivery?
You have no clue till you click into it. It’s also not going to generate auto thumbnails whenever you open the Blink app. It’s not going to take photos every 1 hour. It’s not going to let you know when there’s a person in front of the video doorbell. It’s just going to give you, hey, motion was detected in general. I think it’s pretty pathetic on Blink’s part to ship it with this sync module core. There’s no way to insert a USB drive. There’s no way to insert a small micro SD drive. It just has zero local recording functionality, necessitating you getting a monthly cloud plan. And I think that’s purposely planned on their part. But thankfully, at least they’ve made the Bling Video Doorbell 2 backwards compatible with the Sync Module 2 and the Sync Module XR.
So you can still use the local storage that
Sync Module 2
comes with those. So what I’ve done now is I’ve added the Sync Module 2, which is the older sync module that lets you plug in a USB drive, which is why you can see it’s showing local storage. So, I’ll just go back into clips now. And notice that it’s set to cloud storage, which is if you have a monthly cloud plan. And if I tap on that, it says no clip was recorded. Use async module with a thumb drive. So, we have to switch it from cloud storage to local storage. And once we switch to local storage, it’s going to be much slower. You could see um again, we have no thumbnail preview, so you don’t know what you’re clicking into. If I just tap this middle one here, notice how much longer it’s going to take to retrieve it from the USB drive versus uh the cloud drive.
So, I can go ahead and now I can review that video clip. But again, you’re not notified, you know, what kind of motion it was, if it was a person. And you don’t know, you know, kind of a thumbnail preview, if there’s a package outside or nothing. You’re kind of just in the dark as you’re going through all of the video clips. So, they really penalize you if you do not get that
Recommended?
monthly plan. So, the second generation of the Bling Video Doorbell definitely has noticeable improvements over the first generation. The 150°ree field of view is a welcome change. You could see visitors head to toe, plus any packages that are on the ground. That’s enough of a reason to upgrade, I think, for a lot of people. It also pulls up live view quicker as well, especially if you’re on the monthly plan. And even though daytime video didn’t seem noticeably improved with the new generation, the nighttime video is definitely a little bit better on here. So, if you’re interested in picking up the Blink second generation video doorbell, I’m going to leave links down below. And it does come in white and black.
Just note that if you already have a Sync Module 2 or Sync Module XR, just get the add-on of the Bling Video Doorbell, do not get it with the Sync Module Core, especially if you don’t want to pay for the monthly cloud plan. And if you want a deeper dive about whether you need to pay for a monthly Blink plan or not, check out this video here. I go into a little bit more detail and I explain a couple of workarounds. Well, I hope I made everything as clear as possible. But if I missed anything or if there’s anything you’re unclear about or unsure about, just leave a question down in the comments. I’ll do my best to get back to you.
Now, if you are watching this as a potential Blink customer or if you’re not very deep into Blink’s ecosystem, I’ll leave links down below to other security camera brands that have video doorbells that don’t charge you a monthly fee for what I consider to be core functionality, meaning the ability to record, the ability to see thumbnails for clips, um the ability to look at live view for as long as you want. I’ll leave those down below. I have a huge favor to ask you. If you did find this video helpful, would you mind liking and subscribing? It truly does help me out quite a bit as a small growing channel. And maybe consider checking out some of my other tech reviews.
I review security cameras, wired cameras, other video doorbells, computers, laptops, mechanical keyboards, headphones, earbuds. Really something for everyone. And I really hope you’ll join me in my next video
Buy NEW Blink Video Doorbell on Amazon
Please note that some of the links in my video descriptions are affiliate links where I earn from qualifying purchases. As an Amazon Associate I earn from qualifying purchases.