


Buy Ring Outdoor Cam Plus on Amazon
Please note that some of the links in my video descriptions are affiliate links where I earn from qualifying purchases. As an Amazon Associate I earn from qualifying purchases.
Intro


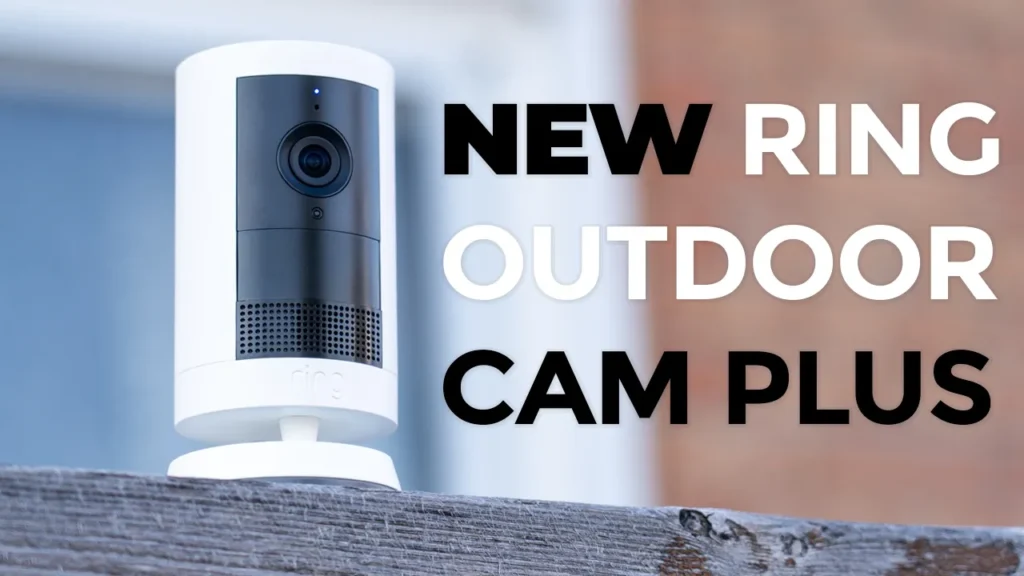
Hey, it’s Adrian and today I’m going to be taking a look at the brand new Ring Outdoor Cam Plus, which has 2K video and a wide 160° field of view, which lets you see everything around your property. It also has very quick app alerts and motion detection, and live view pulls up quickly as well. It can be used in battery mode or wired mode or with a solar panel. You also have two-way talk and alarm siren. But there’s a pretty major deal breaker in terms of the functionality of this system and pretty questionable pricing as well. So, let’s take a closer look at the new Ring Outdoor Cam Plus and you can decide if it’s worth it for your home. In the box,
Package Contents
we have the brand new Ring Outdoor Cam Plus, the mount for it, security sticker, manual, warranty card, all of the mounting hardware and hardwire kit.
Design
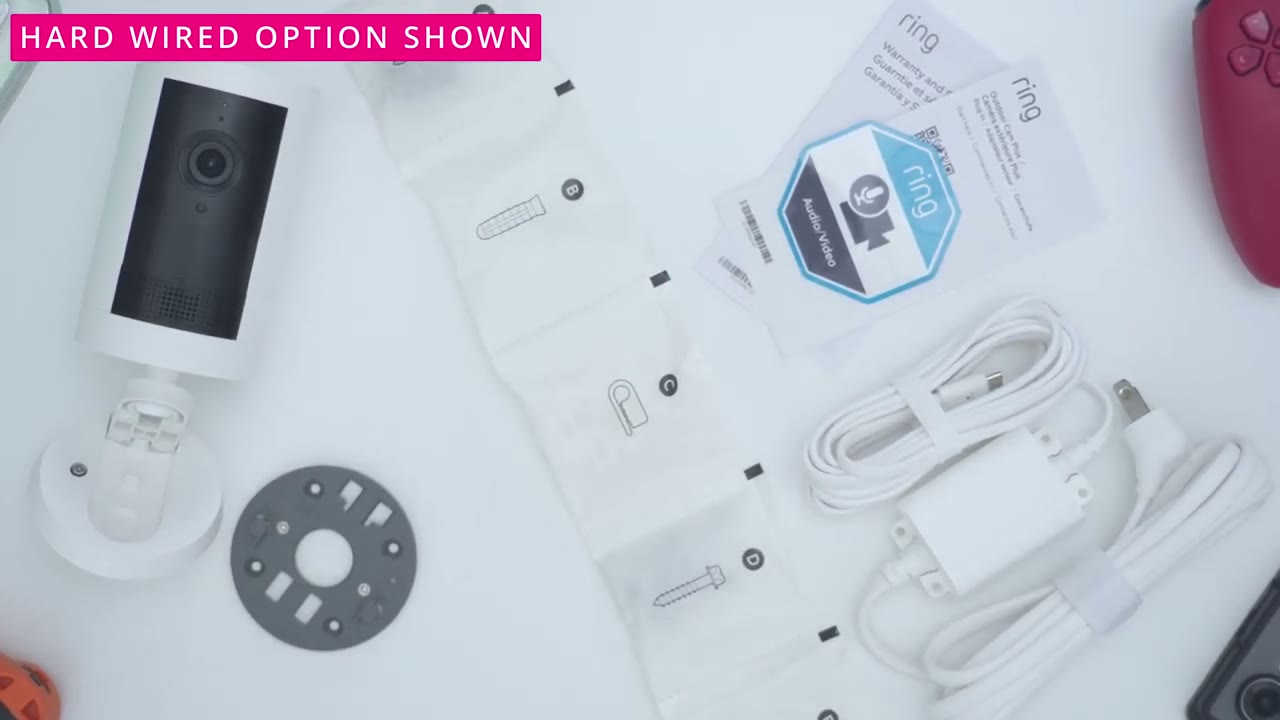
I have the plug-in version of the new Ring Outdoor Cam Plus, which is why it comes with this cabling, but you can also buy a battery only version if you don’t want to hard wire it. Now, in terms of the weight, the version that I have comes in at around 198 199 g or about 0.4 lb. And again, that’s because this has no battery pack inserted into it. But if we rotate it around, we could see that there’s a lock icon here. So, if I rotate this to unlock it, pop this out. This is where the Ring uh battery would go right in here if you did buy the battery powered version. And of course, this is really handy because you could just buy extra batteries and swap them in and out. And if I go ahead and grab this weather sealed portion right here, that grants access to the USB type-C port.
And that is what I’m going to be using with the hardwire cable. And notice that it has a weather sealed ring here to just uh prevent moisture buildup. Now, there is also a little uh weather stopper here. And this is a screw hole. So you can additionally mount this from the actual body versus the base. It looks like unless that’s for some kind of additional accessory that I’m not aware of. Now looking at the front, this is where we have that 2K lens. And this does have coatings to prevent, you know, reflectivity and things like that. And we also have the microphone and various sensors along with the speaker grill. There’s nothing on the top, but if we take a look at the bottom, we have the pre-applied mount. And you can see the up arrow here.
So to detach this, I’m just going to go the opposite way. Slide down till it clicks out of place. And now it’s detached. So to install this, it’s actually fairly simple. You’re just going to use the four supplied screws. Drill this into a wall or a ceiling. And once this is drilled and in place, you’re just going to slide the camera body in till it clicks. And you’re just going to follow that up arrow. Now, this can actually be used indoors as well as outdoors. So you could just place this, you know, flat on a table and it’ll stay in place. Now in terms of articulation, so we could see that we do have this this uh bottom portion here. We can go ahead articulate it right, left, uh top or down. But additionally, if you put a little bit of force, I’m just going to detach this further.
And you’ll hear a click. Ah, so that took a bit of doing. Now, you could see that this is heavily friction, which is why it took so much effort. I kind of actually felt like it was going to break, but you know, if you did ceiling mount this, you do have a bunch more flexibility in terms of how you want to articulate this and angle it. There is also a screw on the underside here, which is optional, but if I go ahead and remove the top again, you can see that that screw interfaces with this hole right here. And that’s to prevent people from just coming by, you know, just opening up the top portion and removing your battery. So, that is a nice design touch. Now, another thing is that there’s no official IP rating on this camera.
Now, I did contact Ring support and I asked them what is the official IP rating and they said they have no data on that. So, that leaves me, you know, a little bit skeptical about how well this would fair. You may have noticed that one thing is missing from this camera that a lot of other cameras have, and that is that there’s no memory card slot. So, you cannot insert a micro SD card for any type of local storage or local recordings. Everything has to be subscription and or cloud-based, which is always a really big annoyance of mine with Ring system. So, just keep that in mind. Here’s a
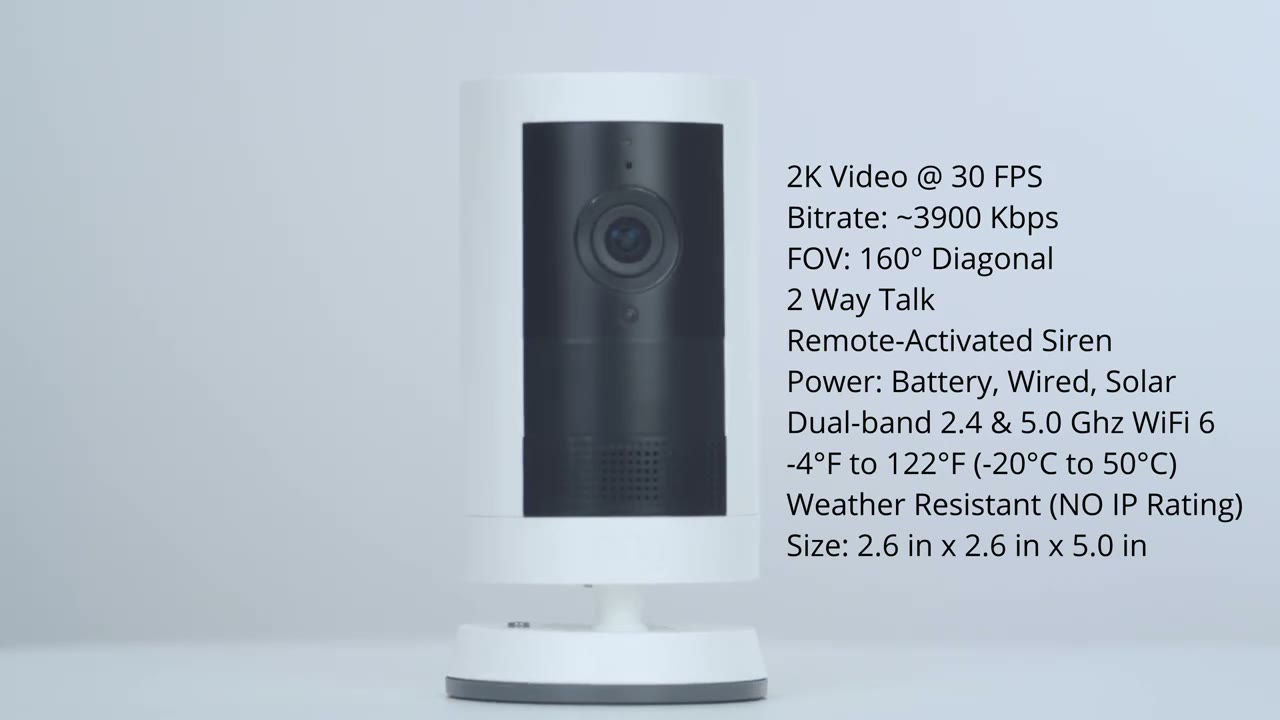
Specs
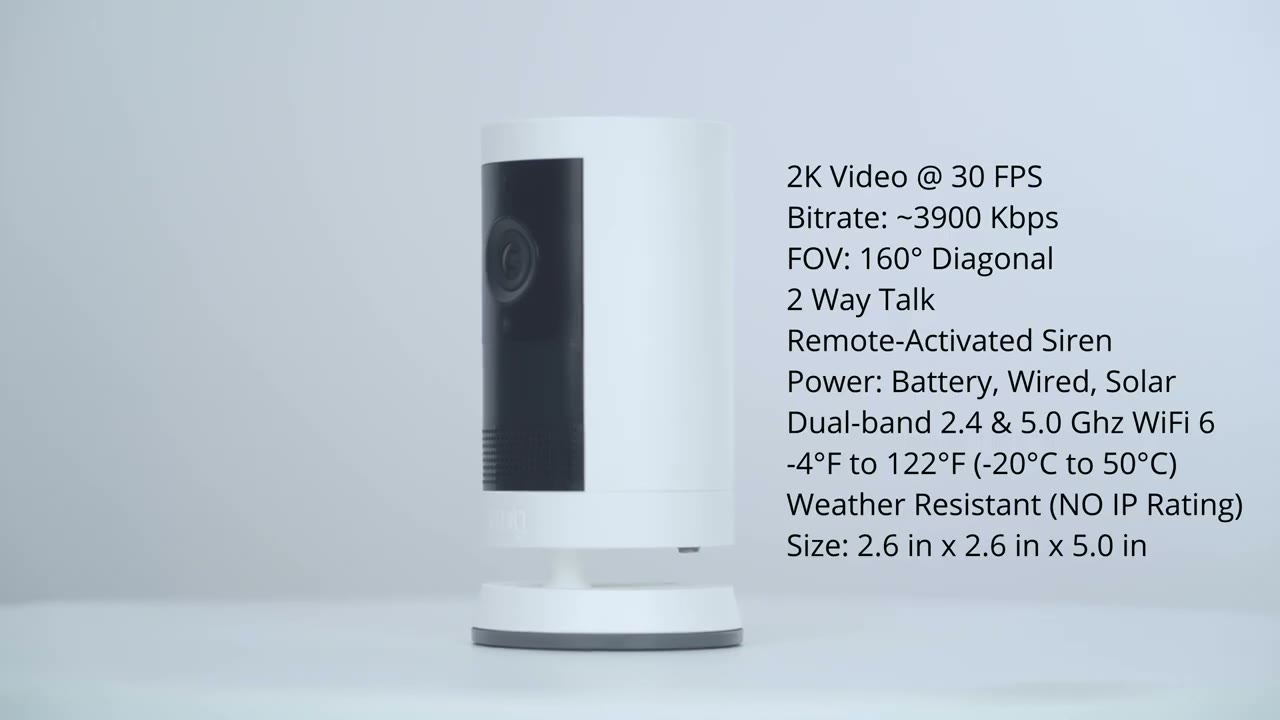
quick look at the specs. Feel free to pause or jump ahead to the next section.
Ring App Setup
To set up the Ring Outdoor Cam Plus in the Ring app, it’s really easy. Go ahead and tap on add device. Pick your existing home or add a new home and then scan the QR code on the back of the camera. Follow all the steps and then input your Wi-Fi password when requested and then let it perform any updates and
Ring App Settings

you’re done. Let’s look at the Ring app settings. So, I’ll open it up and you can see what the camera last saw. So, this was accessed about 13 seconds ago. So, I’ll just tap into it, pull up live view, and it actually pulls up fairly quickly. So, once I’m in this live view screen, I can go ahead and just take this, you know, kind of full screen, but it’s not a horizontal full screen, it’s a vertical full screen. So, I do have to manually um, you know, kind of uh pan around. Now, what you can also do is we can get out of this mode and just go to a regular horizontal full screen mode and you still retain access like ending live view, you know, starting two-way talk, uh, sending quick replies and things like that. But let’s go back into here.
Now, one thing to note is if I actually exit out of the Ring app, you can see that it actually just stays kind of like pictureiner. So, I can just go ahead and use other apps on my phone while constantly monitoring. So, that is a nice touch. Now from here we can also end live view. I can go ahead tap the microphone to initiate two-way talk. Now we also have options at the very bottom. We could tap into controls and we could just turn the camera off if we need to. You can also go ahead and send quick replies and these are broken down by you know spring messages, general leave a message and then we also have messages like hey please leave the property immediately. You’re being monitored. And then we can also turn the siren off which it is right now on mine.
Now, if I tap at the very bottom where we have this more section, this is the feature that I showed the picture and picture feature, but you can just disable that. Let’s just go ahead. We’ll end live view for now. Yeah, it takes us to this type of um horizontal timeline. And you could see that there’s two orange sections on here, meaning this is where motion was detected or I pulled up live view manually. Now, otherwise, I could just kind of go through on here and notice that basically whatever time I pick, there’s footage available. The reason for that is that because I’m on the highest tier Ring subscription plan, this does unlock 24/7 recording if the camera is set up in wired mode. Now, from this screen, we can also go and share video clips.
You could pick, you know, um how long you want the clip length to be. So, it could be as long as um 9 minutes. There is a beta feature right now. So, you can see it has things like package delivery yesterday, vehicle last week, cat in my garden. If I tap, you know, man in front of the house and I search for that, you know, it’s showing me on there while I was kind of setting this up. Now, this is a beta feature, so it’s a little bit hit and miss. Now, you can also go into calendar and go through different days to review footage on specific days. And time scale just lets you see, you know, a lot at once or you could really fine-tune it. And then if we tap into more, we can filter events by, you know, uh, just general motion, whenever it was a person, vehicle, if there was a delivery, etc.
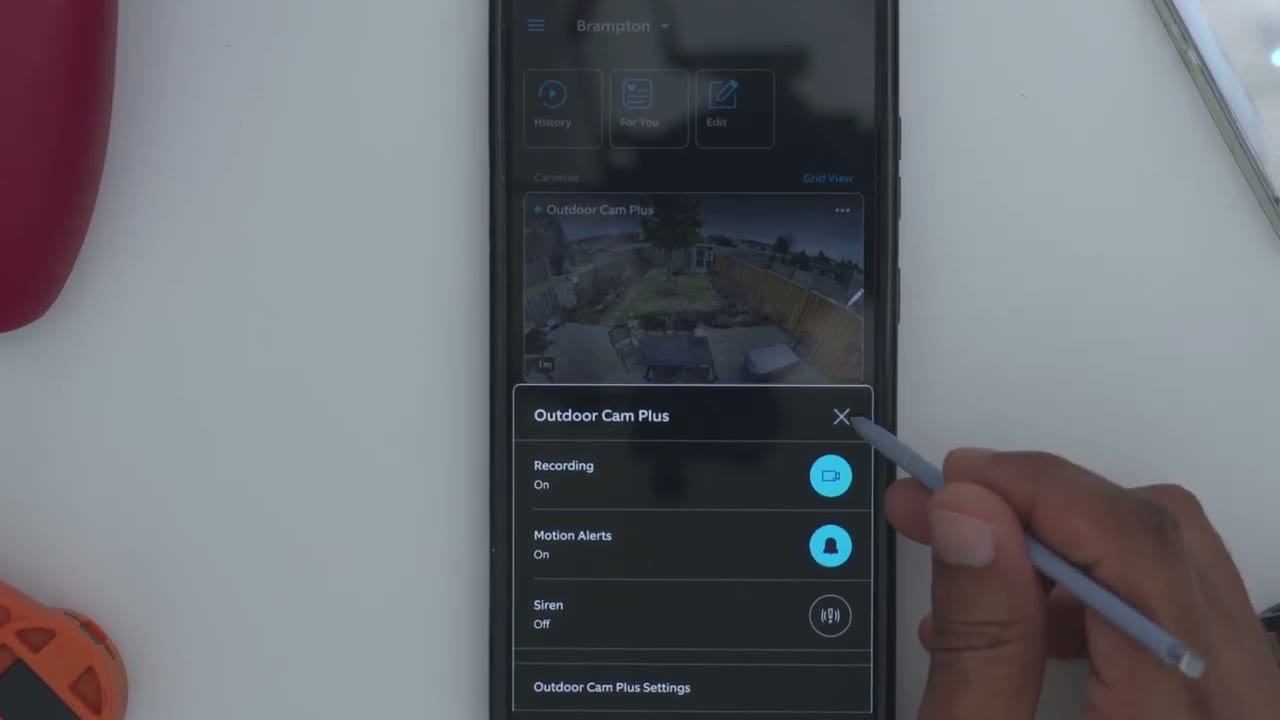
Also delete clips, download them, so you could share them in other ways, or you could just go ahead and take a snapshot. But let’s go into the full settings now. So recordings are turned on. Same with motion alerts. You could disable both of those if you wanted to, and you could actually trigger the siren right from here. So event history, this is where you would go if you want to review video. This is another way to do it and you may prefer this way because you do have a thumbnail preview and again this is one of the benefits of having um the paid plan you get these type of uh rich uh thumbnail or app alert previews. Now mode settings you may or may not want to use this.
So you can have it you know when you’re at home it the cameras function one way and then when you’re away from home it functions another way. Now, if we go into link devices, if you have other Ring products like a doorbell, smart lighting, you can have all of them sync together. And then we can also go ahead and snooze alerts. So, it can be snooze for as little as 30 minutes all the way up to 12 hours. So, let’s just backtrack there. And then you can also go ahead and add link chimes. So, you can go ahead and pair chimes with this. And of course, you do have um Alexa compatibility. If we go into device health, um I’m using it in wired mode, so I don’t need to add a battery, but you can additionally do that.
You know, I guess if power went off, um you could take a look at the signal strength. The lower number is better. And then you could see your current network name and if the camera is online, etc. So far, everything’s been working fine. And then we can also go into motion settings. You could edit the detection zone. So, you know, if I wanted to, I could kind of drag this out and, you know, just have a bit more coverage, but I’ll just go ahead and leave it at the default. That’s been working pretty well for me. Now, motion sensitivity, I do have it cranked. I was trying to get, you know, a lot of footage to see if it would pick up like trees swaying or things like that. And actually, it’s pretty intelligent. It didn’t really bother me when the trees are swinging.
So, that is nice to see even on max sensitivity. And then we can also go and turn on smart alerts. So you’ll be uh notified if it’s a person, if it’s a vehicle, if it’s other motion, and you could determine the type of alerts you get. So, you know, that’s pretty handy. You could find control or fine-tune that. You could also disable smart alerts if you don’t really care and you just want to be notified every single time. Now, motion schedules, it says avoid getting motion alerts during certain times and days. So, you know, if you’re going to be sleeping or at work or whatever, um you could just set it so it’s not going to send you notifications during those times. Under device settings, this is where we could go under power management. Mine is set to wired.
Um, you would see other options here if you were to, you know, uh, set this as a solar panel or with the battery. And if we go into video settings, so very importantly, notice it says recording mode 24/7. Um, so this uses more data and this is only available if you have the higher tier Blink subscription, sorry, Ring subscription plans. This is not available with the basic plan. Now, you can also set it to motion based recording when you’re on the higher plan, but by default, it would just be on motion based recording. And then smart alerts already showed those as well. You can also turn on HDR um just to help kind of balance footage uh if there’s kind of a lot of direct uh sunlight, you know, pointing at the camera lens. And then you can enable color night vision.
Now, I’ll demo this later, but I didn’t notice a huge difference between having this on or off. And then live view. You can access live view from your Ring device any time. This does decrease battery life, but because I’m on wired, not really an issue. And then smart video search. So, this is that beta feature I was telling you. And Ring is going to analyze your videos to help kind of categorize them. So, if you’re, you know, really privacy minded, you may want to disable that. Recording length. So, let’s recordings continue until motion stops. So, up to 120 seconds. Now, I can’t actually toggle this because I do have 247 recording on. So, if I was to switch this to motion based recording here, and we’ll jump back into recording length, and I’ll disable auto.
So, you can set clips for as short as 50 seconds all the way to 120 seconds. And then we can also turn on infrared lights for night vision to help. Now, if you’re placing the camera up against a window or a reflective surface, you’re going to want to disable this. Under snapshot capture, you may want to use this feature if you don’t have your camera wired. But because I do have mine wired, if I tap into it, it’s going to say I can’t actually modify this since I’m continually recording video. Anyway, under notification settings, you’re going to probably want to keep it on rich notifications. This is what gives you kind of that image preview, so you can decide if you actually want to click on that notification or not. And we can also set the app alert tones and the link chime.
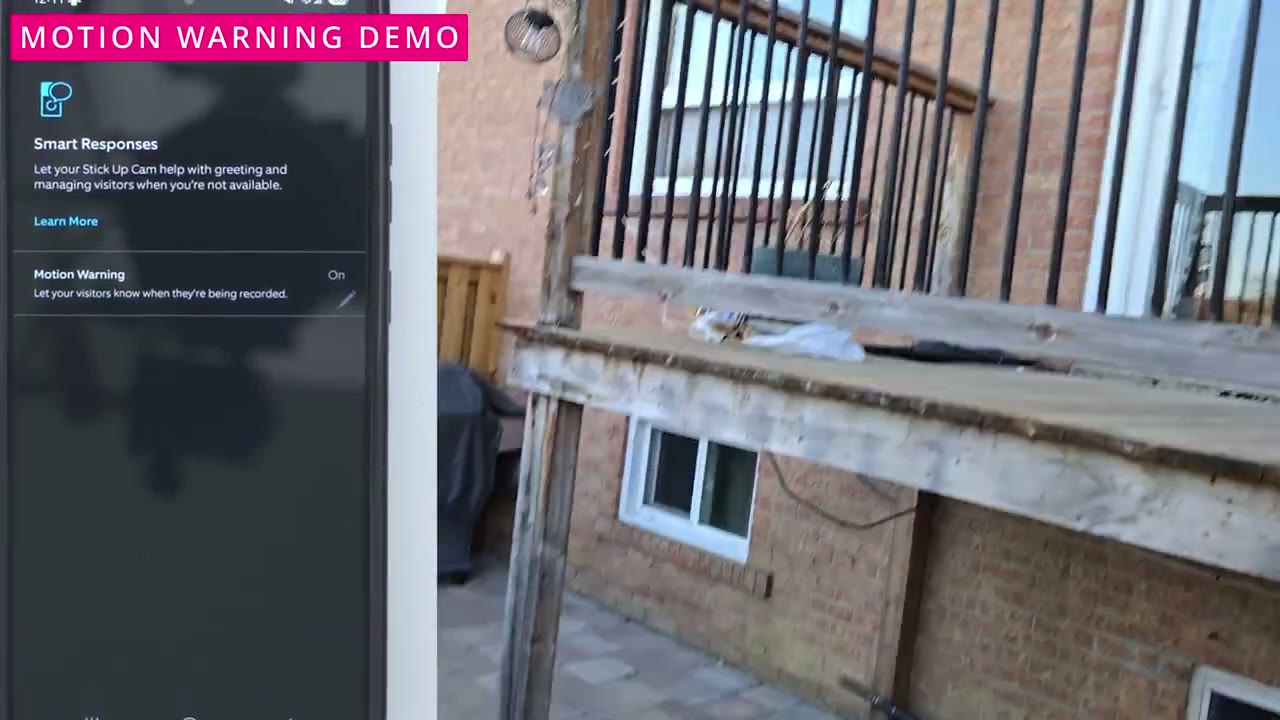
Under privacy settings, this is where you could go ahead and add privacy zones if you need to do that to comply with regulations in your local area. And then you can also turn on or off audio streaming and recording. And then under general settings, this is where you could put the camera name, the location, the volume setting. It’s cranked to the max. It’s fairly loud, but it could be a little bit louder. And then you could set if you’re going to be using this indoors or outdoors. And you can also report the device has stolen if that unfortunately happens. Under smart responses, you can actually have visitors know that they’re being recorded. So anytime the camera detects them, it’s going to say you are being recorded or something to that effect. So that’s a pretty handy feature to have.
And you can also go into the help content and share the camera with other people. By the way, you can also jump into the quick settings right here to turn recordings and motion alerts on or off without going into the full
Video
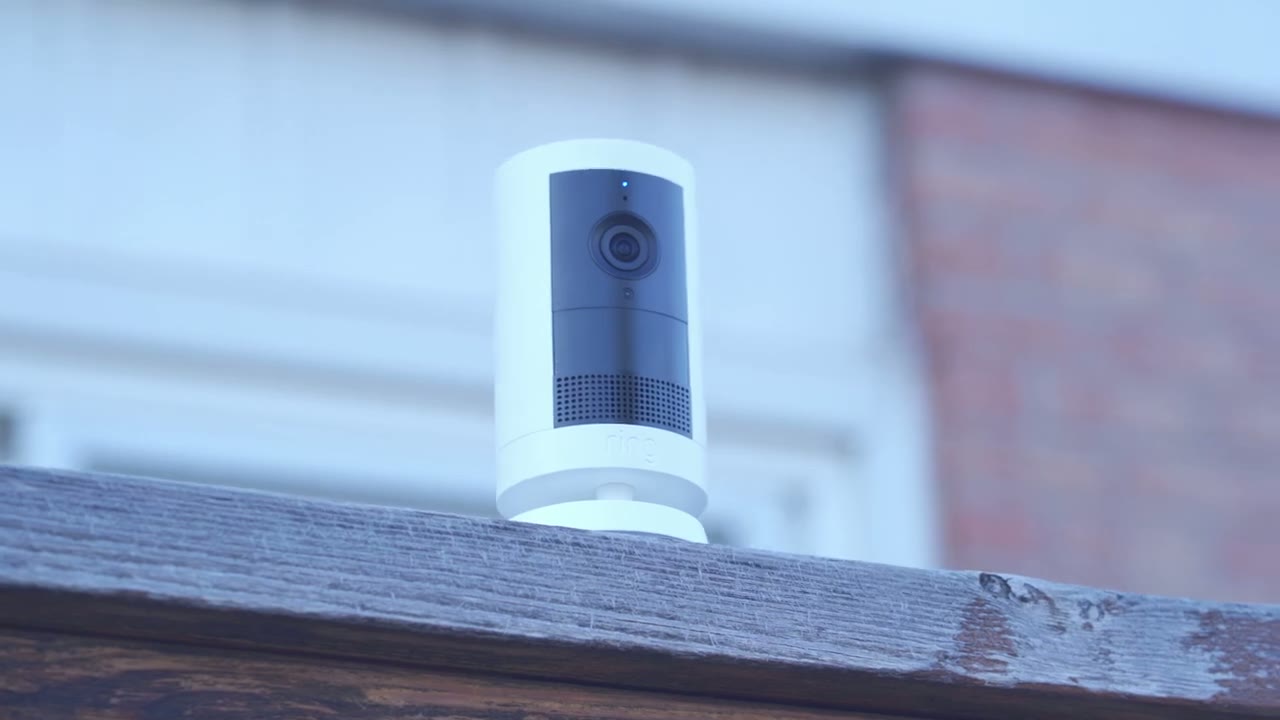
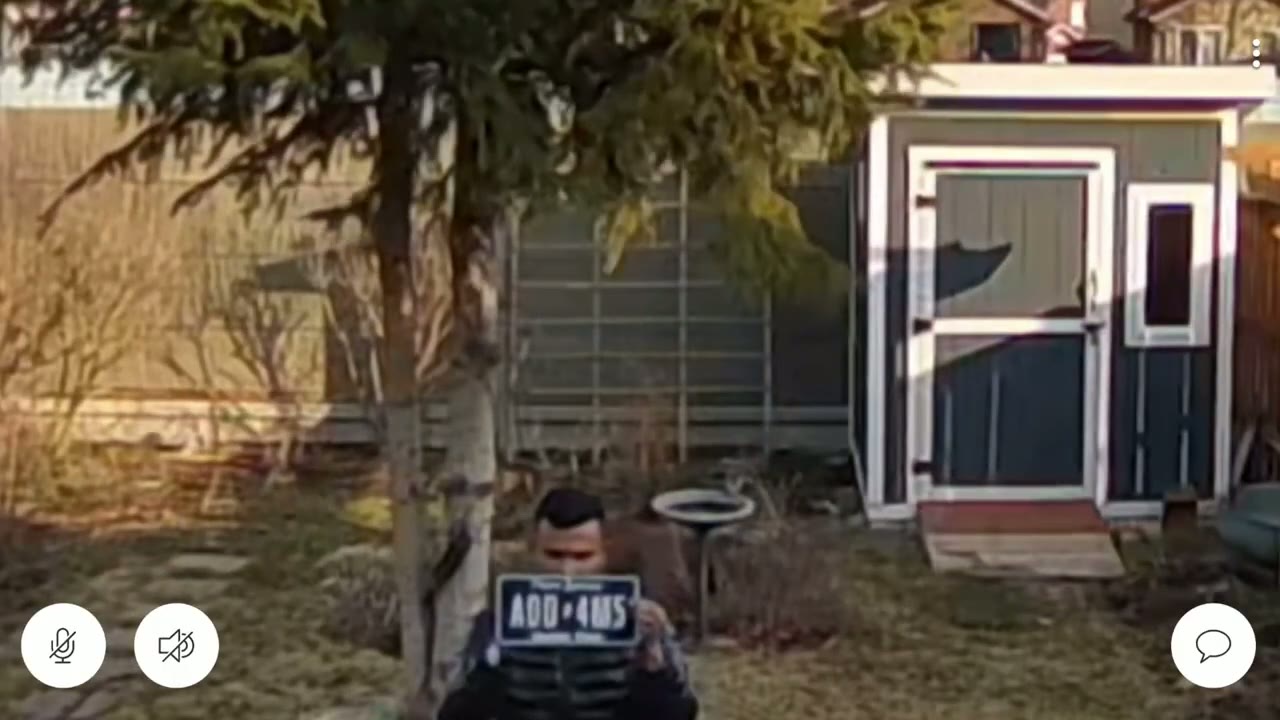
settings. The wide field of view in the videos makes this a really standout camera system for seeing kind of everything at once. I could even see a little bit into both of my neighbors yards on the right and left side and you know a good amount of the sky. So, I’m really impressed there. However, the 2K video quality is something that I found a bit lacking. While it was okay during the day to make out faces, at night I did notice a lot of artifacting that made it hard to make out faces. And that’s even with me turning the color night vision on to kind of help it and turning the infrared feature on as well. All of that said, I was still able to make out license plate details. I would say a good 10 to 12 ft away if I zoomed in digitally. What
Motion Detection
really impressed me though was the speed of motion detection. It detected me really quickly and it also sent an app alert quickly to my phone. Once I tapped on that, the Ring app also opened up really quickly. It’s one of the fastest systems that I’ve used. Hi, you are currently being recorded.
Quick Replies
Welcome. We’re glad you came by. We’ll be there in a moment. Please leave the property immediately. You are being
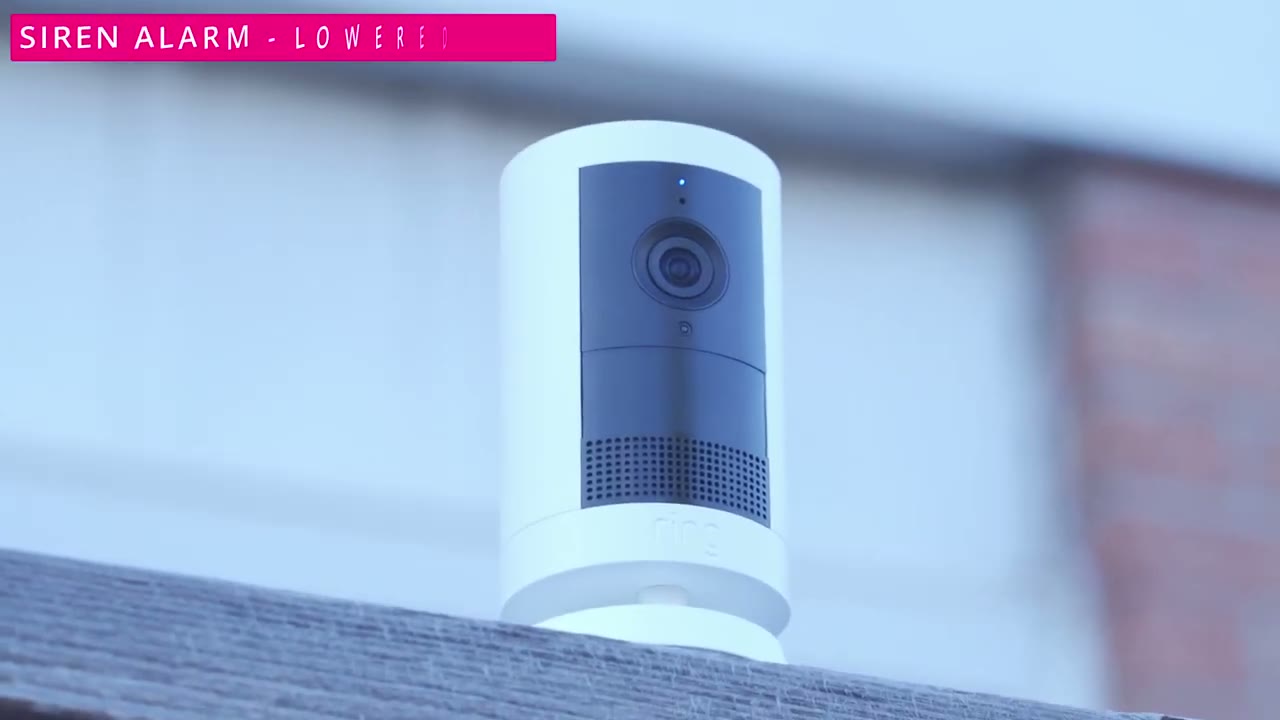
2 Way Talk & Alarm

monitored. Here’s an example of what 2-way talk sounds like on the Ring Outdoor Camp Plus.
Pricing Plans
All right, let’s talk pricing because the plan that you’re on is exactly going to determine what kind of features you see in the Ring app. Since I’m on their trial plan, that’s why I had access to so many features. In terms of pricing though, their basic plan starts at $4.99 a month. The standard plan is $9.99 a month and then their premium plan is $19.99 US a month. And this is one of my biggest gripes with the Ring system is that what they charge you for, it’s things that they shouldn’t charge you for. If you’re a security camera company, certain functionality should be, you know, fundamental. You shouldn’t have to pay for that. So when we went through the design, this camera doesn’t have a micro SD card slot. You cannot store video locally on this camera body.
You must pay for a plan to have it stored online in the cloud. So the basic plan is going to give you 180 days of storage based on eventbased video. So not continuous 247 video if you have this wired. You also have person and package alerts and you also have video preview alerts. So that’s on the basic plan. Now one thing to note on the basic plan is if you start live view um you can’t just run that continuously as long as you want. Um there is a cut off time. Why is there a cut off time? I have no idea. There should be zero cut off time to access live view on that camera. You’re using your home’s Wi-Fi. You in no way have to connect to Ring servers to access live view for extended periods of time. Especially if your camera is hardwired.
So, this is just them trying to squeeze money out of you when they really shouldn’t need to to just access basic functionality like that. Now, the standard plan is going to give you everything in basic, but you also have um video doorbell calls, which doesn’t apply to this, but you also get what they call extended live view. Meaning, if you pull up live view on the camera, you can do that for up to 30 minutes at a time. Again, not a limitation that makes any sense at all. Just something they’ve paywalled. You also get multicam live view, the pictureand picture feature which I demoed earlier, a daily event summary, up to 10 devices in your home, alarm, cellular backup, and an extended warranty. This is on the standard plan.
If you step up to the premium plan, that’s when you get the 24/7 continuous recording. You can also use a live view continuously with no kind of, you know, timeout period. Now, if you think about it, some of these features should not be paywalled behind a premium plan. It’s using your home’s Wi-Fi network. Your camera’s hardwired. Why do you need to pay to just see your camera 24/7? It makes no sense. So, while the appeal of these systems may be that, you know, the upfront cost is not, you know, really high, um, the long-term cost of owning this type of system really adds up. Now, if you were to get another camera brand, you would pay a little bit more upfront, and it’s not a huge amount. You would get things like 247 recording.
You can access Live View for as long as you want, and there’s no monthly fees. And you’re also at Ring’s whim whenever they decide to upgrade these monthly plans. So, it’s an all-around lose-lose situation for my eyes, just, you know, having reviewed a lot of other camera systems. And when you think of a security camera system, the most basic or fundamental thing it should do is record video for you to review after you know the fact if something happened. This system doesn’t do that. And it actually makes me question if Ring should even call themselves a security camera company when you have to pay for what is literally basic functionality. So, can I
Recommended?

recommend the new Ring Outdoor Cam Plus? Well, there are some things that I like about this. The speed of the motion detection and the app alert speed is amazing. The 160° field of view is fantastic as well. And I noticed it was even picking up like trucks that were going by uh behind my wall or behind my backyard wall because it’s that sensitive. So, all of those things are great. But the problem that I have with this system is the 2K video is not the sharpest that I’ve seen. And of course that I do have to pay monthly if I want to get, you know, what I consider to be basic functionality.
Also, the limitations on live view, you know, having to pay for the standard plan so I could watch 30 minutes of live view or upgrade to the premium plan so I could watch, you know, continuous live view or so that I can have access to 24/7 recording are things that I just don’t agree with. But if you already own a lot of Ring products and you’re looking to add a camera that’s going to give you a wide field of view, maybe you need something for your backyard or for the front, then yes, it is a good addition if you’re already used to paying for the monthly plans. So, if you’re interested in picking up the new Ring Outdoor Cam Plus, I’m going to leave links down below in the video description and pin comments.
But if you’re actually hunting for an outdoor camera and you haven’t decided yet, I’ll also leave links to other outdoor cameras that I reviewed that give you the same type of functionality or even more. And there’s no type of monthly fees to pay. And I have a huge favor to ask. If you found this video helpful, would you please consider liking and subscribing? Truly does help me out quite a bit and I do appreciate it as a small and growing channel. And maybe consider checking out some of my other tech reviews. I review more than just security cameras, you know, mechanical keyboards, monitors, laptops, earbuds. Really something for everyone.
Buy Ring Outdoor Cam Plus on Amazon
Please note that some of the links in my video descriptions are affiliate links where I earn from qualifying purchases. As an Amazon Associate I earn from qualifying purchases.