


Buy Tapo CS520WS Camera on Amazon
Buy 512 GB microSD Card on Amazon
Buy 128 GB microSD Card on Amazon
Please note that some of the links in my video descriptions are affiliate links where I earn from qualifying purchases. As an Amazon Associate I earn from qualifying purchases.
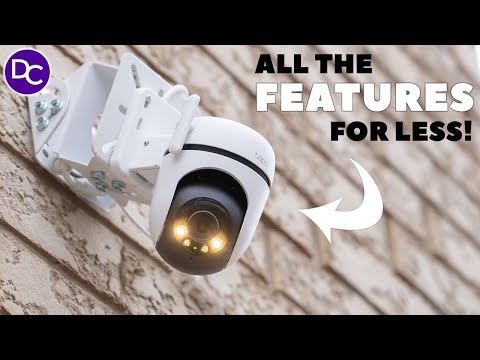
Intro

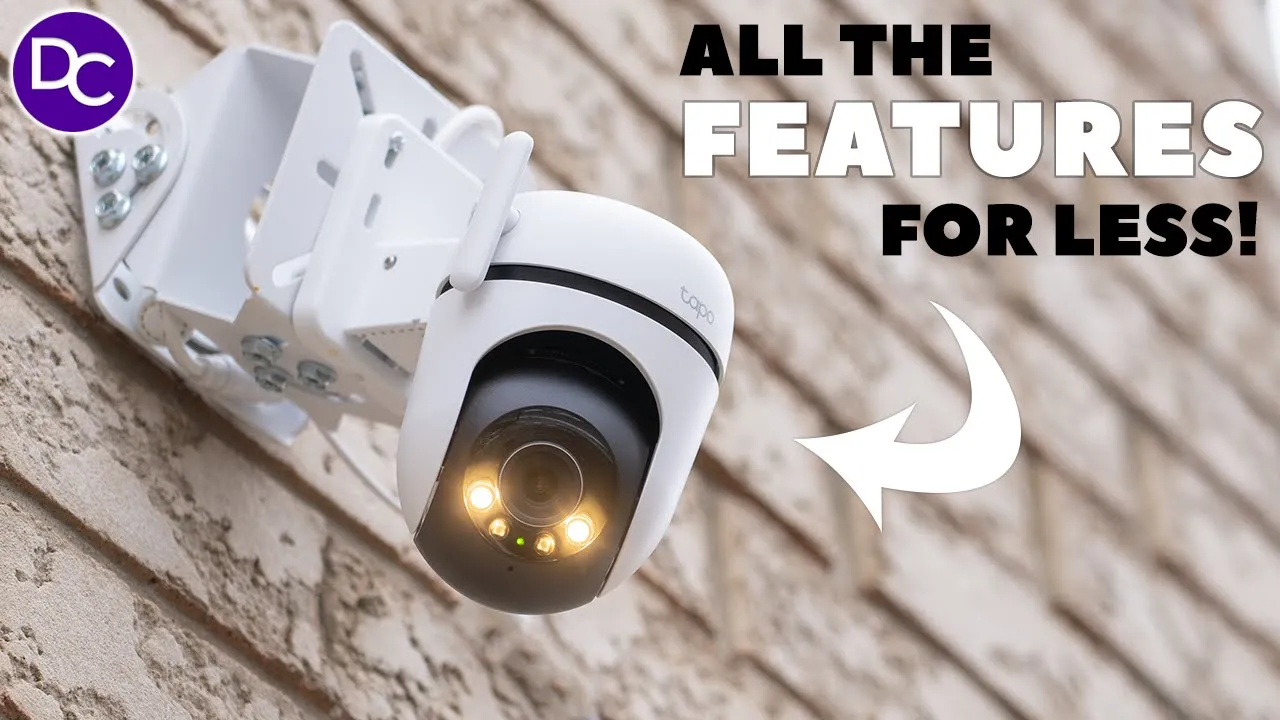
hey guys it’s Adrian and today I’m taking a look at TP Link’s Tapo c520 WS outdoor pan and tilt security camera this is a 2K wired security camera with pan and tilt functionality and it has very impressive color night vision thanks to their Starlight sensor it also has AI detection and smart potion tracking let’s take a look at how well it performs especially that color night vision and see if it’s worth it for you
Package Contents
in the package we have the camera power cable mount for wall or ceiling mounting weatherproof seals mounting sticker and mounting screws this has a 355 ml can of
Design
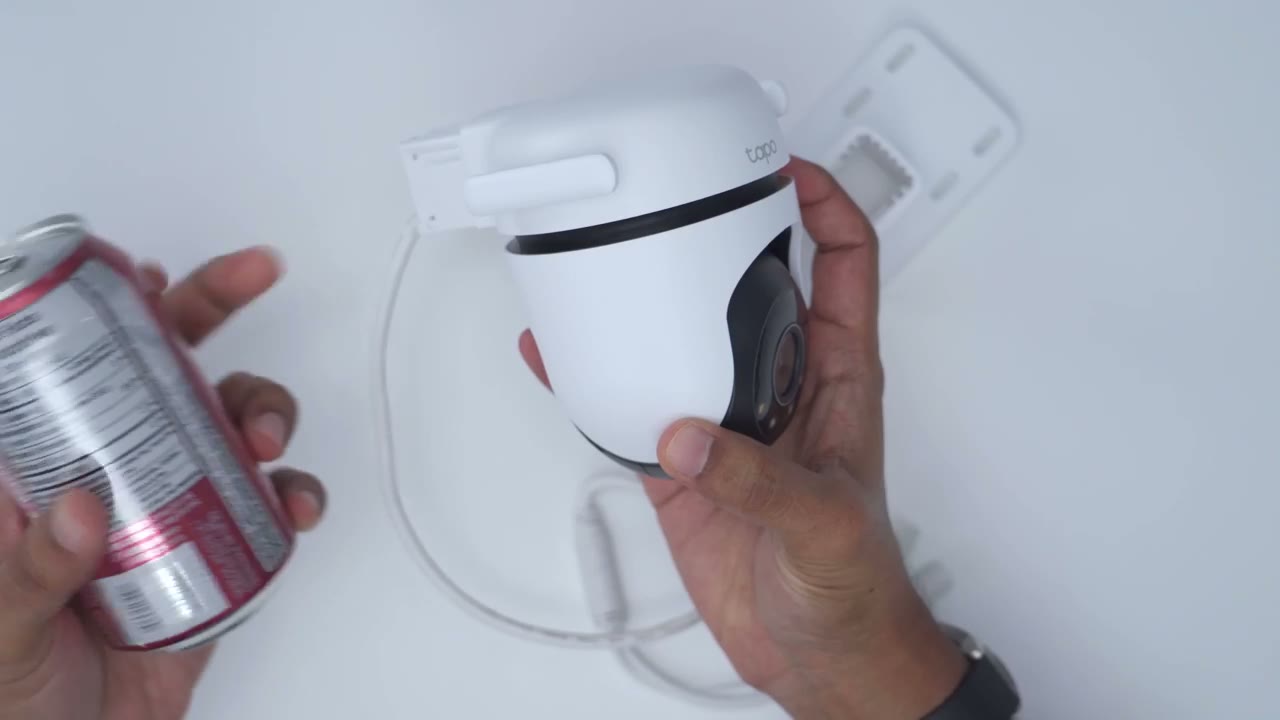
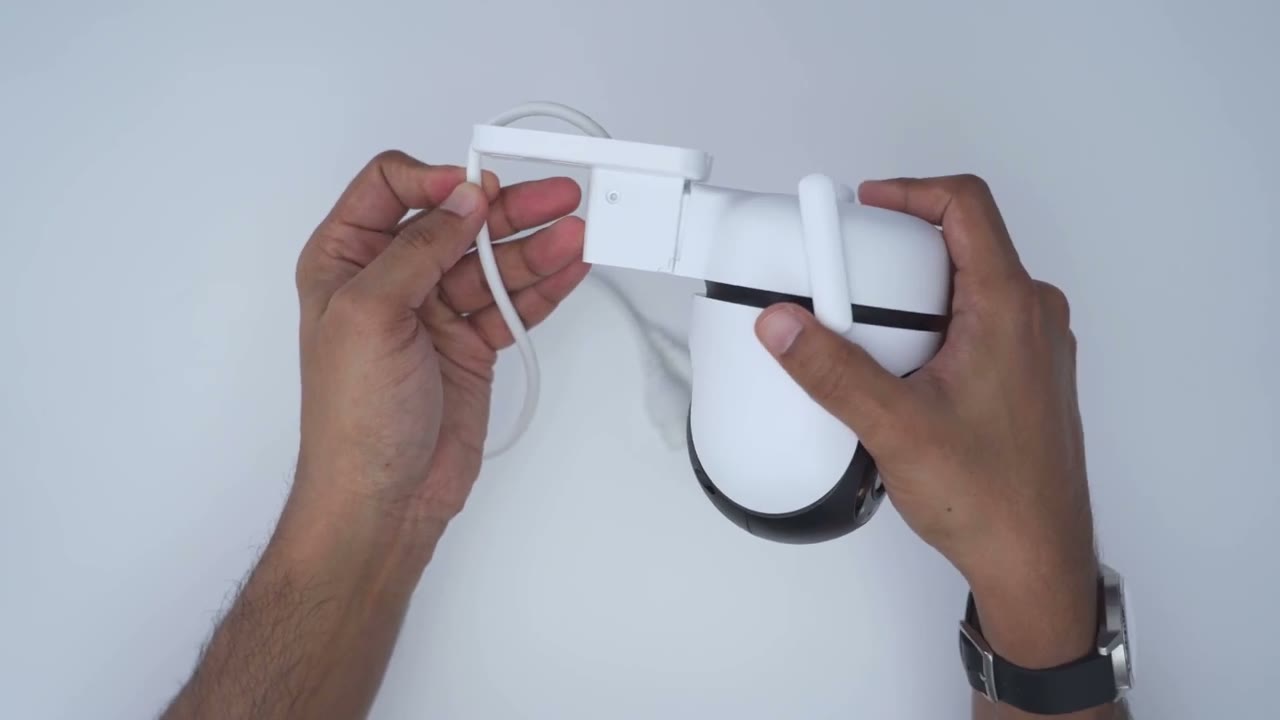
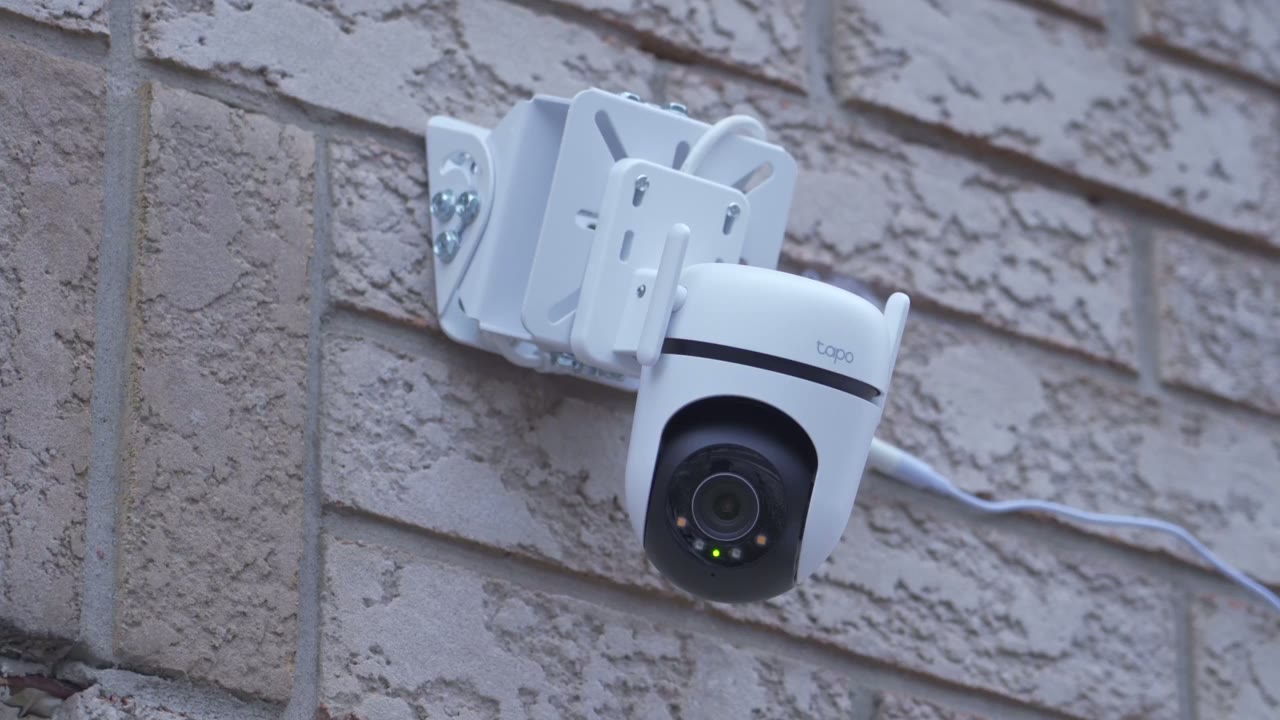
pop and you can see it’s about the same height and you know not much wider than that so fairly compact unit now looking at the front we have the logo here we have the camera module with the spotlights and there is a privacy mode where this will just kind of retract right into the camera body to give you privacy and of course we have pan and tilt functionality now at the very bottom here we do have a speaker Grill and if I actually rotate this all the way that opens up this area here so you can see there’s two protective screws here and if I remove that cover that’s where I’ll get access to the micro SD card and the reset button we also have pre-and wiring so this is a wired camera however for internet connectivity we have the option to use an RJ45 or ethernet cable here or we can go ahead and actually just connect this by Wi-Fi and we do have some adjustable Wi-Fi antennas as well to install the camera
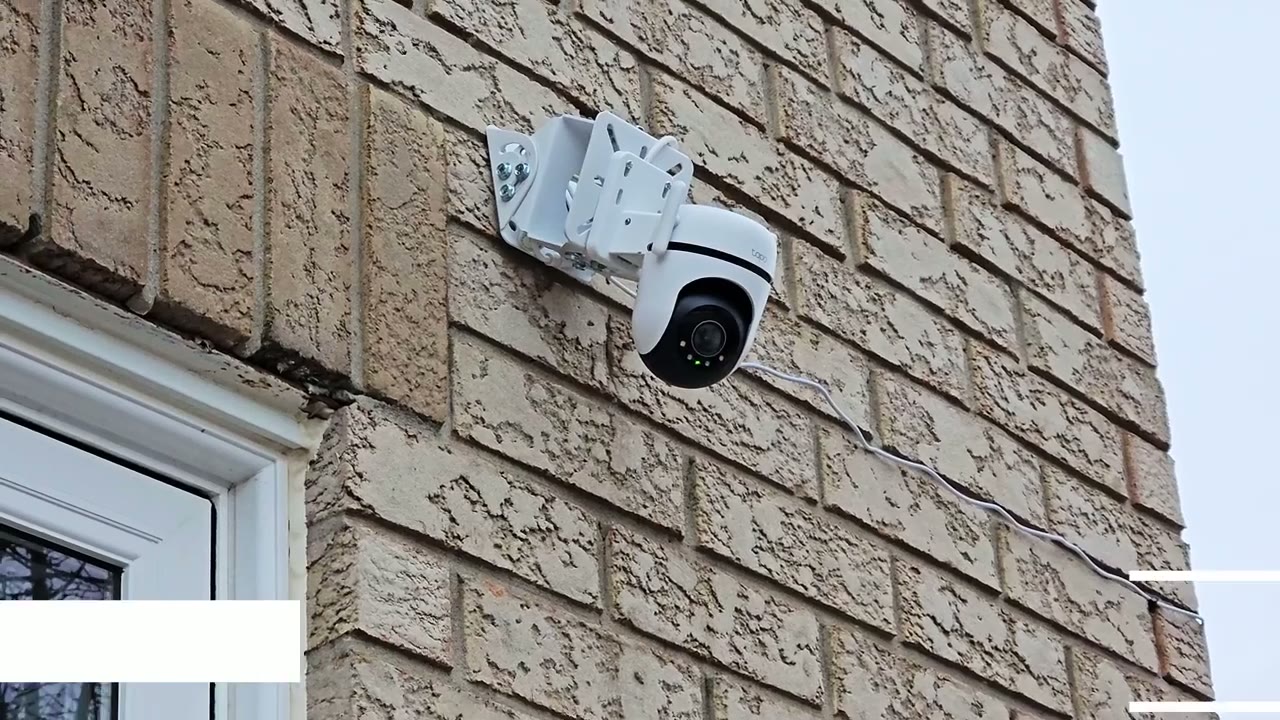
Installation
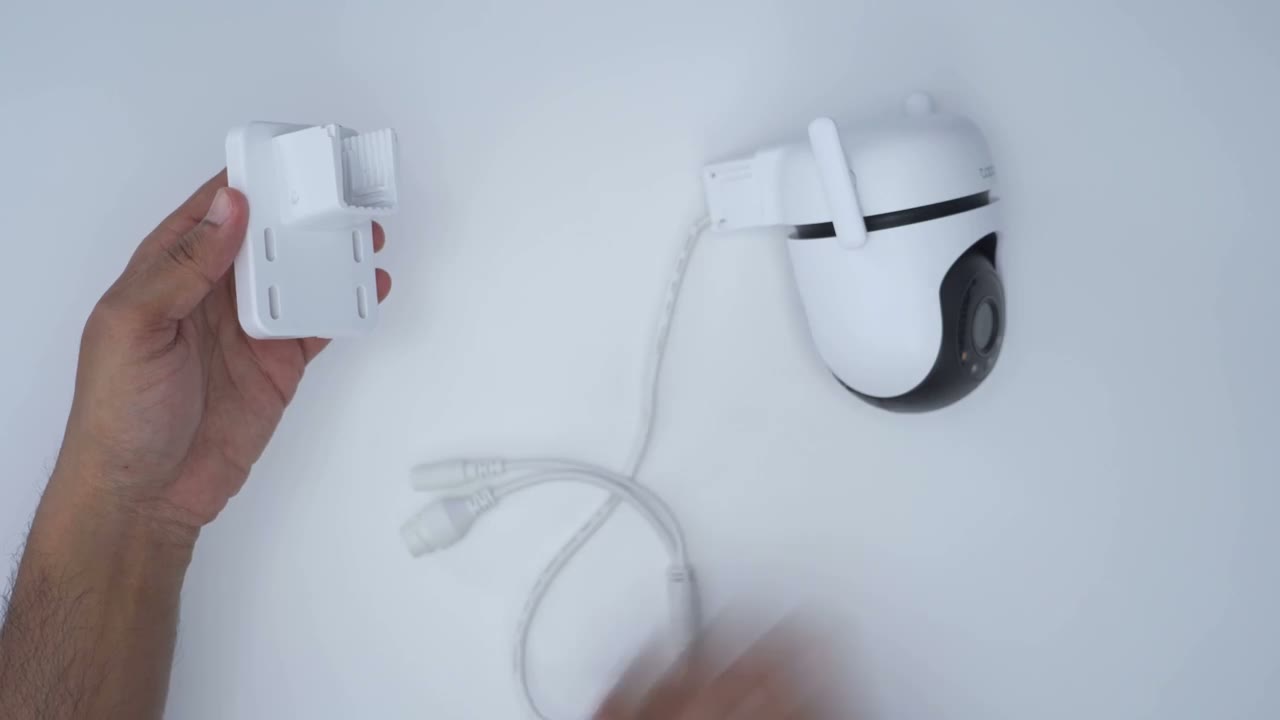
first thing we’re going to do is to run the pre-and wiring through this pass through hole in the mount so just run both of those and then just hold the mount closer to the camera and then from here we’re going to have to decide do we want to do it wall mounted in which case you’re just going to attach the screws and put it into the wall and then you’re just going to slide this into place like so and then secure it now you can see there’s two screws here where you can secure it and then if you want to do it wall mounted then you’re going to just rotate this and slide it in this way and then use those screws and again you can just use this cable and then route it through so pretty simple in terms of
Specs
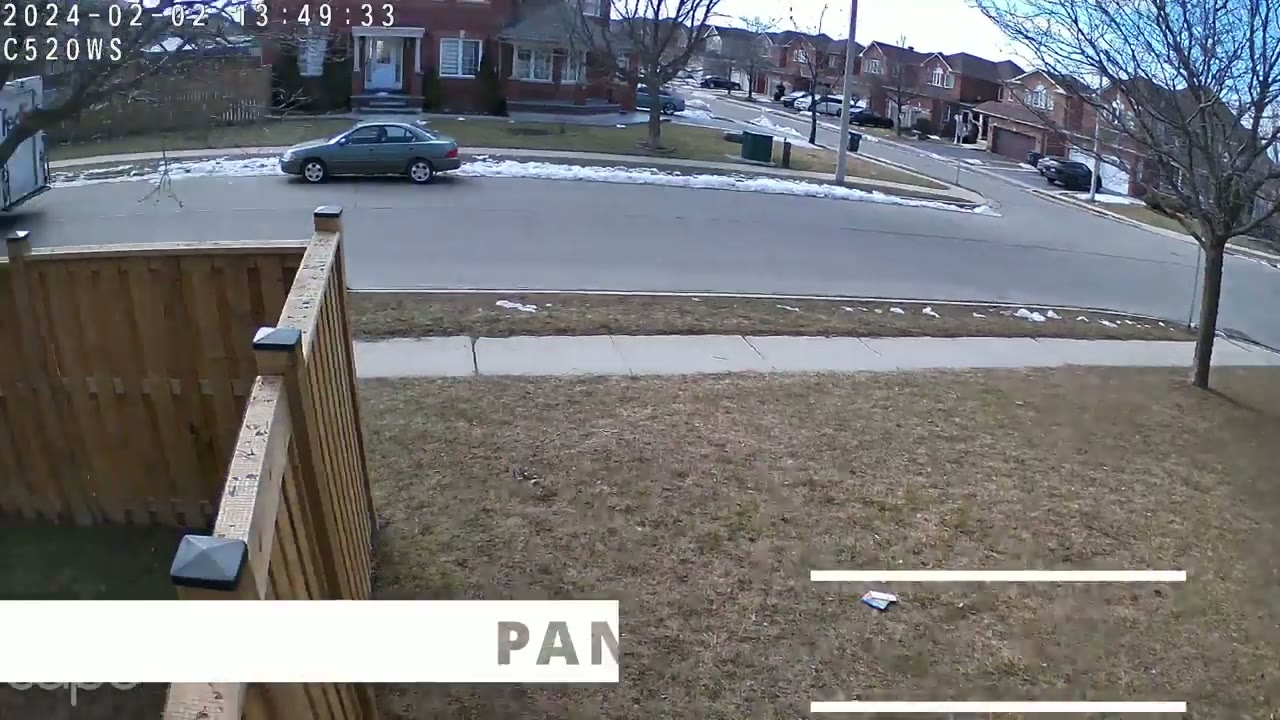
installation specs include a 4 megapixel sensor capable of 2K or Q HD resolution at 2560 x440 the camera pans 340° giving a full 360° view coverage it also tilts 60° giving a 130° view coverage as well the Starlight color night vision is good for up to 98 ft we have two spotlights up to 512 GB micro SD card support ip66 rating 2-way audio we also have ai detection for persons pets Vehicles Line crossing detection so the camera is on
Setup

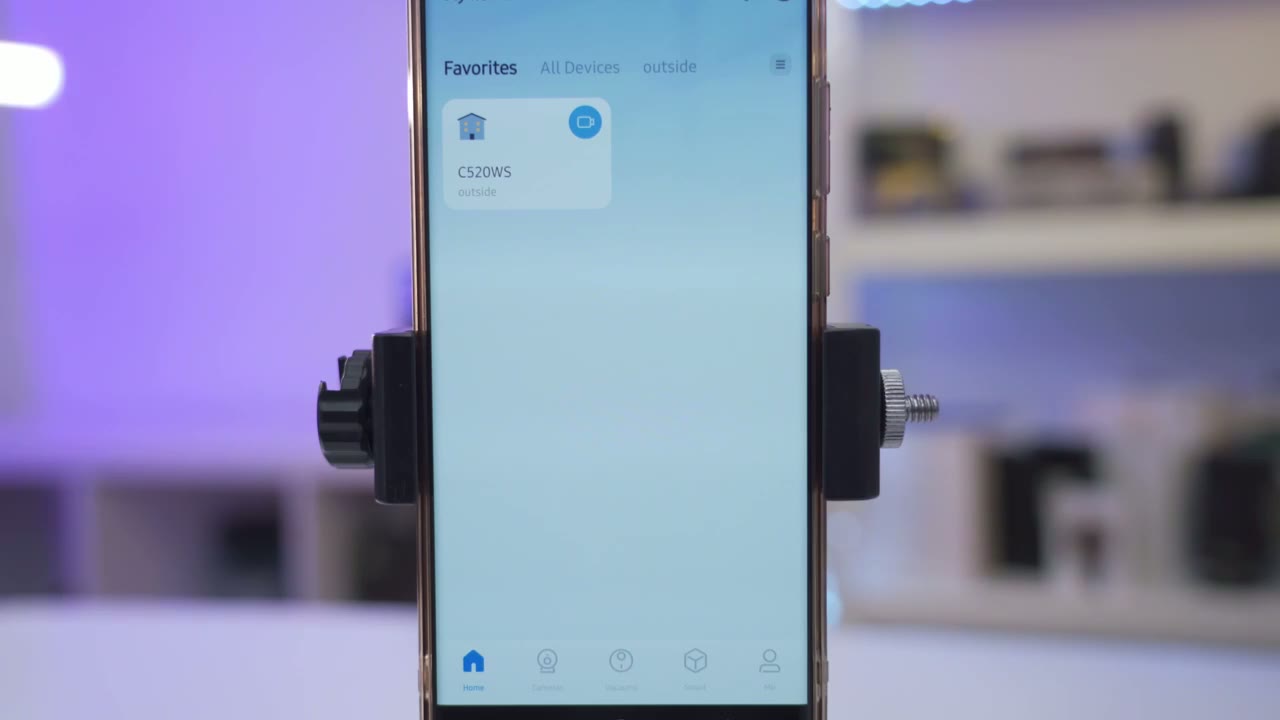
and it’s flashing so I’m going to go to cameras at devices 520 WS right there and I’m going to say I’m just going to connect it wirelessly I’m not going to run wiring for it just for the power cable and I can see that it is powered up so I’ll click next and now we’re going to get our phone’s Wi-Fi settings go back to the app and I’m going to pick my network and I’m going to pick this 2.4 GHz Network and I’m just going to put in my password connecting to Wi-Fi Wi-Fi connected so the camera is now added to the Tapo app that was really easy I’m just going to go ahead and start live view and I can see it pulled up really quickly so everything is working as it should let’s
Settings
take a look at the Tapo app so I’ll tap into the camera and pay attention to how quickly live view loads up considering I’m on Wi-Fi this is not hardwire with an etheric cable it’s quite impressive now if you had more than one of these cameras installed you could click the plus icon here and add more camera feeds let’s just exit out of that and then we can actually make this full screen of of course you know and then just you know zoom in to take a closer look at everything and we have quick access buttons here as well let’s look at this vertically now I can take a screenshot I can also go ahead and start a manual recording if I saw something interesting but again this is 24/7 recording so you don’t really need to do that you can also change the camera’s microphone level and we can also go into the two-way talk here you know you could just tap here to start talking make sure the speaker and microphone is on now we can go into pan and tilt and I’ve set four preset areas so this is the front view I have an A preset for my front yard here one for my backyard door in case anyone tries to get access you can see it actually pan and tilted and I could go and take a look at my backyard or a good amount of my backyard now this is very impressive you can see the field of view lets me have pretty much almost like 180° field of view um combined you know because I could go all the way from my backyard to my front door quite impressive now I can actually go here and change how fast the camera hands and tilt from 5° to 15 now if we go into Patrol you can have the camera Patrol you know preset points and if we go into panel this is really cool it takes a paner image Stitch and you can drag this box here and wherever the Box settles the camera will pan to that area I can also manually trigger the alarm you know on or off I’ll just turn that off and then there’s also a privacy mode if you go ahead and hit that the camera uh will actually retract into do the camera housing so that the lens can’t see anything and of course you can actually turn the light on or off and it’s on a 5minute timer by default now you can see right now it shows vehicle vehicle so there’s like AI smart tagging going on if you don’t like that you could just turn the tagging on or off but I do like to have it on in the full options we can go into detection and you can see it’s set to Auto tracking for all type of activities or you can track only specific activities like people vehicle or pets or you can say you know never track if you just want the camera in a static position and of course you can pick the image detection types you know all types of motion people pet vehicle Etc now if you tap into any of these you can see you can actually change the sensitivity here and you can Define you know kind of preset activity zones you can go ahead and add you know multiple zones and then drag those around I generally don’t use this type of feature but it is available if you want to use it and of course you can see you can change sensitivity you can also go into camera tampering and you know set the sensitivity on here and then have the alarm trigger if someone’s trying to tamper with the camera but let’s go into Line crossing detection this is a cool feature you can see right now I have a line here and it’s showing two arrows now if I go into that I can drag it so basically if there’s any motion that comes and goes from this line I’ll be notified and you can see pay attention to the arrows you can see the arrow just changes Direction so you can see if it’s someone leaving that or coming into the boundary and of course you can add more than one of these if needed it’s a really cool feature to have you can also set a schedule for the boundaries so I just have it set to on all the time you can see all the blue squares but you can just go ahead and edit that and you know turn it off at certain times of the day if we go to alarm and turn that on you can have you know light sound or sound and light and then we can also pick the sound so there’s some presets here like a siren emergency Red Alert or you can set a custom clip and you can also change the volume of that now the alarm duration can be as low as you know 5 Seconds long to 30 seconds or you can have something in between like say 9 seconds we can also trigger the alarm During certain events so it’ll only be triggered if there’s a person Line crossing detection or camera tampering and you can set these as you like and of course we can go and set the alarm schedule you know all day only during the day at night or a custom schedule under pan and tilt mode you can see again we can change the speed of the camera pan tilt but let’s go under Patrol mode and you can see I’ve set four different areas you can set more if you like but if I tap into one of them you can see that you know you can set the layover time for as little as 2 minutes all the way to 59 minutes and it’s just going to cycle through those different types of marks there’s also an optional Cloud plan that you can get and it comes with you know a 30-day free tral you’ll get encrypted video and you know 30 days of cloud video storage now I’ve been using this camera without the plan and I find it fully functional even without it under storage and recording you can see I have my micro SD card here and I have a 512 GB micro SD card and that’s how much space has been used up right now and it is set the loop recording so that when it sits full you know it’s just going to override the oldest clip on here we can also set a recording schedule now I have it set basically for continuous recording you can see at the bottom there but you could actually set it for detection recording and you can set it to only record you know during certain days and times under video and display we can go into the night mode settings and right now I have it set to Smart Mode the camera is dynamically going to switch between infrared and full color mode but you can force it to one of the modes if you like now for video quality I have it set to the max resolution you do have the option for 1080P and 720p and then the frame rate you can go from as low as 15 seconds to 25 seconds the image can also be inverted and you can set up privacy zones if it’s required in your area you can also have onscreen information such as the day and time and the logo and then you can also put you know any type of custom text that you like under Spotlight settings we can change the brightness of the spotlight it’s set at the maximum right now on my camera and then you can change the duration for as low as 5 minutes to as much as half an hour you can also have the status LED on or off I like having it on so people know the camera is actually working and of course we can trigger the privacy mode that I showed and you could see I have full Wi-Fi strength now under notifications it’s set to on and I’m getting notifications for all of these types but you could just unselect some if you don’t want to be bothered all the time and then I have it set to always send these or I could send these during the day at night or during preset times and of course if you pick Rich notifications you will have to get that you know optional Cloud plan and you’re just going to get a thumbnail with your Rich text alerts the camera can also be shared with you know other members of your family as well reviewing video is
Video Playback
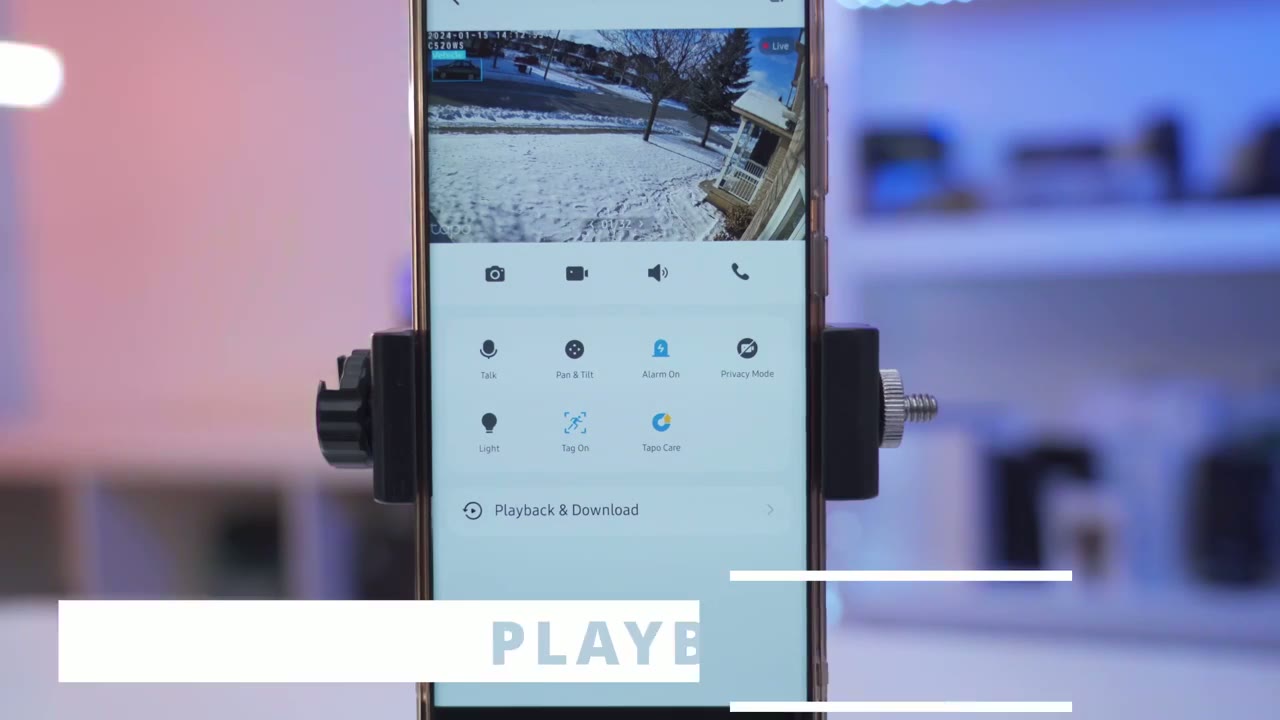
super simple I’ll click on playback and download and once that loads up you can see we have two options here play back and download so basically download is everything that you’ve downloaded from the playback screen now you can see I have a color timeline here and that’s really based on the type of event and of course you could zoom in on this timeline now you can see I have here just general motion um passing if it was a car so and and then if there’s a boundary Crossing which I showed earlier so for example once you have a clip you can just tap on that and from here you can actually just go and hit download now one Quirk I noticed about this is if I hit download you know it will start downloading automatically if I’m on the same Wi-Fi network as the camera is on but if I’m on you know mobile data for example it actually will not download so it’s a little bit of a quirky thing now if that’s a problem say you’re on vacation you can’t be on the same Wi-Fi network as your home well what you can actually do is just manually start to capture uh whatever is recording on the screen if I go into the download tab you can see that it shows the download is complete and these are all the different clips I’ve downloaded the video quality on
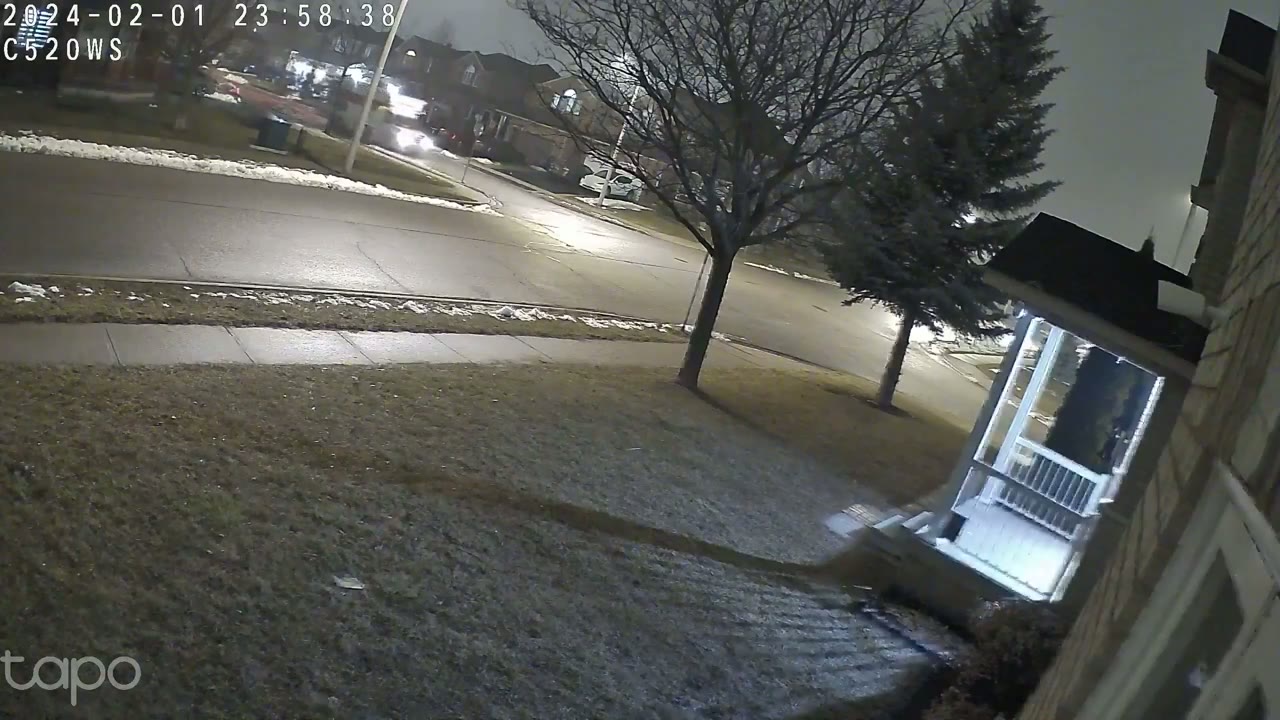
Video Quality
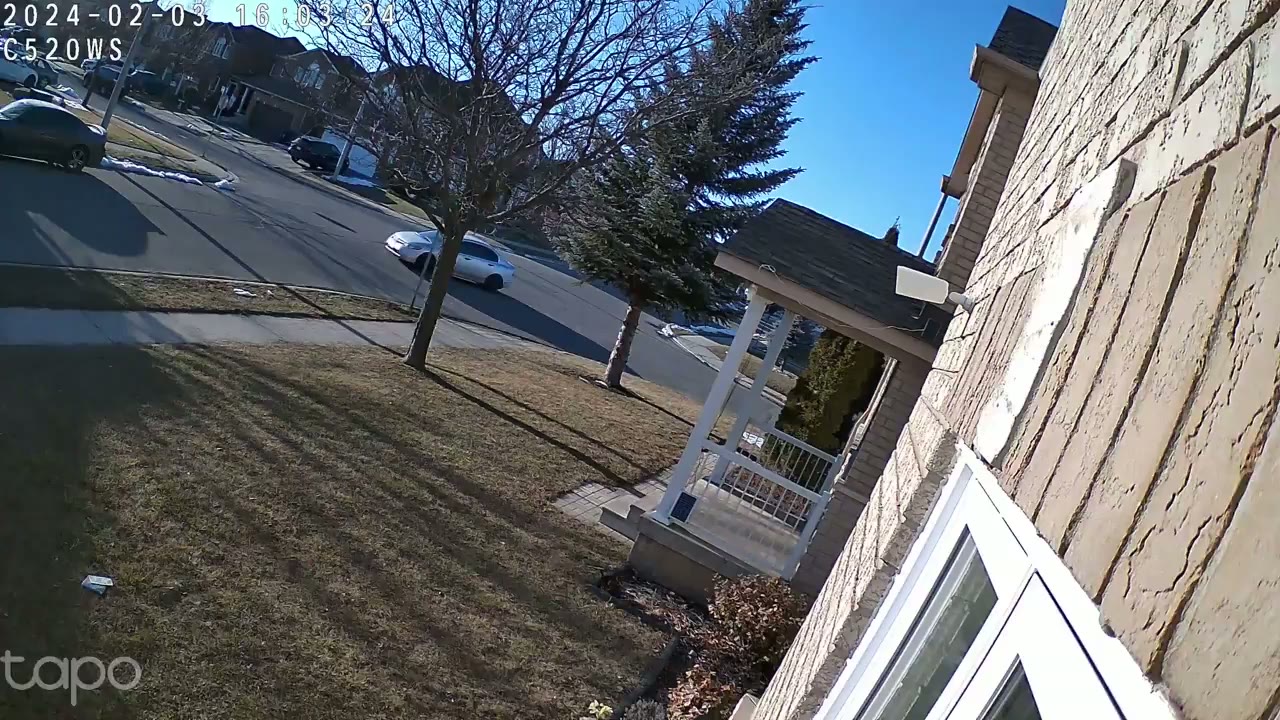
here during the day and at night is one of the best I’ve seen on any type of 2K camera and you can see in some of these clips you know I’ve had a lot of snow where I’m living in Canada and on one of the days you know it was you know above seasonal temperature so the snow was melting and then the water was Dripping and this is sharp enough and clear enough so that I could actually make that out it was also really easy to make out cars and faces of people coming and going during the day and even at night you may have also noticed just how smooth video playback looks like and that’s because I set it to the maximum 25 frames per second the pan and tilt
Pan & Tilt
functionality is also full featured so of course you can manually pan and tilted like with most cameras but you can also set a patrol mode where you add like four markers and it’s just going to go you know between each of those markers motion detection and the speed
Motion Detection & Tracking
at which the app would alert me that it detected motion was a little bit of a mixbag and what I mean by that is there were times where I was standing in front of the camera and you know there was a car going by behind me or some kind of movement and because I set it in the app to track all activities and I pick pretty much everything in there like you know cars pets people you know sometimes it wouldn’t actually detect me and focus on me till it was finished with whatever was going on in the background so just something to be mindful of obviously it would be easier if I you know specifically said the thing I was looking for now whenever the camera did lock onto a person moving or you know a car or vehicle it definitely stayed with them and tracked them the entire way through and I’m really impressed with the wide field of view on here I can see you know them coming from all the way up the road till they go to the opposite end of the road once I got an app alert on my phone and I tapped on it it opened the app up fairly quickly and jumped right to the relevant video now this is with me using Wi-Fi obviously if you hardwire this it’s going to be even faster since camera is a bit on the
Spotlight
smaller side it only has a spotlight not a flood light so you know it’s probably not the biggest type of deterrent in terms of you know light output yeah definitely people will see the light flashing when you know the alarm is triggered or they’ll see that you know it turned on so it knows they’re there however this didn’t really have an impact on night vision video you could see in the clips that I showed everything was really bright and well
Speaker & Alarm

illuminated so I inserted a 512 GB micro
Storage
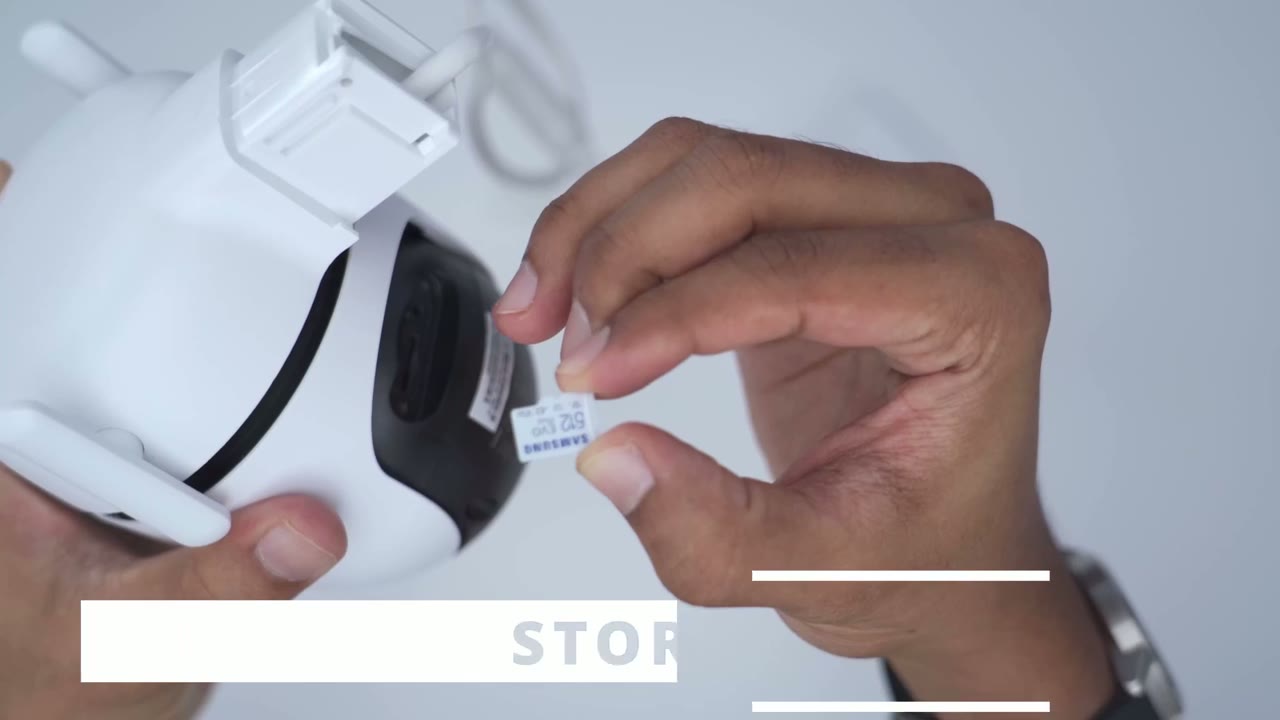
SD card which is the maximum supported and I estimate that I’m going to get around 3 weeks of video playback history and this is with the camera set to 24/7 recording full 2K quality at 25 frames per second and that’s really impressive to me because anytime I’m looking for a system I want you know one to two weeks of video playback history say I was on vacation something happened I have you know adequate time to go back so yeah if you do get a 512 GB micro SD card expect about 3 weeks and obviously if you get a 200 56 uh gab micro SD card it will be maybe 1 and a half weeks now if you wanted even more video playback history you could drop the resolution from 2K to 1080p I don’t really recommend that I would still leave it at 2K but what you could do is to drop the frames per second from 25 to 20 frames per second or to even 15 frames per second and I review a lot of camera brands and it’s usually at around the 15 frames per second Mark and it’s still quite usable
Recommended?
so if you’re looking for a high quality 2K camera that’s you know not too big you can pretty much fit this anywhere you want and it’s going to be Raw Rock Solid and reliable this is an awesome option I mean the 2K quality is one of the best I’ve seen on any type of wired camera especially given the size of this you know both at day and at night you know it was really clear really sharp well exposed video now I really want to highlight the ip66 rating on here you know I review a lot of cameras they have great ratings but I usually don’t review these cameras in the winter time now it’s mid January in Canada kind of like the heart of winter we’ve had two major winter storms in one week it’s been very overcast there’s been ice snow and rain mix and I’ve seen ice you know settle on the camera then melt off afterwards and even throughout all that especially with really high winds you know the camera didn’t give up I didn’t lose connection to the camera pan and til functionality didn’t stop it’s just been Rock Solid reliable so for roughly $7 us depending on if it’s on sale or not you know this is just a really awesome option this is actually my first TP Link camera that I’ve reviewed and I’ve been super impressed with the experience so far you know usually when you’re looking at a smaller camera body like this you’re not getting things like 24 7 recording maybe because of you know heat buildup also at 25 frames per second quite impressive like I’m just really blown away at how stably and how well this works especially again in a Canadian winter so if you’re interested in picking up the TPL link Tapo 520 WS penal security camera I’m going to leave some links down below along with a coupon code also don’t forget to check out some of my other camera review videos especially if you’re looking for something that’s not wired I’ve reviewed a lot of solar cameras as well and as always if you found this video helpful please consider likeing and subscribing truly that’s helped me out and I’ll see you in the next one soon
Buy Tapo CS520WS Camera on Amazon
Buy 512 GB microSD Card on Amazon
Buy 128 GB microSD Card on Amazon
Please note that some of the links in my video descriptions are affiliate links where I earn from qualifying purchases. As an Amazon Associate I earn from qualifying purchases.