Ok, so you’ve just finished taking some portrait shots, and your client is eager to see the final photos. Of course, if you’re shooting in RAW file format, the colors can look flat straight out of the camera (SOOC). Obviously, you don’t want to show the RAW file to the client.
Sometimes, after a long day of shooting and traveling, hopping on the computer and firing up whatever photo editing software you use, or a combination of photo editing software can be the last thing you want to get into. However, we want to keep our clients happy, so we fire up Adobe Photoshop or Capture One and maybe even Lightroom, depending on your workflow. However, what if you could fire up just one program for quick, customizable edits for a polished look to thrill your clients? Well, Portrait Pro 19 could be that answer. Let’s get into the pros and cons of this type of specialized editing software.
This review is not sponsored. This software was purchased independently, and the opinions expressed are my own, and not influenced by the manufacturer or a third-party.
Portrait Pro 19 Versions & Pricing
The program comes in three versions, which are the Standard version, the Studio version and the Studio Max version.
Standard Version – allows you full editing, but restricted to JPEG images only, no raw files.
Studio Version – allows full editing of JPEG, RAW & DNG files with Photoshop and Lightroom integration.
Studio Max Version – Includes everything from the Studio version, but allows for automated batch image editing.
If you are a wedding photographer or portrait photographer who shoots many photos in a fixed lighting environment or setting, you’d want to go with the batch version probably.
At the time of writing (June 2020), the Standard version is $45 USD, The Studio version is $70 USD, and the Studio Max version is $139.95 USD after a 50% applied discount when purchasing from the software developer’s site: anthropics.com
What Can Portrait Pro 19 Do?
First, let’s define what Portrait Pro 19 can actually do, and what it excels at. Btw, this review is based on using Portrait Pro 19 Studio – build 19.8.
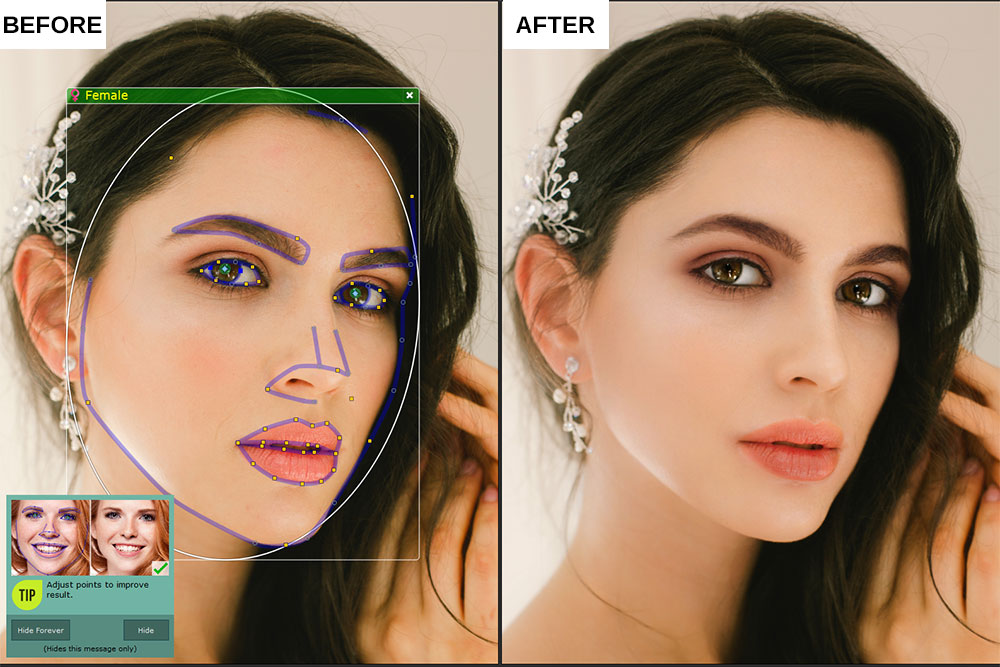
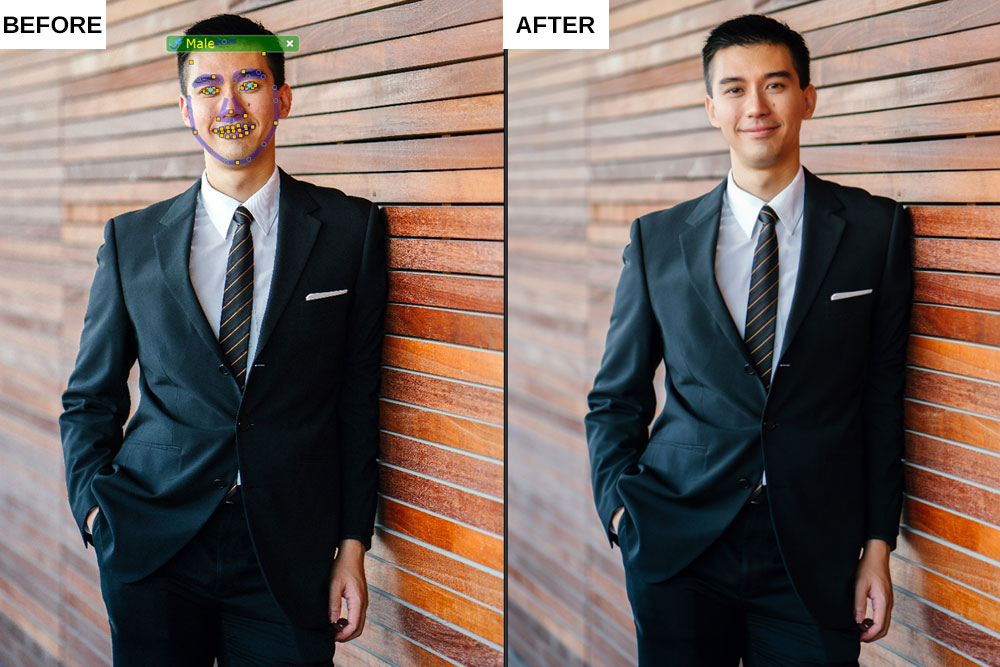
As the name suggests, this program is meant for editing portraits. You can shoot a close-up portrait shot where the face fills the frame or a full body shot, and the software’s AI is intelligent enough to detect the facial portion only from a full body shot.
You can see in the images below, that the software outlines facial features in close-up shots, full-body shots, and with the face partially obstructed. You can also manually fine-tune the anchor points to your liking, but the software does a pretty good job by default.


Portrait Pro 19 – Recognizing Multiple Faces
It it also advanced enough to recognize multiple faces in one image. The software found the faces automatically when I tested it, but you also have the option to manually choose an additional face if you do not like the software’s AI recognition.

One thing to note is that while you can edit each face individually, due to pixel changes, there are sometimes slight changes to the other face. See the animated image below for an example.
Using Portrait Pro 19’s Built-In Presets
The software comes with a lot of presets to choose from to get you started quickly, if you prefer to skip manually adjusting each facial setting. Each subheading can be expanded to see all the built-in presets, pictured below.

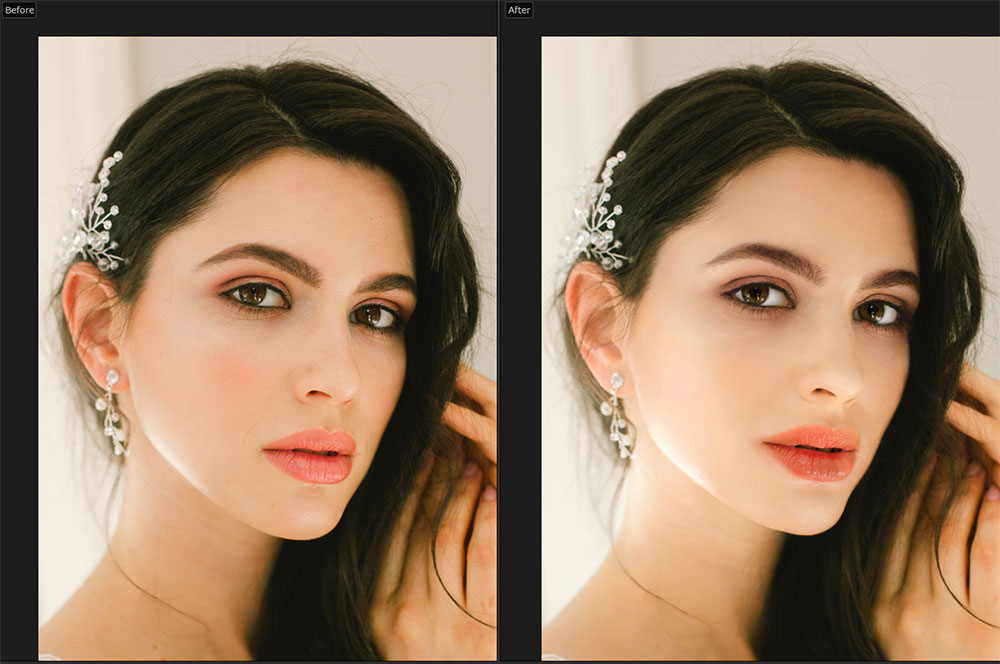
Here is an example of a photo that was edited in under 2 minutes using only the built-in presets, and without touching a single dial or slider setting. While the editing style or modification strength may not apply to your personal style, this is just to show the capabilities of the software.
The image below was edited by turning on the following built-in presets:
- Standard Sculpt
- General Skin Smoothing
- Lift From Below Lighting
- Whiten Eyes
- Sharpen Mouth & Nose
As you can see, it is pretty easy to quickly change the look of an image or facial features just by turning on the built-in presets.
Built-in Preset Considerations
While you can achieve great results using the built-in presets, it can be easy to go overboard by turning on tons of presets. If you are turning on presets, be sure always to preview the before photo so you can monitor the changes to ensure that you do not drastically change the subject’s natural features.
Also, pay attention to the chin area when using built-in presets since the chin area may become slightly distorted depending on the strength of the effect. Of course, if you had never seen the original image, or the image was used in a smaller resolution size for Instagram use, some of these things may not even be noticeable.
Use Caution – Watch The Eyes
One word of caution is to pay attention to your subject’s eyes when using the built-in presets or even with manual editing. Look at the image below that was edited using a built-in preset, specifically the right eye. Notice that that is an unnatural curvature in the eyelid. However, if you always pay attention to the eyes, it is easy to catch and correct by manually adjusting the eye setting shown in the second image below to avoid this issue.


Portrait Pro 19 – Manual Only Adjustments & Settings
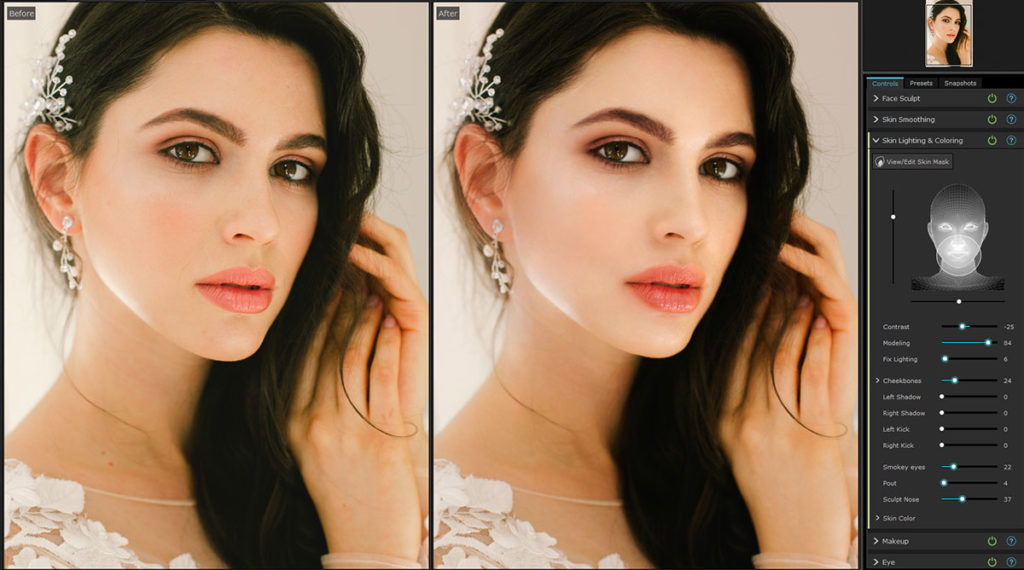
The image below was edited in Portrait Pro only using manual settings. Adjusting the manual settings took around 7 minutes. No built-in presets were applied.
Some of the manual settings that were adjusted were sculpting of the face, skin smoothening, applying mascara, modifying the light direction and position, lip gloss, darkening of the hair, and a few more manual adjustments. While the original image looked great, and any client would love the outcome of it, you also have the option to quickly make manual adjustments to present two versions of a photo for the client to choose from.
Portrait Pro 19 Makeup Effects
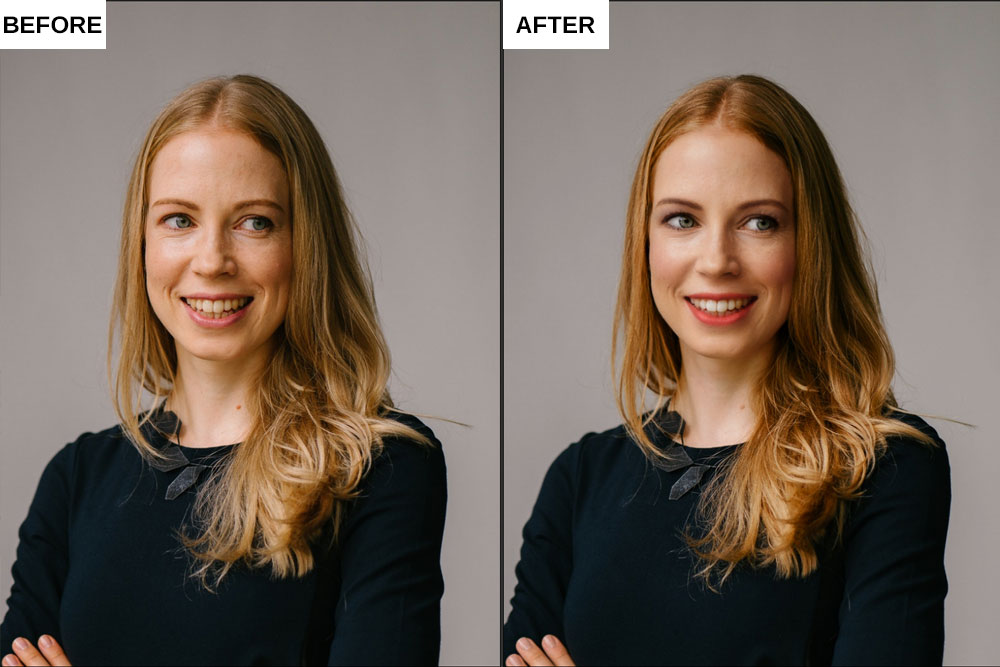
In addition to all of the settings you can change, one of my favourite features is playing around with the Makeup effects manually. Check out this image that was edited in about 7 minutes only using the Makeup tab and the hair tab, which produces dramatic results that are realistic.
Save Editing Styles With The Snapshot Feature
Have you ever spent a half-hour editing an image, then you step back and think, did I overdo it? Should I start over and go in another direction? With the Snapshot feature, you can do all of your editing, save that snapshot with a name, then do a completely different editing style and save that as another snapshot to compare. This way, you can have multiple edits saved as snapshots to choose from or to get feedback from before choosing a final file to deliver.
This is different than saving a preset, which can apply to any image that you open. Whereas, the snapshot feature applies to just a single image or image session. Snapshots are your own individual edit that applies to one image or image session, and cannot be used to apply to a new image or image session.
Saving & Exporting Files
If you start working on an image edit and you want to save the editing progress to come back to it later, you can save your work as a session file and save that file based on your file organization, then reopen it at a later time to resume. Once you are finished all of your editing, you have the option to save or export the file as a JPEG, PNG, or TIFF file.
Portrait Pro 19 & Adobe Photoshop
You also have the option to edit your photo in Photoshop first to adjust any settings to the body, cropping, etc., then pushing the file to Portrait Pro 19 while in Photoshop if you choose to install the Portrait Pro 19 plugin.
Do I Recommend It?
Absolutely. While many of these effects and edits can be done in programs like Adobe Photoshop, Capture 1, or Lightroom, if you don’t fancy spending hours editing photos, then Portrait Pro 19 will fulfill most of your needs for portraits. If you have clients that want instant results, this is a great option to provide a deliverable file the same-day, which your client will appreciate. Portrait Pro 19 takes all of the manual steps you would perform in other editing software and helps to automate that with built-in presets and manual adjustments for fine tuning to your preferences. As with any software, newer versions will add functionality to make it even more robust, and iron out any small issues, such as the eye issue I mentioned above.
If you prefer to spend your time shooting photos, and not editing them, give Portrait Pro 19 a shot. They currently offer a free trial so that you can decide if the features are worth it for your editing style. You will have full functionality, but you will not be able to save or export a file. Once I used the trial, I was sold and purchased it the same day.