Buy Luminkey Magger 68 HE Gaming Keyboard
Please note that some of the links in my video descriptions are affiliate links where I earn from qualifying purchases. As an Amazon Associate I earn from qualifying purchases.
Intro
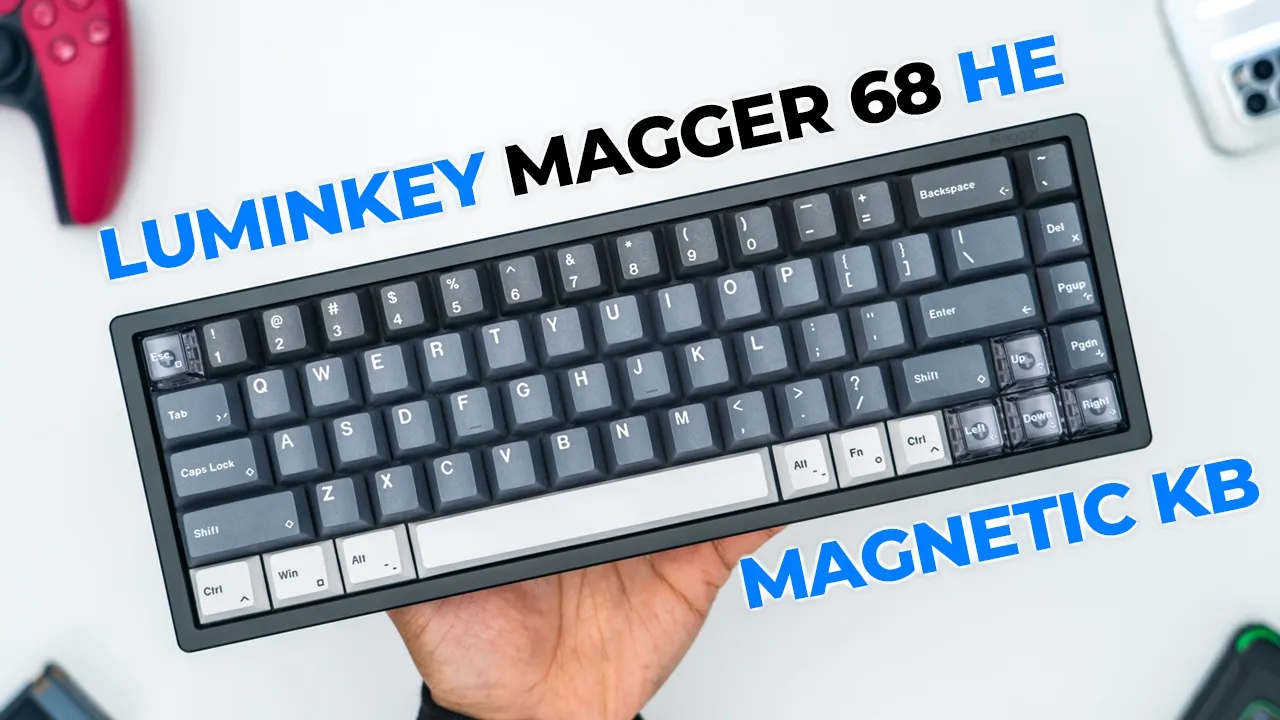
Hey, it’s Adrian and if you want that competitive gaming edge, you should definitely check out the Lumen Key Mag 68 magnetic keyboard, which uses Gadron Pro magnetic switches instead of traditional mechanical switches, allowing you to set key press actuation points to as low as 0.1 mm to 3.4 mm. There’s a bunch of gaming settings like DKS, MT, TGL, RS, SOCD to really fine-tune and optimize your gameplay. And there’s also up to 8K polling rates and as low as 0.125 milliseconds of latency along with Nordfacing RGB PVT key caps all housed in a premium anodized aluminum casing. So, let’s take a closer look to see if the Mag 68 HE keyboard could be your very next gaming keyboard. And a big thanks to Mechans for sending this out for review. In the
Package Contents

box, we have the Lumen Key Magger keyboard along with a USB type A to type-C braided cable, extra replacement switch, a keyboard shortcut list, and a key cap and switch puller. And this is
Design
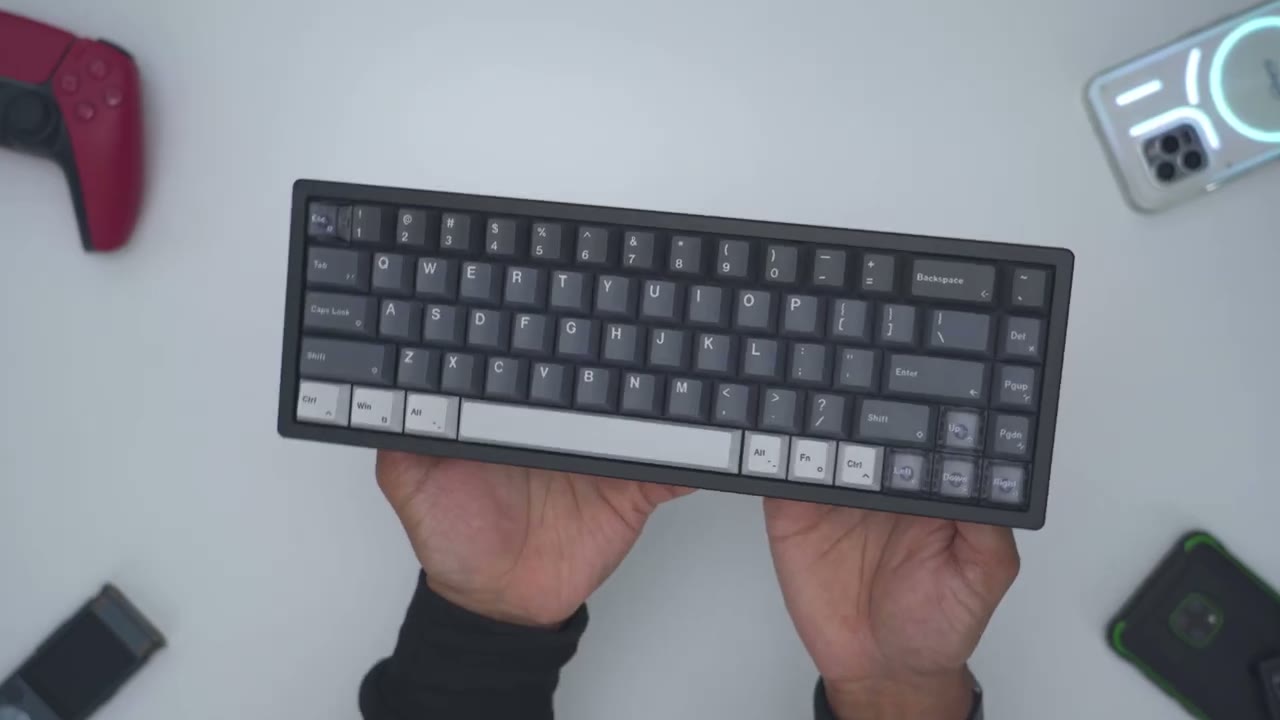
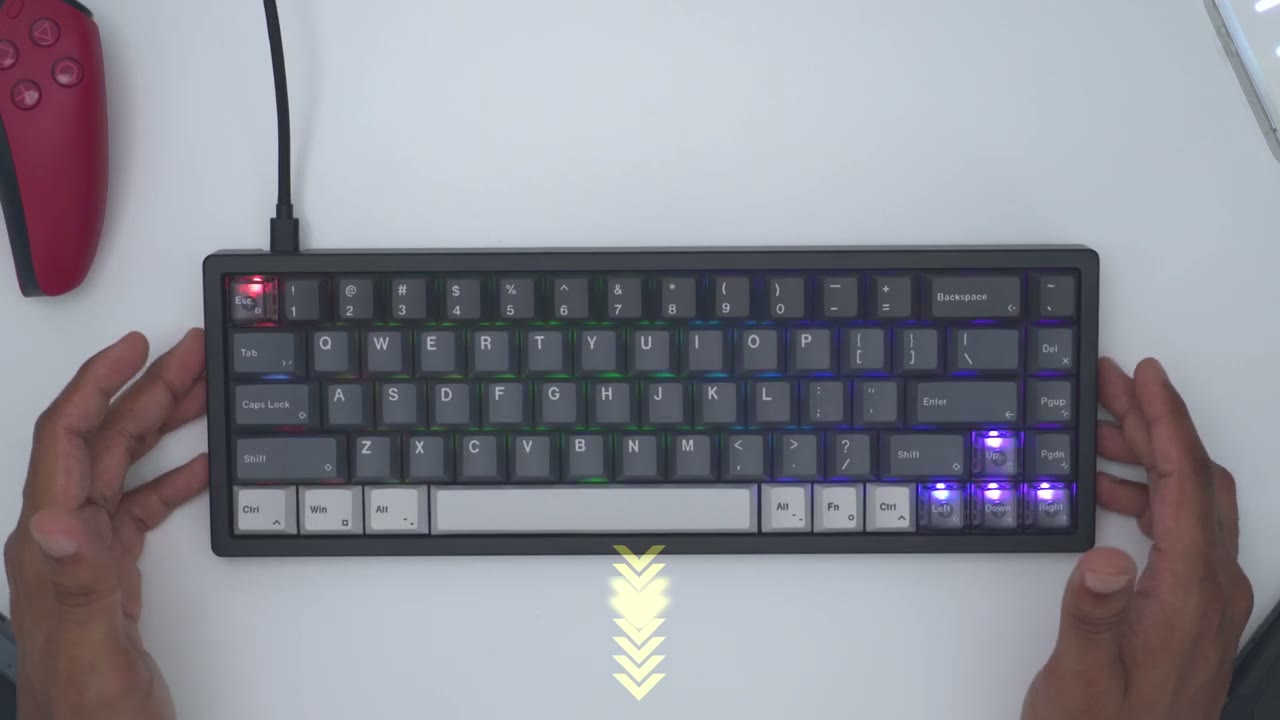
what the Lumen Key Mag 68 magnetic keyboard looks like. And it just feels so premium and nice in the hand, and it actually looks so nice in person as well. Now, it comes in two other colors. There’s a champagne gold version and an e- milky white, but I think this looks much better than those. Let me know what you guys think down below. There’s a performance version, which is what I have, and there’s also a pro version. Now, the performance version comes with Gadron white magnetic pro switches, while the Pro version comes with the GaDon magnetic J Pro switches. Now, the Pro version is going to be a little bit heavier, but the performance version is still very heavy itself. So, this comes in at around 2.6 lb or about 1.2 kg.
So, the Magger 68 keyboard is a 68% layout with 68 keys, and there’s no other layout options available. And the color scheme on here looks so beautiful. It’s a perfect pairing. So, we have this darker top row here, then this lighter gray, and then this very light gray or kind of off-white color. And then we have these type of smoke translucent key caps in the bottom right corner. And for the escape key, and it just ties everything so nicely together. The housing is this anodized black aluminum and it looks nice and it also feels really cool to the touch as well. Now, in the top right corner, we do have the Mag logo and this is debossed into the casing here. Now, if we take a look at the side, we do have a 7% typing angle.
And if we take a look at the back here, there’s no actual, you know, kind of uh feet or adjustment feet to adjust the typing angulation of the keyboard. We also have the H debossed again into the case here or this rear plate. And then we also have the lumen key also debossed as well. We have PBT key caps, but they’re not shine through. The only ones where you’ll see that are these translucent smoked out ones. And these are what the key caps look like. So, here’s the control key, and you can see it’s a fairly thick type of PVT key cap. And this is what the smoked or translucent key cap looks like. So, very clear and see-through on the side, and then at the very bottom, and you know, kind of smoked out or this type of matte finish at the top.
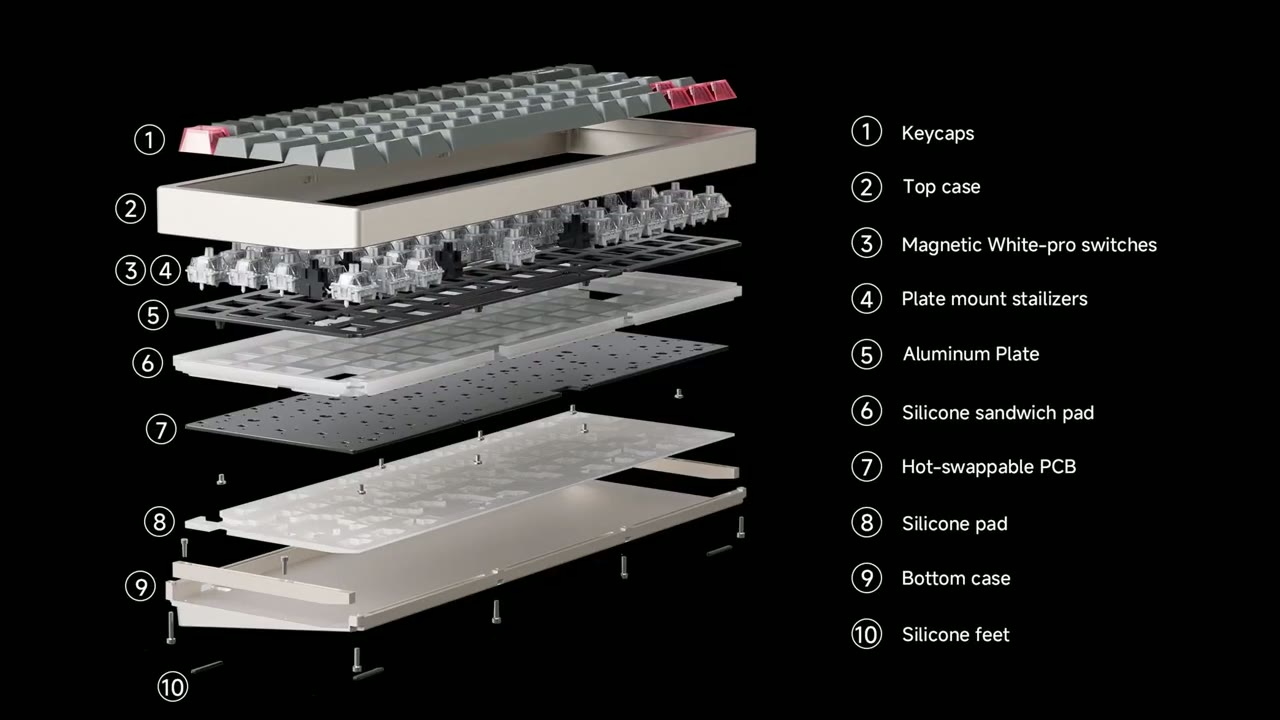
And when I run my fingers along the control key, I can’t actually feel the printed lettering on that one. However, on the smoked or translucent one, as I run my fingers, I can definitely feel it’s a little bit raised on these ones. And of course, we have a hot swappable PCB. The very rear of the keyboard has a USB type-C port because this is strictly a wired keyboard. It doesn’t have any type of wireless or Bluetooth functionality. There’s zero flexing or creaking at all as I just kind of, you know, try to twist the keyboard or exert any type of pressure. It just feels really well built. And there’s nothing on the right or left sides of the keyboard. Now, I’m not going to be taking my keyboard apart, but here’s an image just to show you kind of the internal structure.
Specs
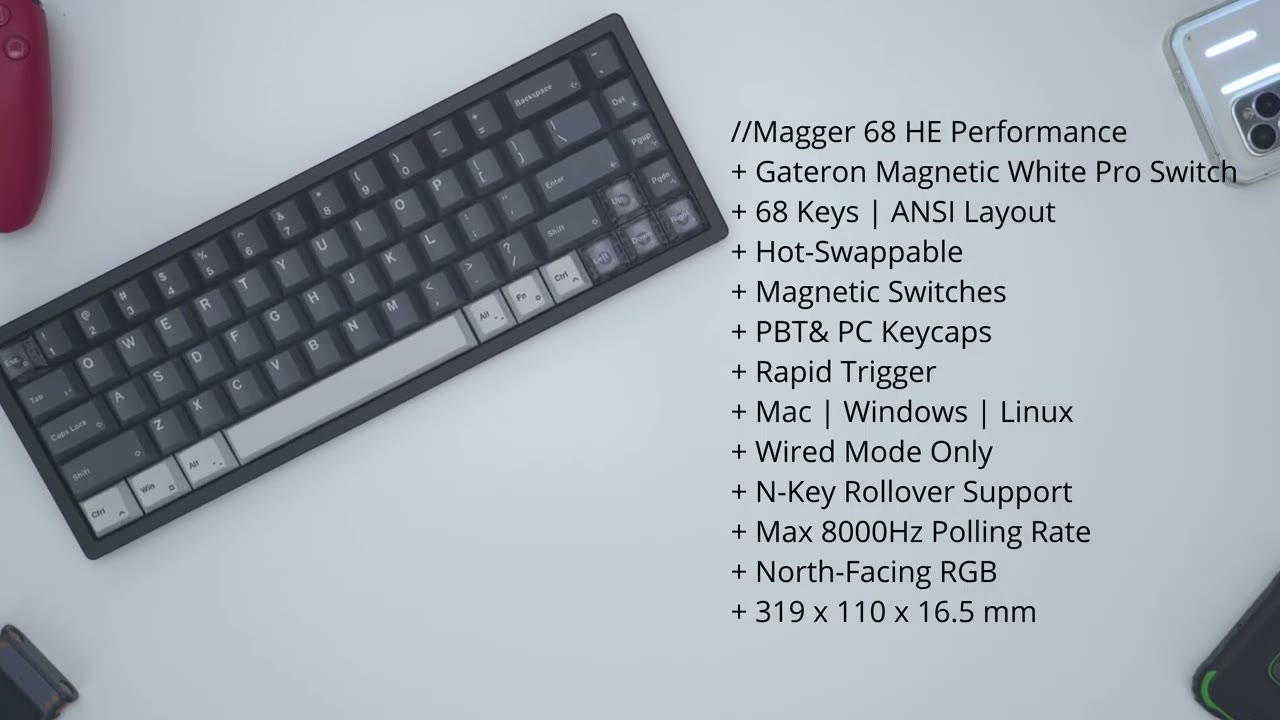
Here’s a quick look at the specs. Feel free to pause and review or jump ahead
Software Settings
to the next section. Let’s take a look at the Lumen Key H software. Now, important to note is that this is the driver software installed. But if you actually go to this website here, you can actually get the same type of, you know, interface. So, you can see performance, advanced features, key remapping, RGB. I’m just going to prioritize the downloaded software for now. Now, at the very top right, you have the debounce. You can set that from high, medium, or low. And then pulling rate is 8K, but you can also lower that as well down to 1,000 hertz. Now, we do have different layers here. So, the function layer, function layer 1 2 3. And you can see if I hold down function, you know, it’s showing those shortcut keys there. And of course, you can go ahead and modify that.
Now, if you type or click on Windows layout, you can switch to different layouts. I’m going to leave it on Windows. um on there. You can also reset everything, export profiles just like so. And you can also import profiles as well. Now, at the very bottom, you know, this is showing a full keyboard kind of, but we’re on a 68 uh layout, but you can go through under multimedia, you know, special function, lighting, macro, mouse, and you know, just remap whatever you need to if uh that’s important to you. But let’s go into performance. Now you see here you can actually select keys individually or you can just select everything at all or just do like an inverse selection. So you have a bunch of things there. Now real important before we get into it I want to look at recalibrate.
You may see a message at the top here that says keys are not calibrated or something to that effect and you need to recalibrate. So to do that you would go into the performance tab, hit recalibrate and right now everything’s recalibrated. That’s why it’s showing in green. But
Sound
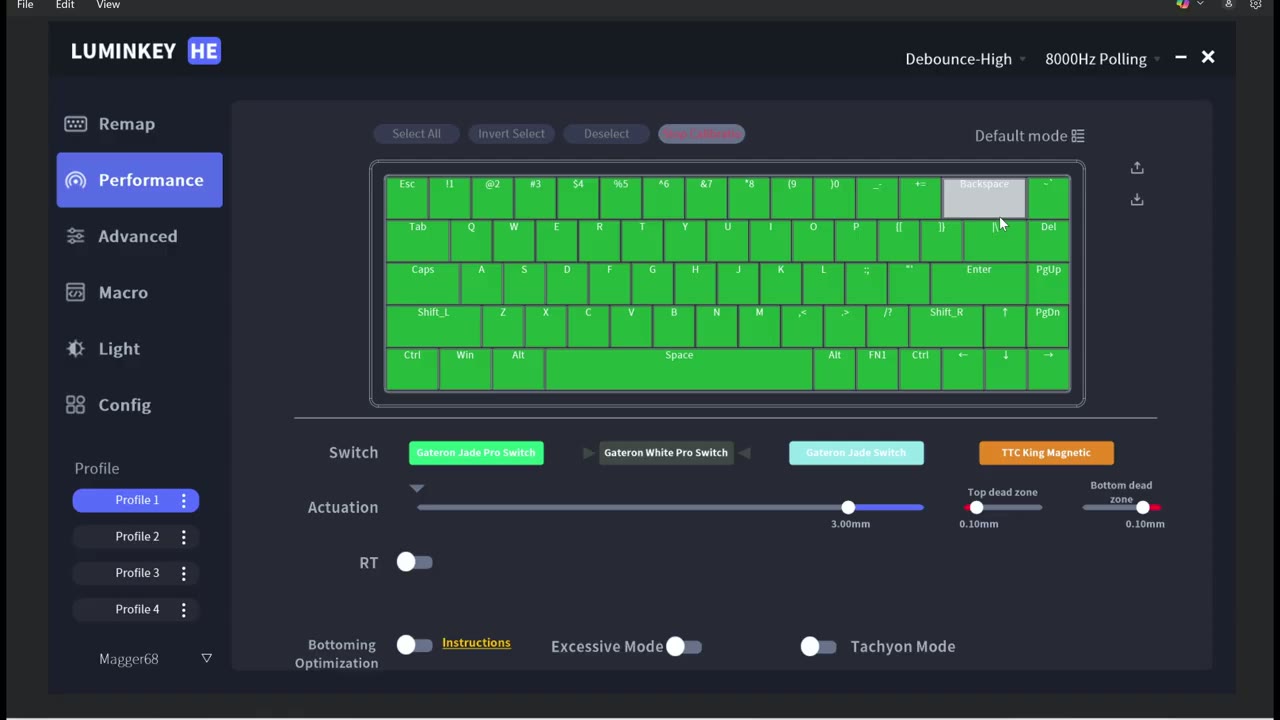
for example say backspace wasn’t. You may see it looking like this or you know it may be yellow. Just go ahead and press it until it’s green. Hit stop calibration and that should take care of the calibration. But let’s move on. So under performance um say I wanted to do the uh A key right here. I would hit three and I could see the actuation is set to 3 mm right now. But I could lower that to as low as 0.1 of a millimeter. Now I do have notepad up here and for example if I press A very lightly you can see that’s already actuating. I’m nowhere close to bottoming out this key. And then if I just crank the actuation um up to 3.4 mm. Then I do have to press you can see my finger has to go all the way down now to actuate that key.
Sometimes when you’re um a bit excited you may press down by mistake. So, you may want to increase the actuation or increase um the top and bottom dead zones. You have all of those options. And of course, we do have options for rapid trigger and then um bottoming optimizations. You could read the instructions if you want for that. You have this excessive mode. Now, it says this is not covered under warranty. Um and that’s if you want to go to values even smaller than 0.1. Uh probably not something needed. And you also have this option for tachon mode and also separate press and release sensitivity. Full stroke quick trigger. You can see there’s really a ton of options on here. Um it doesn’t matter if you unplug the keyboard, you know, turn your computer off, it is retained.
Let’s take a look at DKS first. So if you tap on that, it shows you can have up to four functions with a single key. So in FPS games, I’ll generally use control to jump. So, I’ll start with control, hit continue, and you could see it has two down arrows and two up arrows. So, these are your downward presses and then your release uh actuation point. So, I’ll just clear all of that. Now, I can say from 1 to 3 uh millm of actuation. I want this to perform how it normally does, which is for me to jump. But then, when I release, I want to actually crouch, just as an example. So I’ll say from 1 to three I want to crouch and then once I let go again I’ll jump again for example. Let’s just say so I don’t really need the fourth action.
I I usually don’t get that complicated but you can see so far this is the progression. So if I lightly press on control that would be me jumping. If I press lower that’s me crouching and then once I let go I’ll jump again. Right? Versus traditionally, say you had two keys, uh, this one key binded. Once you let go, you wouldn’t really do anything, right? But once I let go here, the last one is going to be me jumping again. So, you know, I’m jumping. Maybe someone’s shooting at me. I’m just going to immediately crouch and then I’ll jump back up and shoot them. So, that’s how that would work. Now, let’s go under empty. So, a single key will achieve two functions. Hold it for one, click it for another.
So say I’m playing a game and um I’ll just click V for example and say V is my inventory sampling an RPG or something. So when I click I want um click to be V and I want hold to be uh let’s say M M for maybe menu for example. And then when I test that binding I could see it here. So a um hold will be M which is going to pull up the menu. But if I just press it once, it’s just going to pull up my inventory, right? So, you have some uh versatility there with having the key. And what that saves you is, you know, a lot of time you’re no longer stretching your finger over with just a quick press or a hold. You’re accessing two different functions. Now, if we go under TGL, so it says click the button to switch on or off continuous or, you know, uh kind of like a rapid type of trigger deal.
So, let’s say we pick N for this one. Right. Drag and click end there. Click continue. So now I’ll just say whenever I press N, I want it to continuously trigger. So you’re going to see if I press N, it’s just showing N, it’s actually spamming N. Let me just prove it to you. So I’ll press it again to stop. You could see it went away. Let’s open up Notepad. I’ll hit N. And you could see it’s just spamming N continuously. Hit it again to stop. So depending on some games where you need to have, you know, like rapid inputs repeatedly, like quicktime events, you could just do something like that. Let’s take a look at RF. So it says, “Select two keys and press the button further away in the process of triggering.
When both keys are pressed completely, both keys will be triggered.” So let’s just say for key one, we’ll pick R. Key 2 T. Hit continue. And then the actuation point, I’ll just leave it on this default 1.5. So it says it monitors uh the two selected keys and activates whichever key is pressed down further or kind of hardest. Let’s just say. So if I hit save, you could see if I press R and then I press T, T is first in the order. So T takes priority. Conversely, if I press T first, press R down all the way, R takes party. So, for example, say you’re using WD, uh, you know, you’re moving, you keep moving, and then you want to just crouch automatically because someone’s going to shoot at you. While you’re pressing W, you could just hit uh C, and C is going to take priority.
So, that’s how you would use that feature. Hope that makes sense. Lastly, let’s look at SOCD. So, refers how to handle opposite direction while triggering input. So this is more for navigation like so it’s showing press the if you press the right and left buttons at the same time it’ll determine which input is triggered. So for example let’s just say key one is uh forward key two backwards. Hit continue. And I’ll leave the actuation point where it is. So you can set this to last input priority. Um you can just make one key take party. So either the up key or down key or leave it to neutral which I mean I guess that would kind of be like not even having having it but let’s do last input party. So say for example I’m playing an FPS game and I’m just moving forward all the time.
I’m just walking forward running forward and then I see something suspicious and then I just press back right away. Um back will take priority over keeping moving forward. So that’s what that means in terms of last input priority. And of course you could just say it um you know absolute priority uh either the up key or down key and that’s how you would use that feature. Of course you can also record macros and once you record the macro you can just go into the remap here you know pick a certain key jump into macro and assign whichever macro you recorded from 1 to 10. And then we have the light options here.
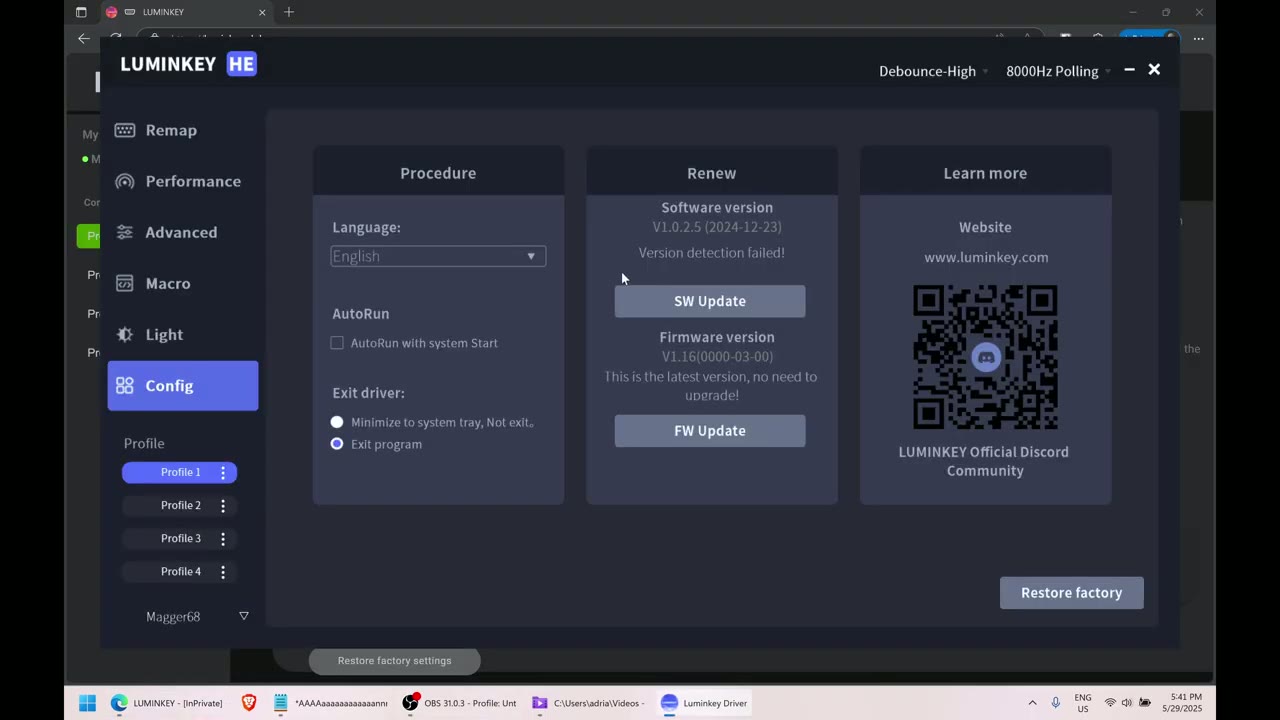
So you could see kind of in real time like say I went into static you know it’s a static color and then I could just pick you know green say yellow blue and you could see that all happening in real time. You can also change the brightness of that and you know set up any type of um custom settings. Some of these do have like speeds and directions as well. And then lastly you can go into config. Um, these are the available languages and you can have it, you know, automatically run the driver software when you start, but like I showed, it does retain the settings. It’s not like really necessary unless you’re constantly changing things. And I am on the newest firmware version. Now, one thing to note is I wasn’t able to really update it via the driver software to 1.16.
I did have to use um like the website. So, uh when you go here, you go to connected device. So if you run into the same problem, just jump on the site, go down, and then update it here. So yeah, it looks like we have, you know, kind of two options to to manage that. But yeah, that’s uh about it for the
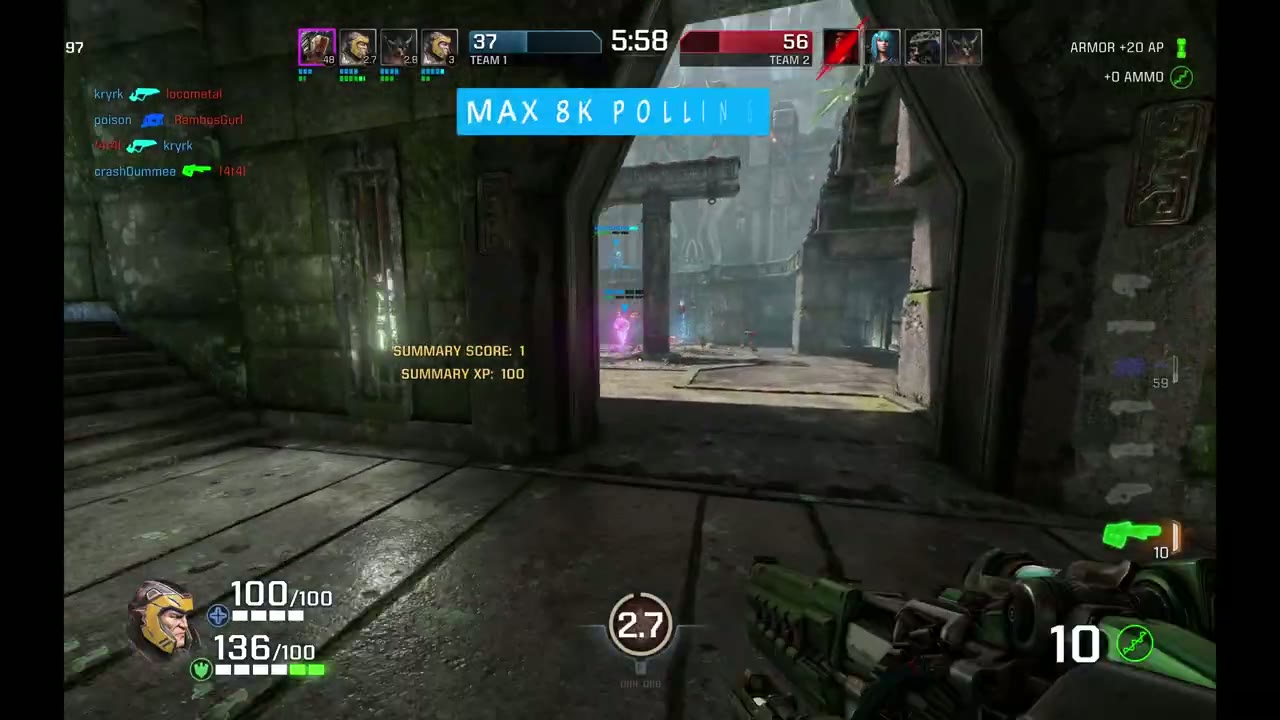
Gameplay Demo
driver software. All right, let’s test some of those key settings in game. So remember with control, this is what I used to jump. Now, if I just go ahead and I’m jumping, but if I hold it down, notice that I’m crouching and when I let go, I’m gonna jump again. So that was that three-stage DKS that I use on there. And now let’s do V. So remember if I just go ahead and hold it down, it’s actually going to pull up the scoreboard. But if I just tap it, you can see it’s pulling up chat on the screen there. So that’s a two function key. Now the other thing is uh if I tap on F, you can see it’s just automatically firing all the way. Tap on it to disable that. So this is what you can use for, you know, kind of rapid trigger or quicktime events.
And it’s that simple to just, you know, kind of set that up in the software. Since this is wired only, you’ll get latency rates as low as 0.125 milliseconds of latency along with up to
Typing
8K polling rates. In terms of the typing experience, it’s a pretty good experience overall. Now, everything is done technically correct on here. So, the keyboard is nice and planted, and you can see as I press, and I’m pressing really hard. Take a look at my um fingernails here. I’m pressing the blood is kind of draining away and there’s no flex. There’s no give. The keyboard is not shifting in any way. It’s a very planted and stable typing experience. So, when I was typing on this, you know, I didn’t have to press down as much to get the keys to actuate. And if you’re someone who actually enjoys typing quite a bit, you may feel, you know, the typing experience is a little bit lacking.
But I’m assuming a lot of you guys again are getting this keyboard or you’re looking at this keyboard mostly for the gaming performance with the magnetic switches. So maybe the typing experience isn’t at the top of your list, but something to be mindful of. The GaDon white magnetic pro switches, which I have in this performance version, has a gram force of 30 and the professional version has 36 g
Sound Profile
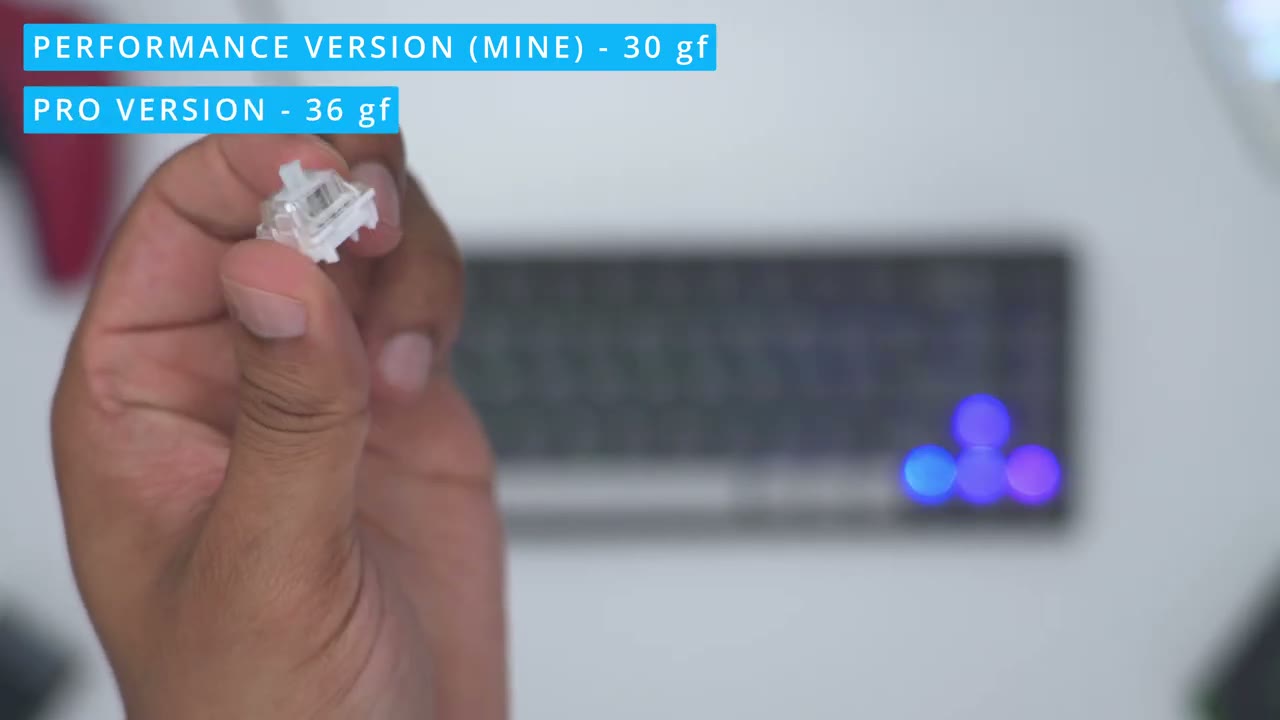
force. So, the sound profile is really going to come down to personal preference. I’m coming from a docky sounding keyboard and it’s just what I’ve been in the mood for recently. I’m really liking that type of profile. So, when I was typing with the Mag 68, it did sound, you know, a little bit more on the harsh end, at least in my ears, just because I’m going through that kind of phase. But, you know, for you, it’s probably not going to be an issue. And if you’re gaming, you know, you’re already, you know, clicking with your mouse, you may want to hear those like key presses actually registering or clicking down. So, it’s probably not that big of a deal for you. But, let me know what you guys think of
RGB
the sound down below. So, we have north facing RGB, and I’ve cut the lights and you can see what the RGB looks like. So, there’s no shine through key caps except for these arrow keys, and then the escape key here. And this is as bright as it gets. So, function G just increases the brightness. and then function F lowers the brightness. And of course, you can turn it off completely if you like. Now, if you don’t want uh any type of backlighting, you could just hit function T very quickly to turn it off or on. Function Y just cycles through various RGB effects like you can see right here. And function U is what you would press to switch between different type of colors. Function 8 just slows down the RGB effect. And function J increases the speed.
And important to note, the keyboard actually has dual chips to ensure that the RGB doesn’t affect your gaming performance
Recommended?
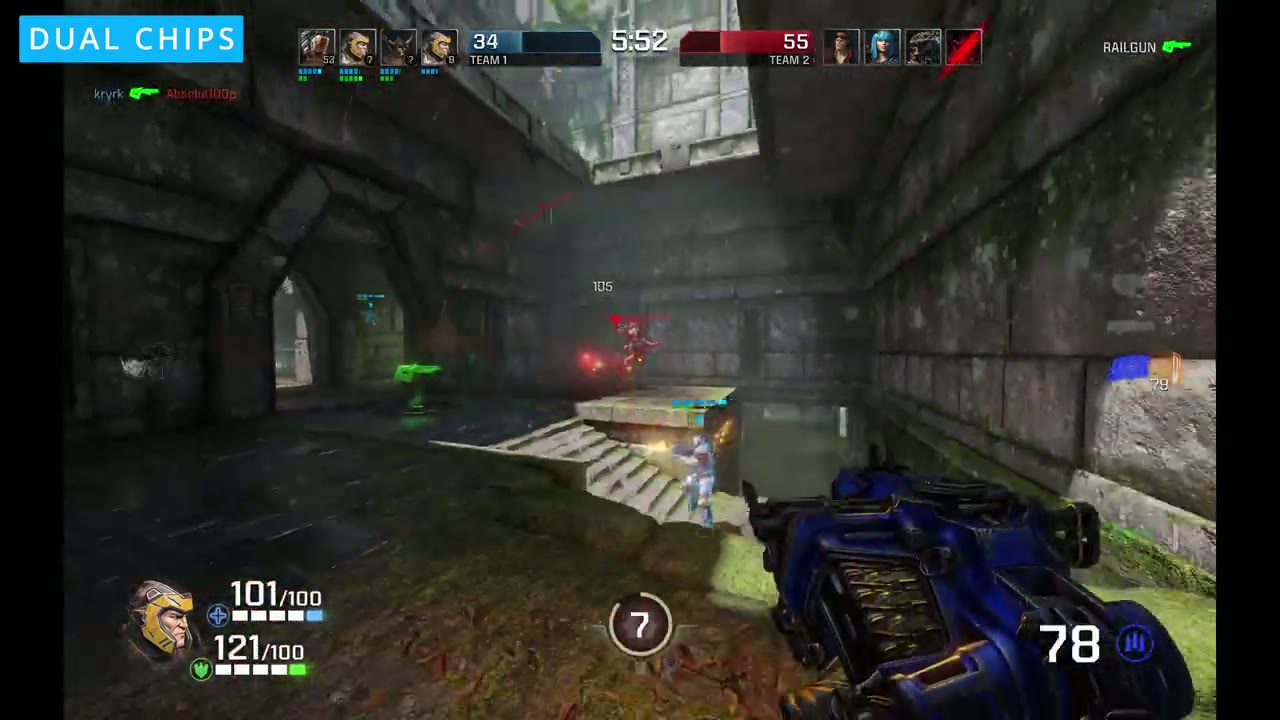
in any way. So, the Magger 68H magnetic gaming keyboard is one of the better magnetic keyboards that I’ve used to date. And the software experience is pretty fullfeatured as well. So, you can just quickly dial in your keybinds, rapid trigger settings, custom actuation points, store it all on board on a keyboard, and it’s ready to go when you are. If gaming is your first priority and you want as much of a gaming edge as you can get, this is the keyboard and it really delivers. I’ll leave links down below if you’re interested in picking up the Mager 68H keyboard either in the performance version like I have here or the professional version. And if the Mag 68H keyboard is a little bit out of your budget, check out this video next for a more budget friendly option.
If you found this video helpful, please consider liking it, subscribing. I review a bunch of different type of keyboards and tech in general.
Buy Luminkey Magger 68 HE Gaming Keyboard
Please note that some of the links in my video descriptions are affiliate links where I earn from qualifying purchases. As an Amazon Associate I earn from qualifying purchases.