Buy Samsung 980 PRO SSD 1TB – M.2 NVMe Drive
Buy 122 Piece Computer Screwdriver Kit
Buy Metro DataVac Blower & Duster
Please note that some of the links in my video descriptions are affiliate links where I earn from qualifying purchases. As an Amazon Associate I earn from qualifying purchases.
Intro
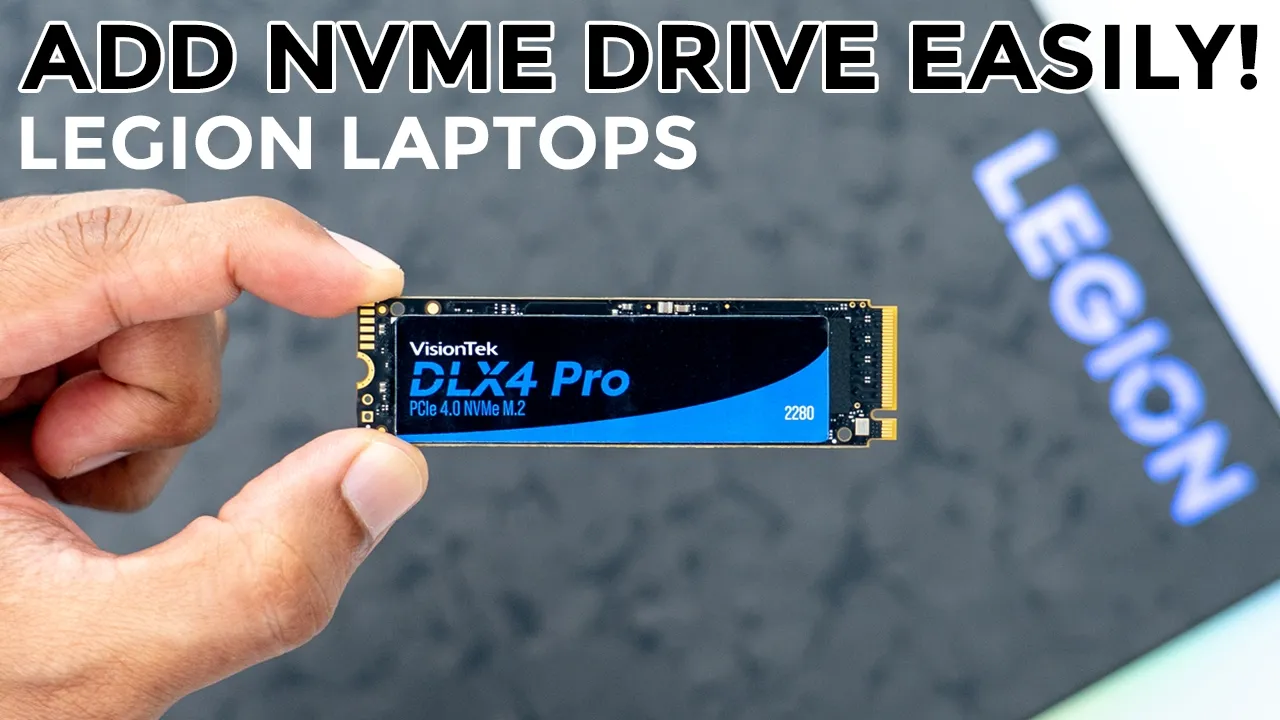
hey guys it’s Adrian and today I’m going to walk you through how to add additional nvme storage to your Lenovo Legion 9i laptop or basically any Legion laptop that has a similar configuration so let’s get into it to remove the back
Remove Laptop Cover

cover we need to remove eight screws so there’s four at the top two on the sides here and two on the other side and these are fairly small screws so you will need you know probably um a type of tool kit like this for smaller devices phones and things like that I’ll link it down below if you don’t have access to one of those so I’ll get started on removing the eight screws all eight screws are removed so to get the back cover out it’s going to be much easier if you have some kind of a wedge tool like this that you could kind of you know slide in and pry it up now worst case maybe you could use a credit card not sure but if you get a toolkit you know it does have this type of tapered end to make it easier if we take a look at the side of the laptop you could see where this ventilation area is there’s a little bit of you know a very small or minor Gap that runs along here and this is where I’m going to insert this wedge tool to kind of get my first way in okay the rear cover is off and I did have a little bit of resistance at the front so what’s going to be better actually is if you start at the side with the ventilation that I mentioned work your way to the back and down to the other side and just for reference you know this is the back laptop where all of the ports are so once you loosen it basically from this area here it’s easy to just pry the cover off from the bottom here but don’t try to attack it from the Bottom by the way this is a great time to clear out your fans you can see I have a bit of dust going on there so I’m going to do that before we continue I’m using this datavac electric duster now it’s a little bit expensive but it’s still cheaper in the long run than buying compressed air I’ll link it down below if you want to check it out we’re now
Install NVMe Drive
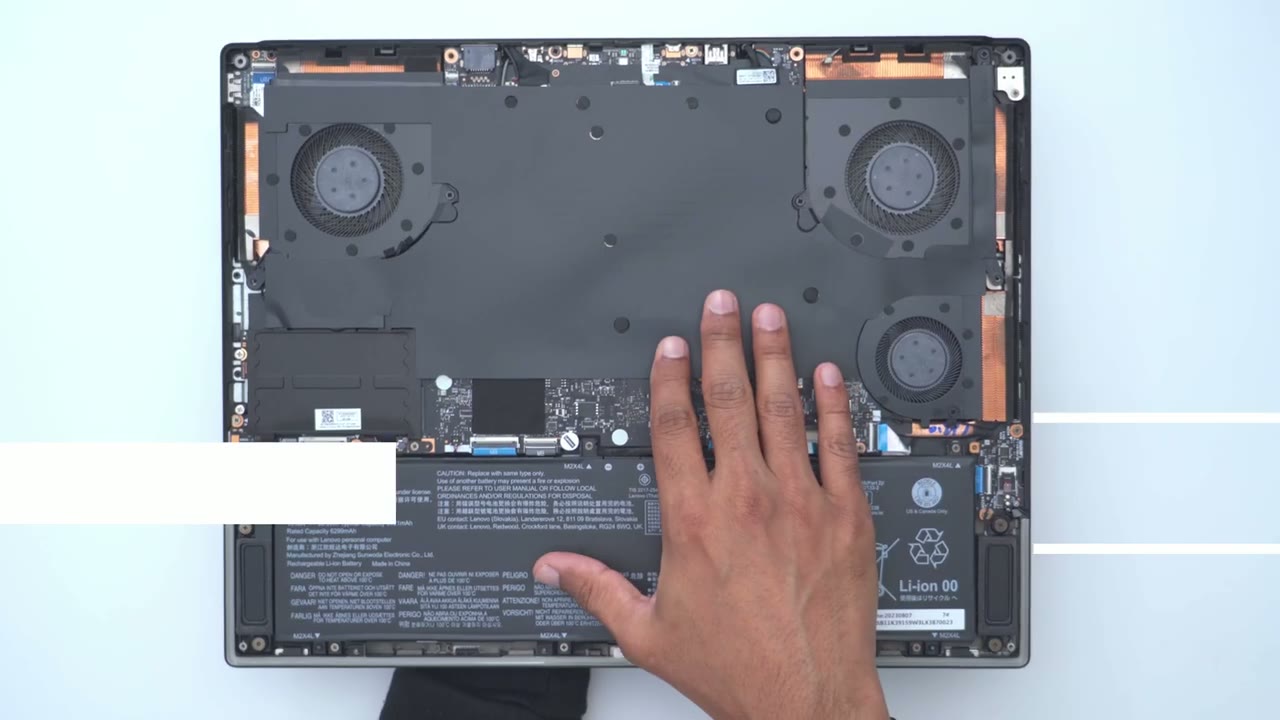
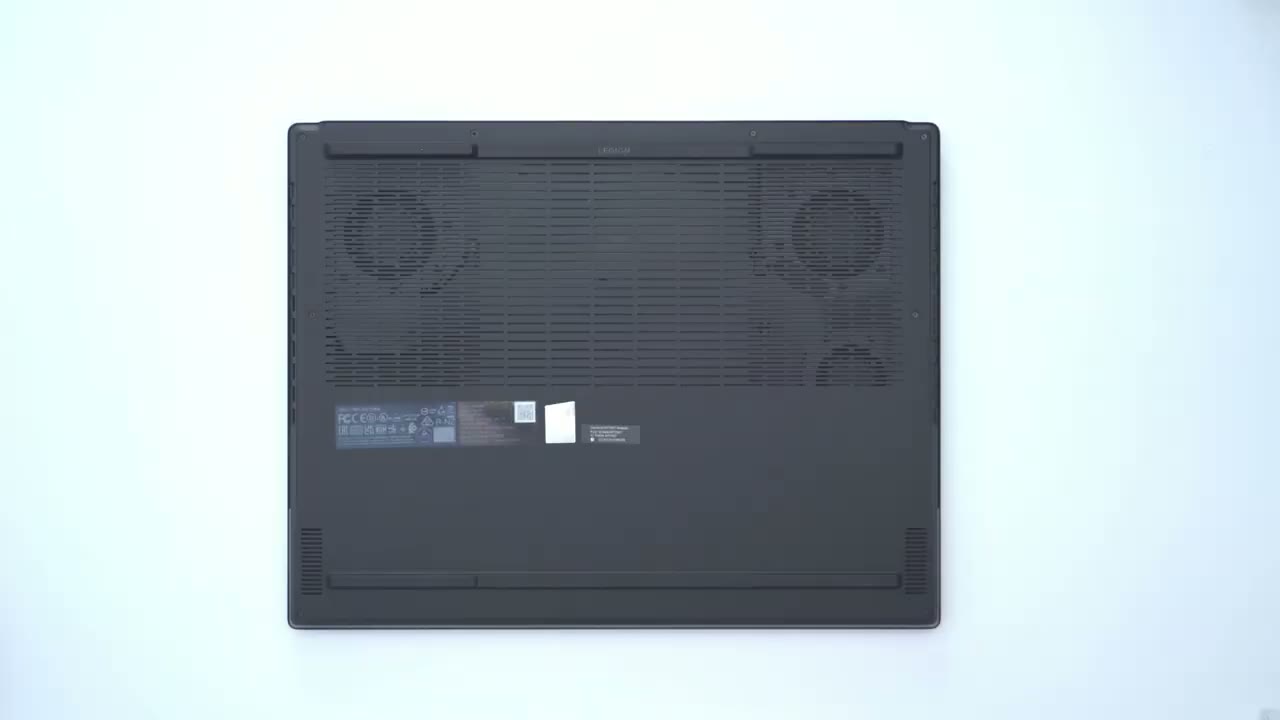
ready to add the secondary drive to the laptop so there’s this big metal plate here and there’s four screws to remove one here one there and then if you lift lift up this kind of protective sleeve here there’s another one right there and then under here may be a little bit hard to see but there’s another screw hiding right under here as well you can kind of see it there now this is for the Lenovo Legion 9i if you have another model and it doesn’t look exactly the same one other giveaway is that you could see the current nvme drive just sticking out there and then if I take a look at the drive we’re putting in this VIs Tech Drive you know it kind of matches exactly so you can figure it out that way as well so I’m going to remove those four screws and go very gently and carefully during this step you don’t want the screwdriver to slip you know and scratch or damage anything while you’re doing this so four screws like I mentioned once all of the screws are removed very gently lift up this metal plate and then just kind of fold it and leave it here you can see it’s attached with adhesive so you don’t want to just yank it right out looking at a side view so this is the original nvme drive and you can see it seats into this mounting bracket here so we’re just going to slide the drive in you know kind of gently it’ll only go in one way so don’t force anything before we add the drive we’re going to remove this retention screw and the way to know which screw to remove is it’s exactly in line with the other one for the nvme drive the original one so go ahead and start removing this and that’s out of the way with the retention screw removed we can now seat our dri so notice this little cutout on the connector end and the half circle cutout this only goes in one way so you’re going to place the drive sticker side up to match the original so we’re just going to very gently slide this in and it can’t go any further and if I press down notice that it interface or lines up nicely with that uh retention screw hole so go ahead and put back the retention screw that you previously removed and don’t overtighten it just once you feel resistance that’s good enough so you can see both drives are now installed now that the metal plate is back in we can add the rear cover so the easiest thing to do is to start at the bottom so where the lid of the laptop is not the rear where the vents are so you’re just going to kind of lift it up like this angle it so it’s nice and flush here and then you’re going to use the rubber feet here since they’re elevated and you’re going to pull towards you so I’m going to put my fingers here pull till I hear that click and I’ll do the same on this side so I’m going to pull towards me you may not hear a click on that side but it’s definitely in and then you could start pressing down on the sides and rear of the laptop and once you hear all of the retention Clips click into place give it a once over make sure everything is nice and flush and you can see I have a bit of a gap here so I will have to press that in a little bit more just like so and just make sure it’s flush all the way around and once you to determine that we could read those eight screws the rear
Initialize Drive In Windows
cover is back on we’re going to boot up the laptop jump into the BIOS to make sure that the motherboard recognizes the new drive then we’ll go into windows and initialize everything now let’s jump into the BIOS to make sure the laptop recognizes the drive just plug your laptop in so it’s fully charged so I’ll just press the power button and keep spamming the F1 and F2 keys I can’t remember exactly which one um is to go to the BIOS but we could see that we’re in the Bios now and what we’re going to do is once you’re in there go into more settings and we could see here nvme SSD the first one is a Samsung and we can see the second one is that Vision Tech Pro that I install so I know that the computer recognizes the drive so we should have zero issues now um if we go and initialize this in Windows so now we’ll just boot into windows now that we’re in Windows if we go right into file explorer so I’ll jump into that right now and I’ll go to this PC and it only shows the original drive and that’s because we haven’t initialize the drive we just added so to do that go into your start menu and start typing disk and then manager and you’ll see this option here create and format hard disk partitions this is what we want so we’ll click on that and it says You must initialize a dis before it can access it and this is exactly what we want now just leave it on GPT um instead of Master boot record so we’ll click okay and now if we expand this I can see that dis down here so it’s dis one uh 931 GB unallocated so we still can’t use it at this point we now have to allocate it so click on the driver and be very careful do not touch uh your existing driver you’re going to wipe everything see it says Windows um leave that alone so the one that says unallocated right click on it go to new simple volume click next and we want the maximum size here unless you want it to split it but I just want it all in one drive I’ll assign it to drive D and I’ll keep as NTFS and I’ll keep everything basically as the default and I can call this drive um uh Vision Tech and then I’ll go ahead and hit next finish and we’ll let Windows do its thing and now the drive is ready so you can see we now have our C drive and D drive and we have full access you can install you know games or other programs or you know video files which is what I’m going to be using it for if you found this video helpful please consider liking and subscribing truly help me out and don’t forget to check out some of my other tech reviews our review keyboards monitors desktops laptops Etc I’m sure you’ll find something you like and I hope to see you in the next one soon
Buy Samsung 980 PRO SSD 1TB – M.2 NVMe Drive
Buy 122 Piece Computer Screwdriver Kit
Buy Metro DataVac Blower & Duster
Please note that some of the links in my video descriptions are affiliate links where I earn from qualifying purchases. As an Amazon Associate I earn from qualifying purchases.