Buy aosu Solar Wall Light Cam Pro
Buy 128GB microSD Card on Amazon
Please note that some of the links in my video descriptions are affiliate links where I earn from qualifying purchases. As an Amazon Associate I earn from qualifying purchases.
Intro
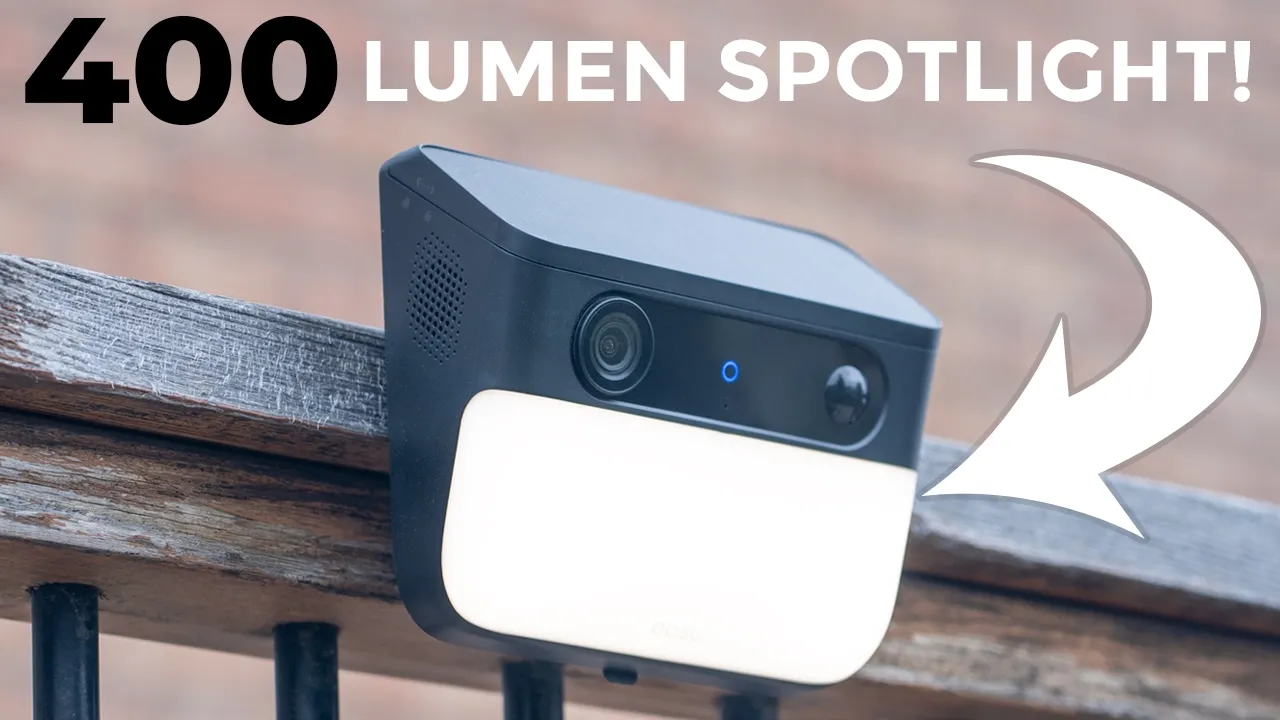
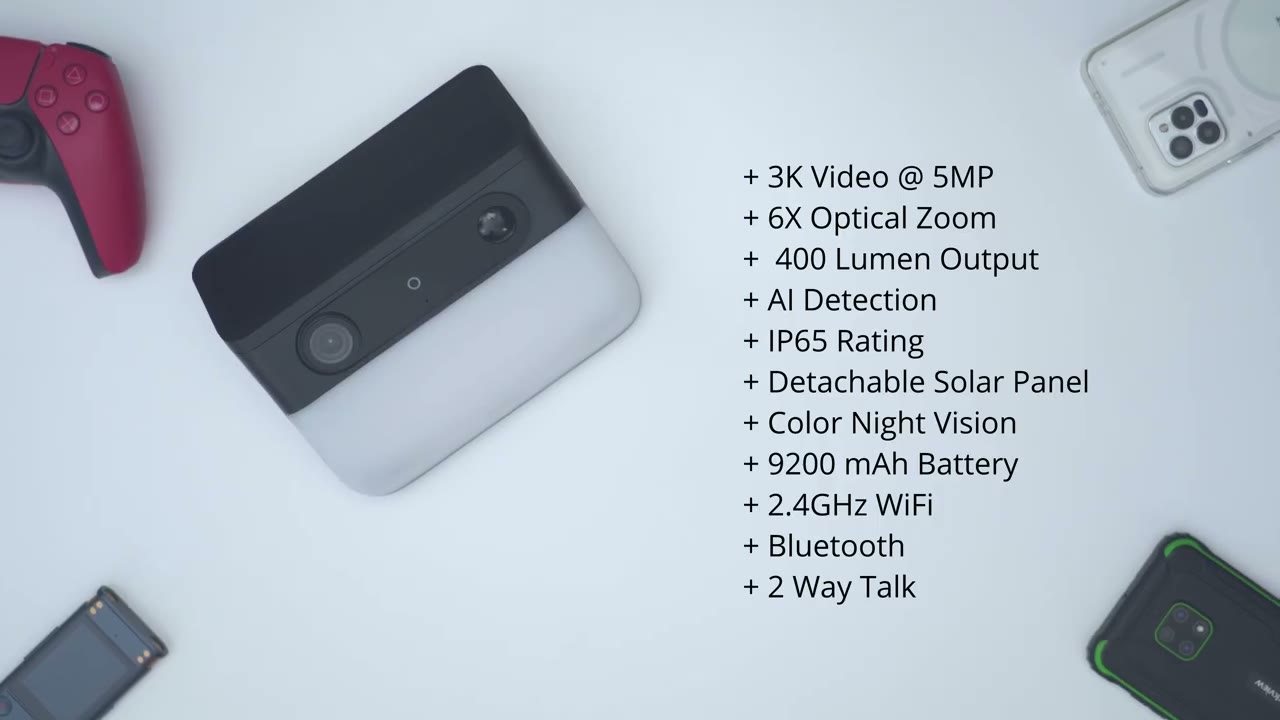
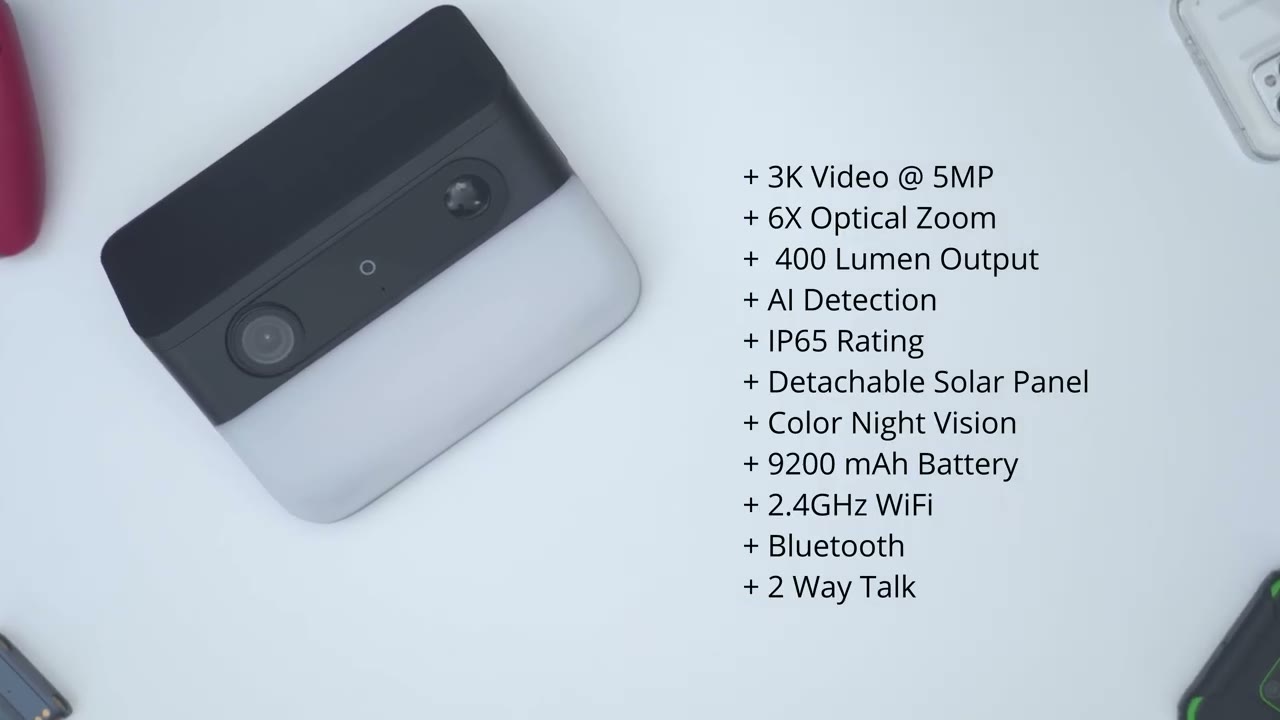
Hey, it’s Adrian. And if your current security camera is lacking light output, you’re going to want to check out the AU Solar Wall Light Cam Pro because this has an impressive 400 lm spotlight to act as a visual deterrent or to illuminate parts of your property. It also has sharp 3K video, color night vision, and IP65 rating. A large solar panel that’s actually detachable, so you can install this optimally. something that a lot of other wall lights don’t have. It also has impressive year-long battery life, up to 128 GB, micro SD card support, so you don’t need to pay any monthly fees, and AI motion detection. So, let’s take a closer look at how well it performs and if this is a good fit for your home. And a big thanks to AVU for sending this out for review.
Package
In the box, we have the AU Solar Wlight Cam Pro along with the mounting bracket, a USB type A to type-C charging cable. There’s also an optional mount for the solar panel, which I’ll explain later, and then an extension cable for that as well. There’s mounting screws, a positioning guide, manual, and security
Design
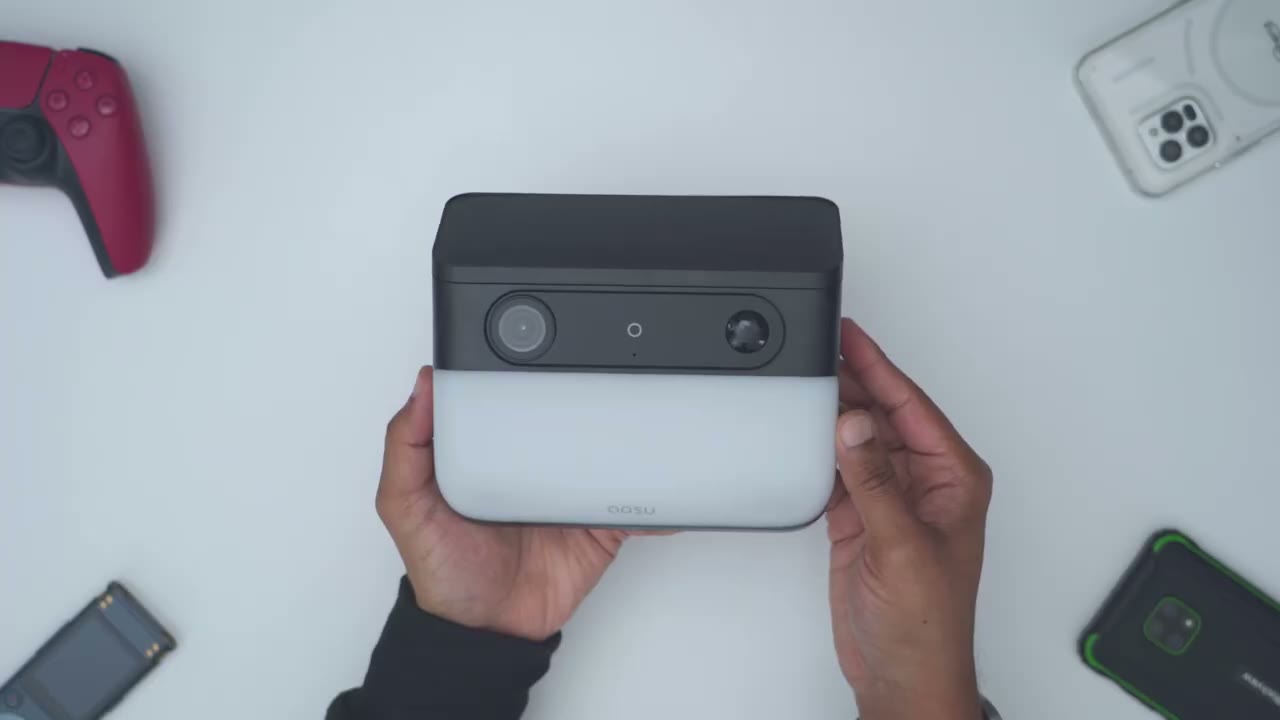
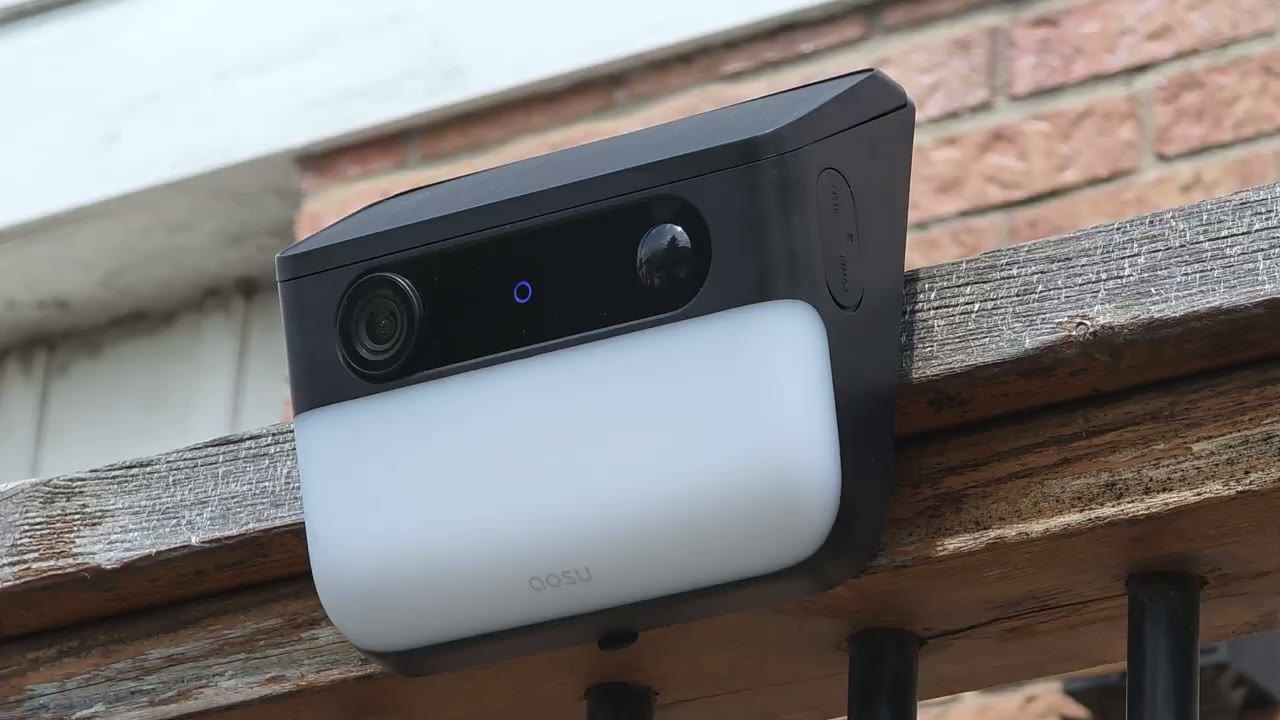
sticker. And this is what the AU Solar Wlight Cam Pro looks like. Now, you can see if I just put this in my hand, it kind of fills my entire hand. So, it’s a fairly sizable wall light, and it comes in at around 1.3 lb or 0.6 kg. On the front, we have that 3K lens along with an LED indicator light, microphone, various sensors, and then we have that huge spotlight panel right here with the AU logo. And this is capable of outputting up to 400 lumens. So, this will nicely illuminate anywhere you place it. Taking a look at the side, we have a speaker grill. And then, if I go on the other side, we do have this weather sealed cover, and this gives us access to the power reset and micro SD card slot. Now, this does have an IP65 rating because everything’s pretty much uh weather sealed on here.
And then the micro SD card slot, and this accepts up to a 128 GB micro SD card. And on the top, we have this very large solar panel. And it’s the largest solar panel I’ve seen on a walllight so far. But there’s a second reason why this is so unique. And if we take a side view here, you could see that from the solar panel, there’s an extension cable right here. here. And then if I just unplug it from the back of the camera body, this is a USB type-C connector. And we do have this like weather uh proofing strip here just to keep that IP65 rating. And then it plugs into the camera body. Now, why is that important? Well, you know, normally you could just mount the wall light just like this up against a wall. This is how a lot of wall lights are mounted.
But what if you know there’s tree or um you know, kind of a shade or an roof overhang? Well, you may not get the optimal um type of charging on here. But what you can actually do is you could remove the USB type-C connector in here. And then you could use this extension cable that’s included. And you can see it’s going to interface directly with this one here, which is also weather sealed. And then you can actually detach the solar panel by removing this one retention screw. And you could place this solar panel anywhere away from the wall light to make sure it has optimal charging. To install the solar wite cam pro, what you’re going to do is you’re going to take the rear bracket and you can see the up arrow here. You’re just going to use these supplied screws to drill this into a wall.
And then once this is permanently mounted in there, you’re just going to go ahead position the camera body on the mount and then just slide up just like so until you hear that satisfying click. And if you ever need to remove the camera from the mount, you could just press down on this kind of retention clip here and slide it right out. Here’s a quick look at the
Specs
specs. Feel free to pause and review or jump ahead to the next section. To add
aosu App Setup
the Wlight to the Au app, it’s really easy. You’re just going to press and hold the power button until you see a flashing blue light on the wall. Open the AU app. Tap on the plus icon. Let it scan and find the wall light. Click next. Click your Wi-Fi name. Enter your Wi-Fi password. Click next. And the camera will be automatically added to the AU app. Let’s take a look at the AU
aosu App Settings
app settings. So, right away, I could see the Solar Wlight Cam Pro. And then I also have my P1 Max cameras. And these are amazing cameras in terms of AI functionality. I’ll link up above. You could check the full review. But looking at these solar walley cam pro, so it’s at 100% battery life and I have full signal strength. So the solar panel on here has been very efficient at keeping this topped up. Now from this quick tile, we could go ahead snooze it from 30 minutes to 12 hours. I can also jump into events and it’s just going to pull up events that are stored. You could see locally, even though I do have, you know, a uh cloud plan trial, it’s just going to pull up whatever is local. I can also go ahead and turn on the light.
So the spotlight on here can be turned on manually if you want. And then we can also jump into the full settings. And note that it shows it is actively charging. So anytime it drops below 100, it’s just going to charge back up. So yeah, the solar charging has been working fantastic. Let’s jump into live view. And you can see that pulls up very quickly. And let me crank the volume. And you can hear the microphone pick up out there. The microphone’s really good. You could hear the birds and all that. Now, from here, you could also turn the light on manually. Here, let me just tap that a bit harder. And this is if you know you’re kind of looking at live view, you see something suspicious, you can just activate the light if it’s not activated.
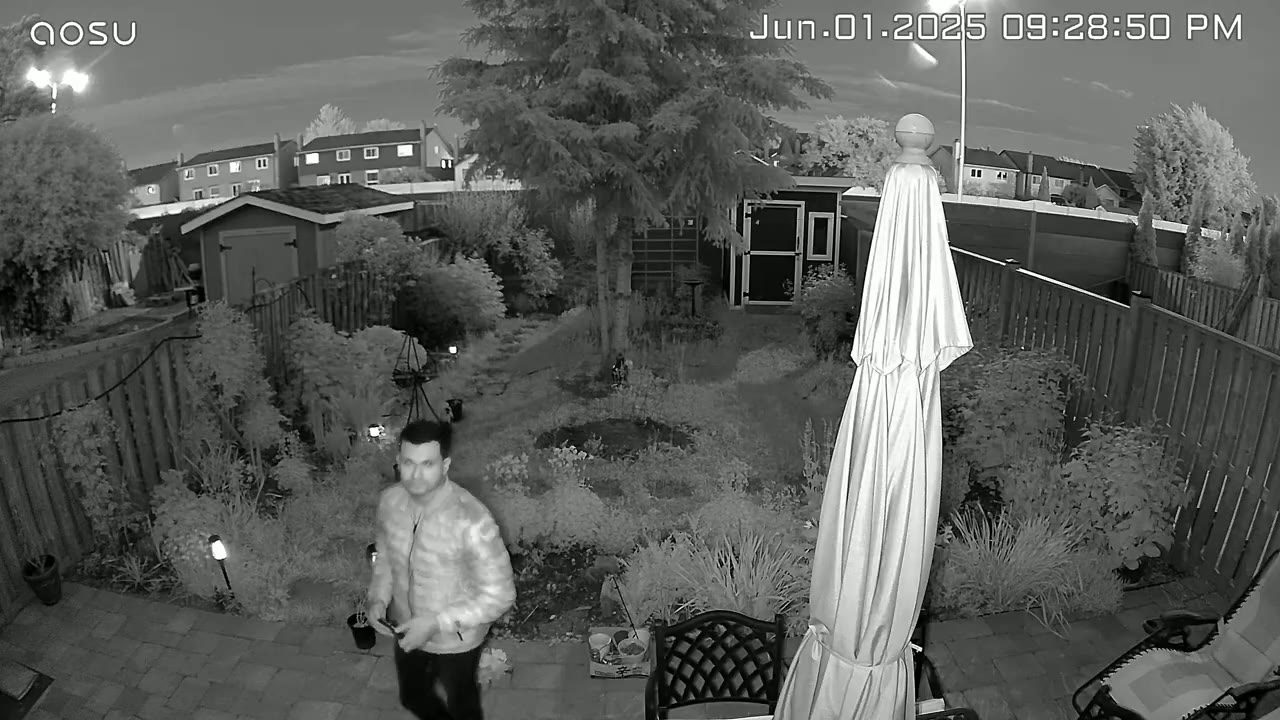
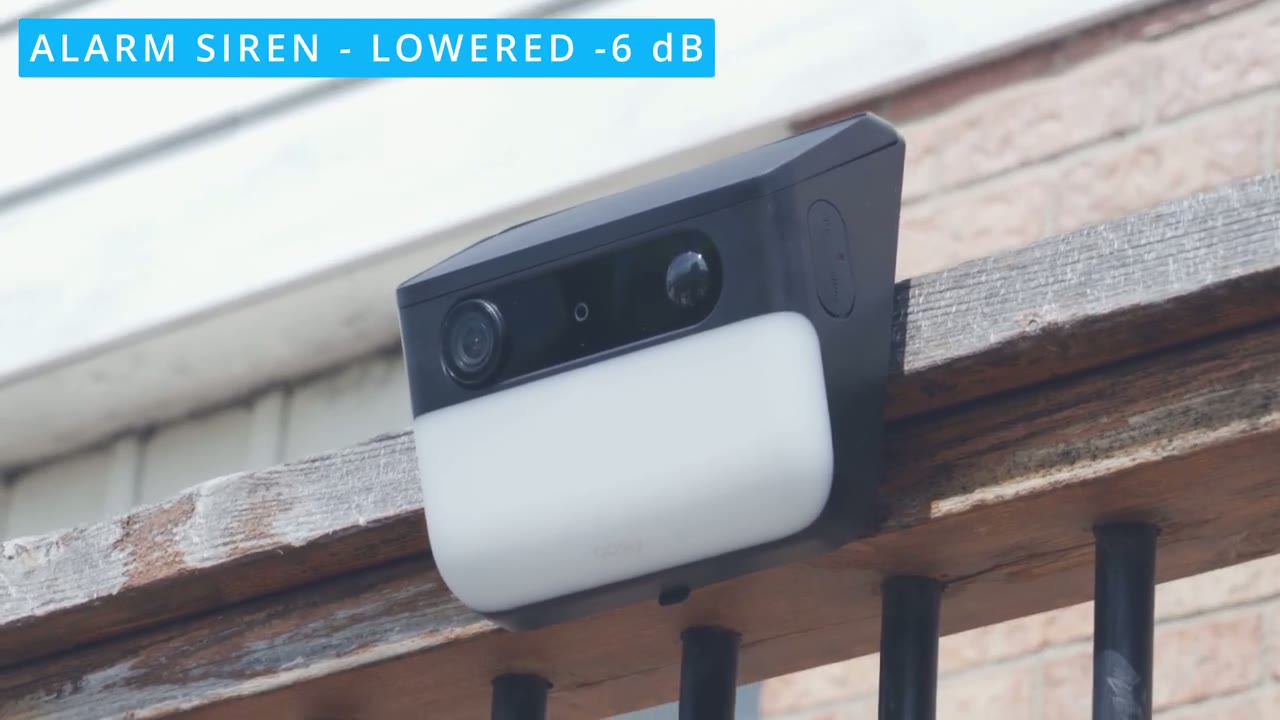
You can also change the tone for your voice to give you kind of a mail filter. You can enable two-way talk. You can also tap this icon here to um enable the alarm siren. I’ll demo that later. And we also have some quick voice alerts. I’ll demo those later as well when I talk about the speaker. And of course, you can also go ahead and switch it from kind of this UHD to standard definition, but obviously if you want the best quality, leave it on UHD. You can also take a manual recording and it’s just going to save it to your phone’s album. And then you can also take a snapshot. And of course, you can look at this in full screen and just take a look at how sharp that video is.
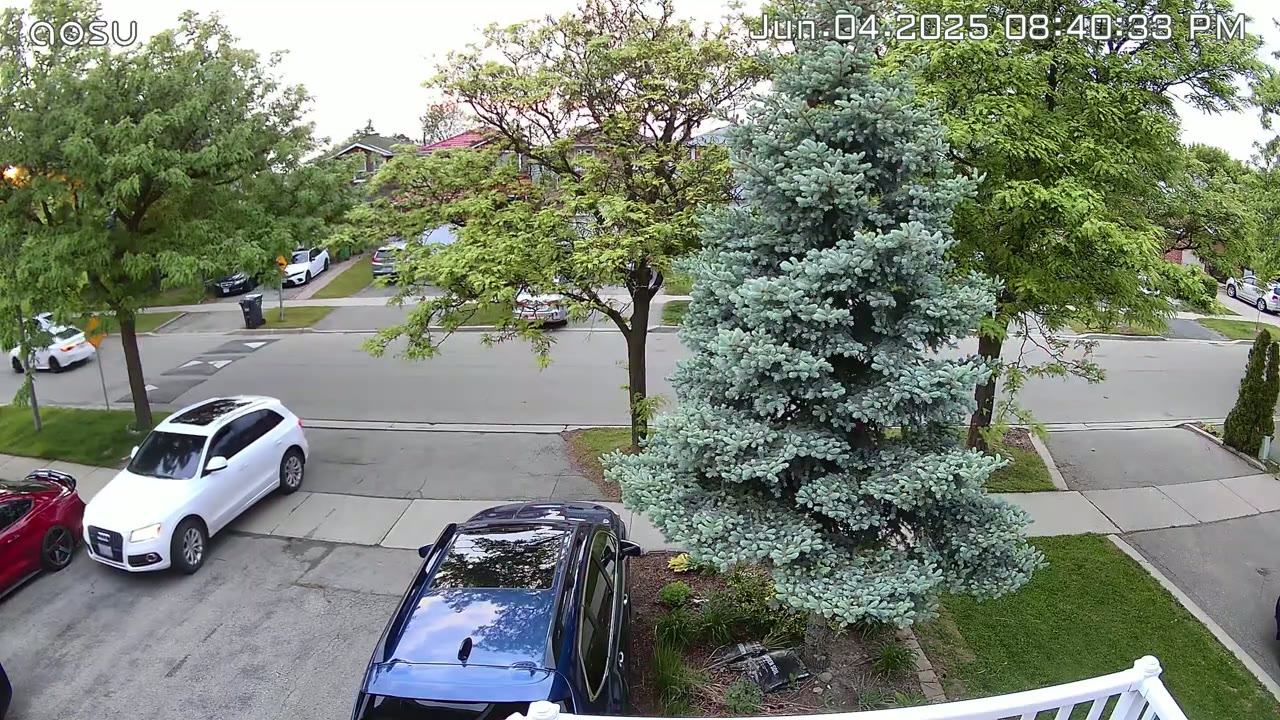
If I actually zoom in and punch and I could see, you know, this kind of little stool here, I can take a look at the various type of, you know, plants and flowers going on here. So, the quality is pretty good. Let’s jump into the full settings here. And you can give it a name. You can turn the camera on or off. You can share it with friends or family. And then under light settings, so you can see you can actually set the brightness adjustment. So I have it cranked to the max. But if you want to kind of balance battery life, um especially in winter uh seasons, you can just reduce that. And then you can set the manual lighting. So anytime you turn it on manually, it can stay on from 1 minute all the way up to 10 minutes.
And then you can also set it up to be uh controlled with Alexa and Google. Under AI surveillance, you’re going to want human detection enabled by default. There’s also an intrusion option here. So when that’s on, you can set a detection zone and anything that kind of occurs in the zone. Of course, you can, you know, kind of stretch it out as you see fit. It’s going to trigger that alarm siren. Now, you can also set this to come on all day, every day, or you can set custom times, you know, like for it to only come on, say, after 900 p.m. when you know you’re not going to be out there. Now, you also have this beta feature, um, intrusion prevention at yard wall. So, just to demo this, I’m not using it, but if you turn it on, and then we go under AI yard wall detection.
So, it’s actually using the AI functionality on here, and you can see if I tap here, it’s identified the yard wall right there. And of course, you could always add in and, you know, kind of draw in your own yard walls as well. There’s also a pet detection option. Again, this is another beta feature. Now, under detection settings, this is where you can enable or disable motion detection. You could set it to detect everything, but you may get some false positives or just to detect humans and animals or you could just say human only depending on your preference. And you can also set the system to adjust this intelligently.
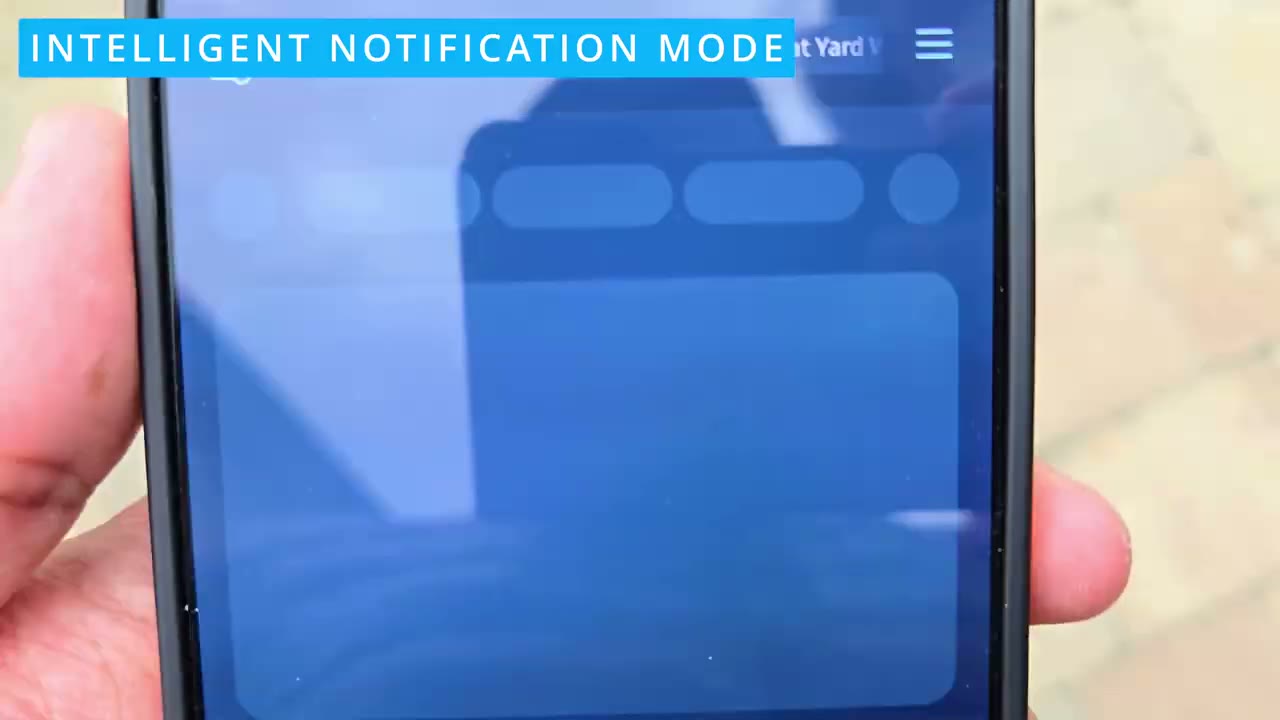
I find this actually works really good with AU’s cameras, but you can also say, “Hey, I only want motion to be detected when it’s very close or when it’s very uh far away under notification settings. So, you can enable app notifications all day, every day, and you have two options. So, one is immediate mode. This is going to give you the app alert the quickest because it’s not really breaking down or analyzing the scene. However, if you switch it to intelligent mode, it’s going to be sent a little bit later, not as fast, and it’s going to give you more of a breakdown. Hey, was the person staying? Were they just passing by? Or were they intruding on an area under night vision? So, you could set it to black and white night vision, color night vision, or you could turn the infrared light off.
So, since we do have a wall light, it’s probably better to leave it on color night vision, and I’ll demo some footage of that later. And then, if you want to cloud recording, again, there is local storage on the camera. You don’t need to get this unless you really want to. I generally don’t get that. Now, under video and audio, it’s set to 3K streaming, but you can also set it to smooth mode if your internet connection is not the greatest. You can set the speaker volume, and you can set whether to record sound or not. Under battery management, you could see it’s at 100%. Again, since I’ve installed this, it’s stayed at 100. The solar panel is fantastic.
Now, you can set it to power saving mode if you don’t have a lot of sun or it’s overcast or, you know, during winter months, and it’s only going to keep recording lengths of 20 seconds long. And um on the intelligent mode, which I have it, it’s going to have recording lengths as long as 60 seconds or one minute. Now, you can also set a scheduled sleep time if you know you don’t need the camera on, like say during the day when you’re at home. And then you can also have the status light on. I like having this on so people know the camera’s actually active and recording. And then we also have Alexa and Google uh integration. Now, if we go under about device, this is where we could take a look at the storage use. And you can see I’ve used just a measly 1.2 2 gigs.
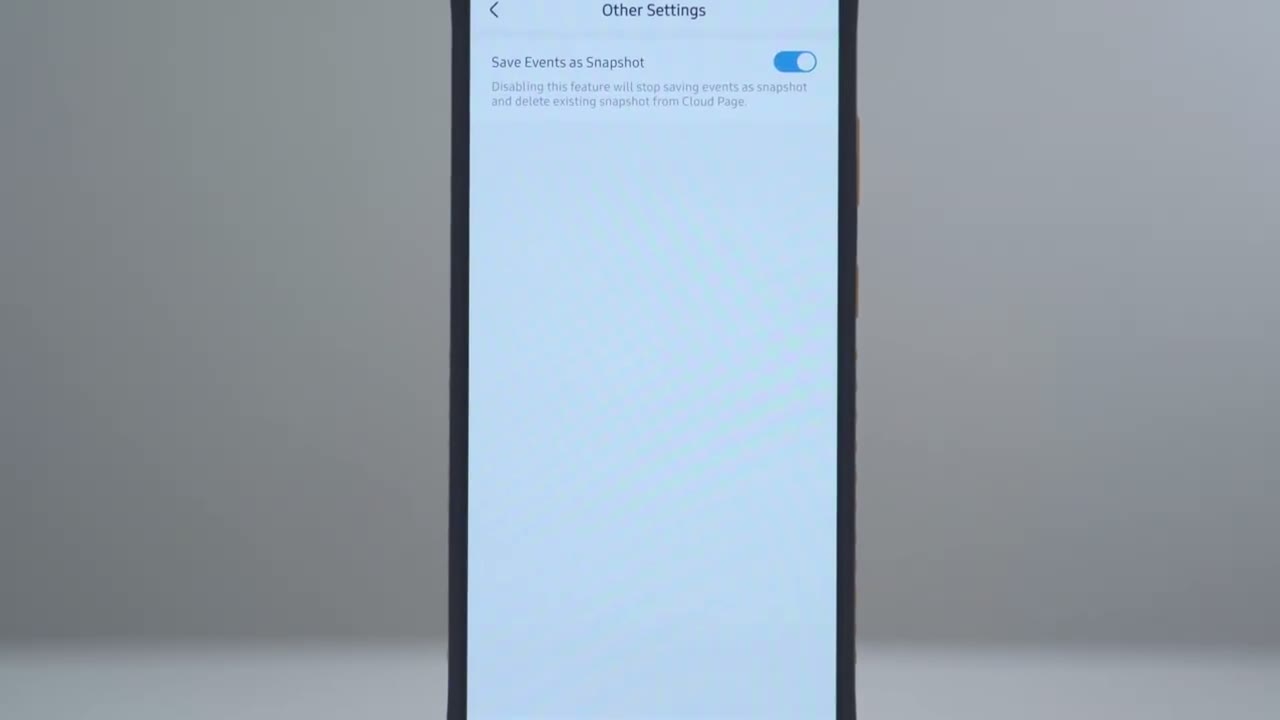
You can also go ahead and check for firmware updates. You can take a look at the quick start guide, reconnect the Wi-Fi, or you can go ahead and save events as snapshots.
Video Playback
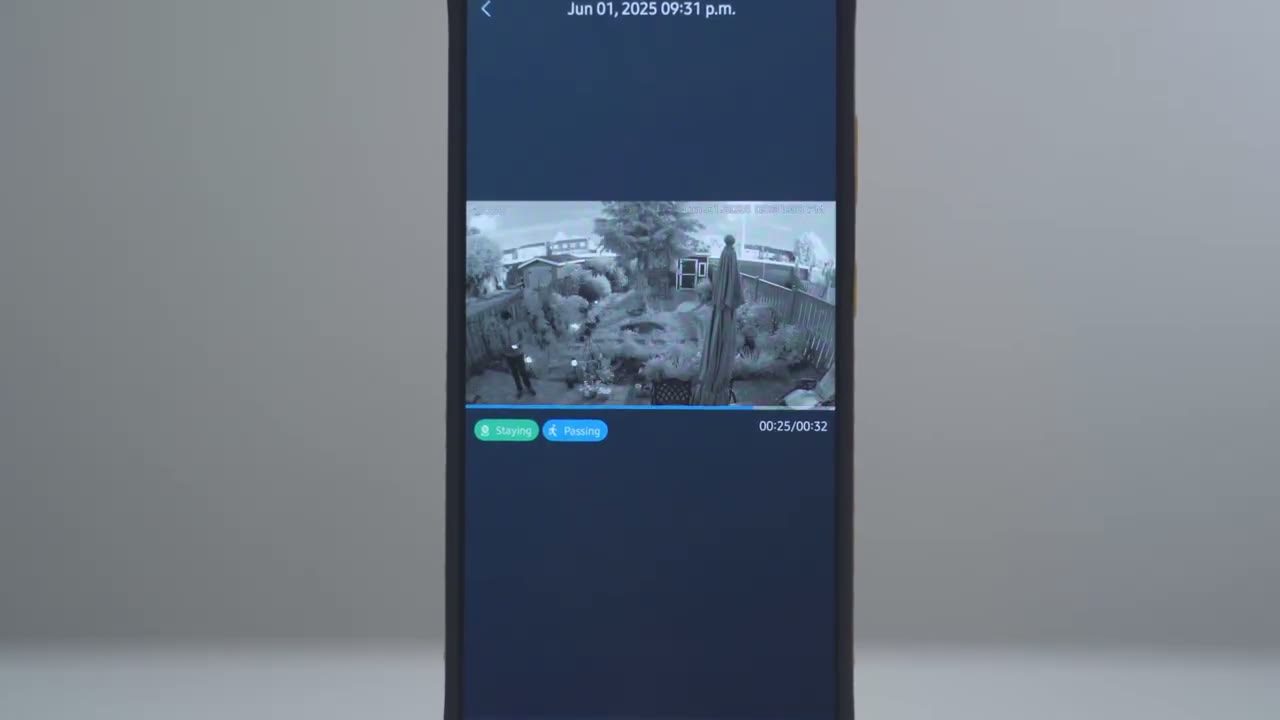
To review video, we’ll tap on the events button at the bottom here. And then I’m going to jump into Sunday. And this is when I was kind of testing the night vision. So, you can see that’s me right there. And notice that it shows staying staying. And at the very top here, you could just tap on any of these icons to kind of filter through clips that match. But if I tap on this first clip right here, you can see once it loads up, I have the option to look at this in full screen. Let me just go back. And right from here, I can hit the download icon and it’s just going to save it to my phone’s gallery. And then I can just share it. So very simple to
Video Quality
review playback. So the video quality on the AU Solar Wlight Cam Pro is pretty good for a solar powered camera. We have 3K video with a 5 megapixel sensor. And video looked good. Whether it was daytime and sunny or, you know, a little bit overcast, it was still easy to make out faces and see details up close and even further away. Color night vision is especially good on here since we have 400 lumens of output to easily illuminate any subject or, you know, a backyard pathway or a driveway. And if you wanted to use the traditional black and white night vision, that’s also
Motion Detection
available as well. Motion detection is also really quick. And once you get an app alert and you tap into it, it loads up quickly as well. Now, one thing to note is that for motion detection, you have two options. One is immediate mode, one is intelligent mode. Immediate mode is where you’re going to get the notification as quick as possible. The system is not really going to analyze whether it was a person, you know, a pet or things like that. Now, if you set it to intelligent mode, the notification will come a little bit more delayed, but you’ll get a bit more info. So, up to
Speaker
you. The speaker gets very loud for two-way talk and the alarm siren. Here’s a demo of that. Here’s an example of 2A talk. Here’s what the voice filter sounds like using 2A talk. Please put the package at the door. Thank you. Hey, what are you doing here? Please get out of here now.
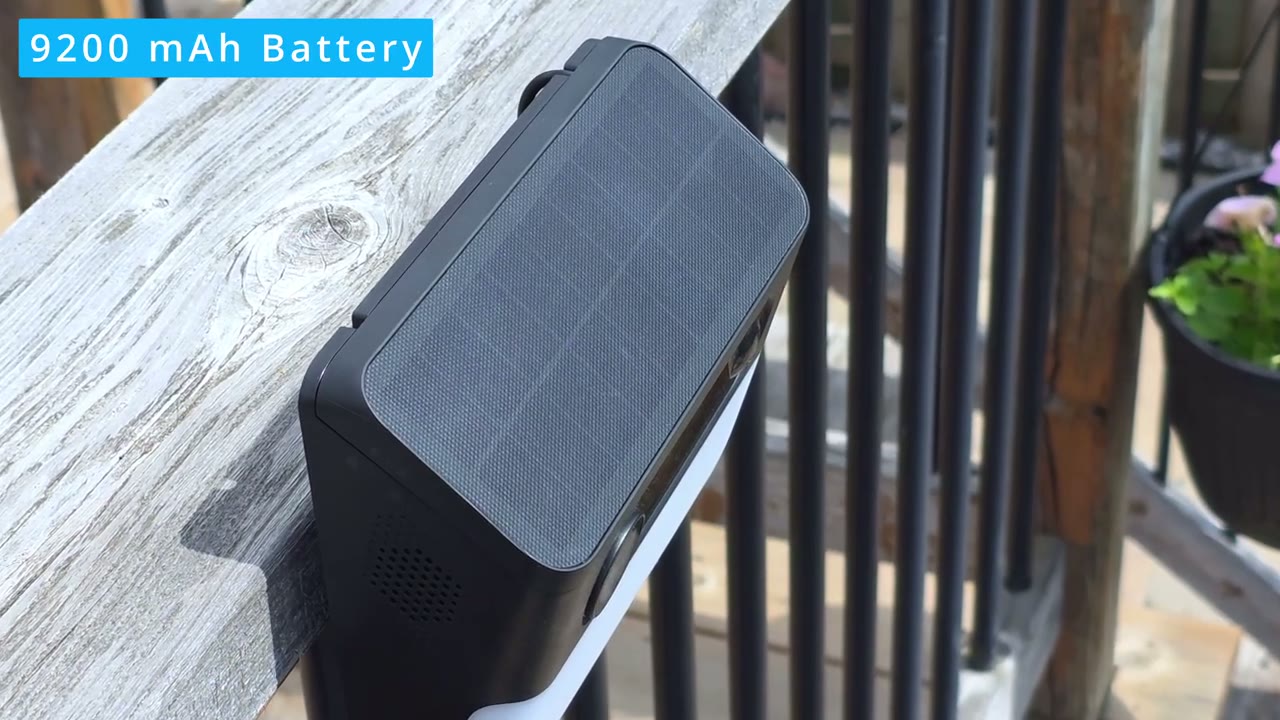
Battery
The battery life has been standout on this. So, since I installed it, it’s been at 100% the entire time. And that’s thanks in part to that really large solar panel on here. You know, it’s larger than a lot of other wall lights. Where I have it installed, it’s been doing perfectly fine at 100%. So yeah, this seems like a year-long battery
Storage
life. You can install up to 128 GB micro SD card on here. I’m going to get around 9 months of video recording history till the oldest clip is overwritten. So if you’re putting it somewhere more busy like a driveway side of your house or, you know, kind of a pathway, you’ll still easily get months of storage, probably between 3 to 6 months. It’s pretty impressive. So, if your current
Recommended?
security camera is recording fine, but there’s not enough light output to act as a visual deterrent to scare away lurkers or to just, you know, properly illuminate your driveway, pathway, or your backyard, the AU solar widelight CPro is a fantastic option because unlike a lot of other solar wall light, this actually has a detachable solar panel, so you can place it optimally to get the most sunlight. You also have the 128 GB of local storage, meaning you don’t need to pay for a cloud plan unless you want to optionally pay for one. You can still record locally. So, if you’re interested in picking up the AU Solar Wlight Cam Pro, I’m going to leave links down below for you to get your very own. And if I have any type of coupon codes, I’ll leave those down below as well.
And I highly recommend you check out my review here of AU’s P1 Max Home Cortex system. It’s powered by their Home Cortex AI, and it’s actually usable AI. It’s not that gimmicky AI that comes with a ton of other products. And I have a huge favor to ask. If you found this video helpful, would you mind liking and subscribing? It really does help me out a lot as a small and growing channel. And maybe consider checking out some of my other tech reviews. I review more than just security cameras, video doorbells, keyboards, monitors, laptops, headphones, really everything. So, I think you’ll find something you like. And I hope you’ll join me in my next video
Buy aosu Solar Wall Light Cam Pro
Buy 128GB microSD Card on Amazon
Please note that some of the links in my video descriptions are affiliate links where I earn from qualifying purchases. As an Amazon Associate I earn from qualifying purchases.