UGREEN NAS on Official Store(15% off)
Please note that some of the links in my video descriptions are affiliate links where I earn from qualifying purchases. As an Amazon Associate I earn from qualifying purchases.
Intro
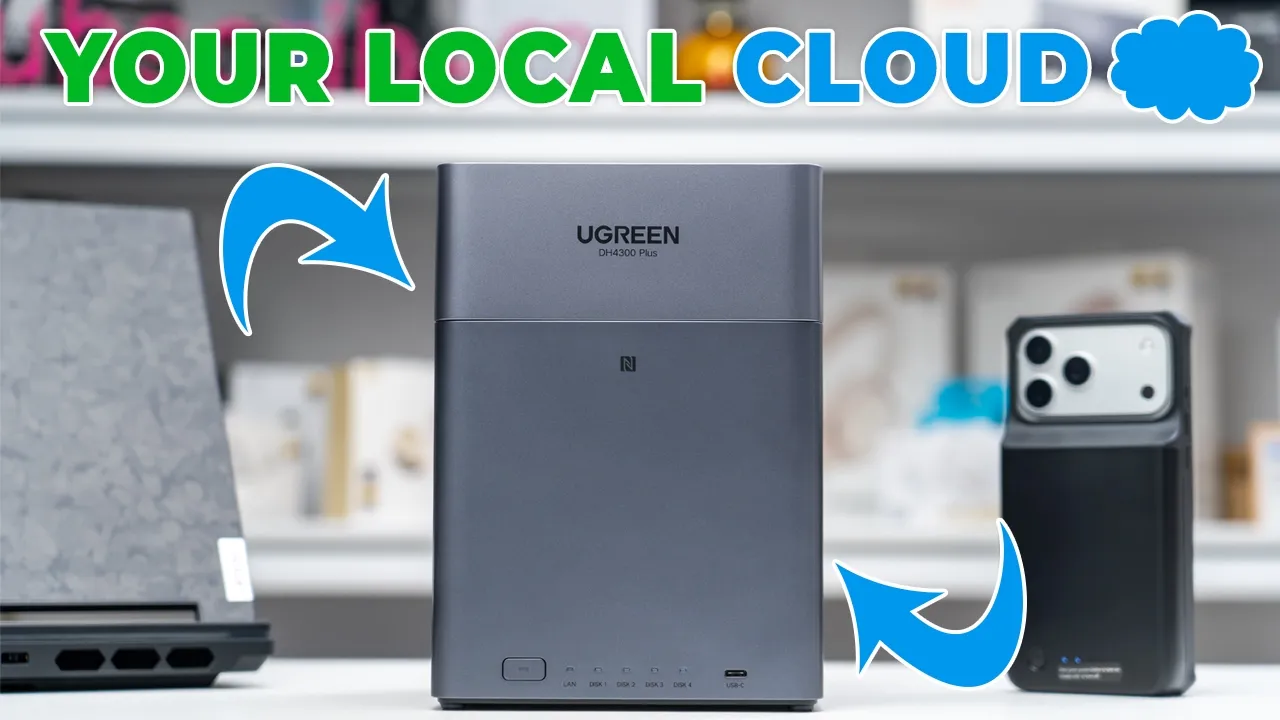
If you’re looking for a reliable NAS that’s easy to set up and can actually replace your costly online cloud storage, you have to check out UG Green’s NASC DH4300 Plus. The DH4300 Plus acts as your own personal and local cloud capable of managing up to 120 terabytes of storage through four hard drive bays and wide hard drive compatibility. Setup is quick and easy with a simple NFC tap and the UG NAS app. There’s AI on board that stays local to protect your privacy and it helps to organize your photos, detect people, understand scenes, and more. You can sync your online cloud drive, whether it’s Microsoft One Drive, Google Drive, or Dropbox to the NAS, and you can schedule backups of your phone’s photo gallery or your computer’s files as well.
It even has an HDMI port, so you can watch your favorite videos or media on your TV or your monitor. But how fast are the transfer speeds, and can this really replace your online cloud storage plan? Well, let’s take a closer look. And a big thanks to UG Green for sending this out for review.
Package Contents
In the box, we have the UG Green DH4300 Plus NAS along with a power brick, power cable, Ethernet cable, magnetic screwdriver, screws for the hard drive, quick start guide, and a 2-year warranty card. This is a discless system, so you will have to provide your own disc. Just be sure the drive matches UGG’s compatibility list, and I’ll leave some links down below for compatible drives.
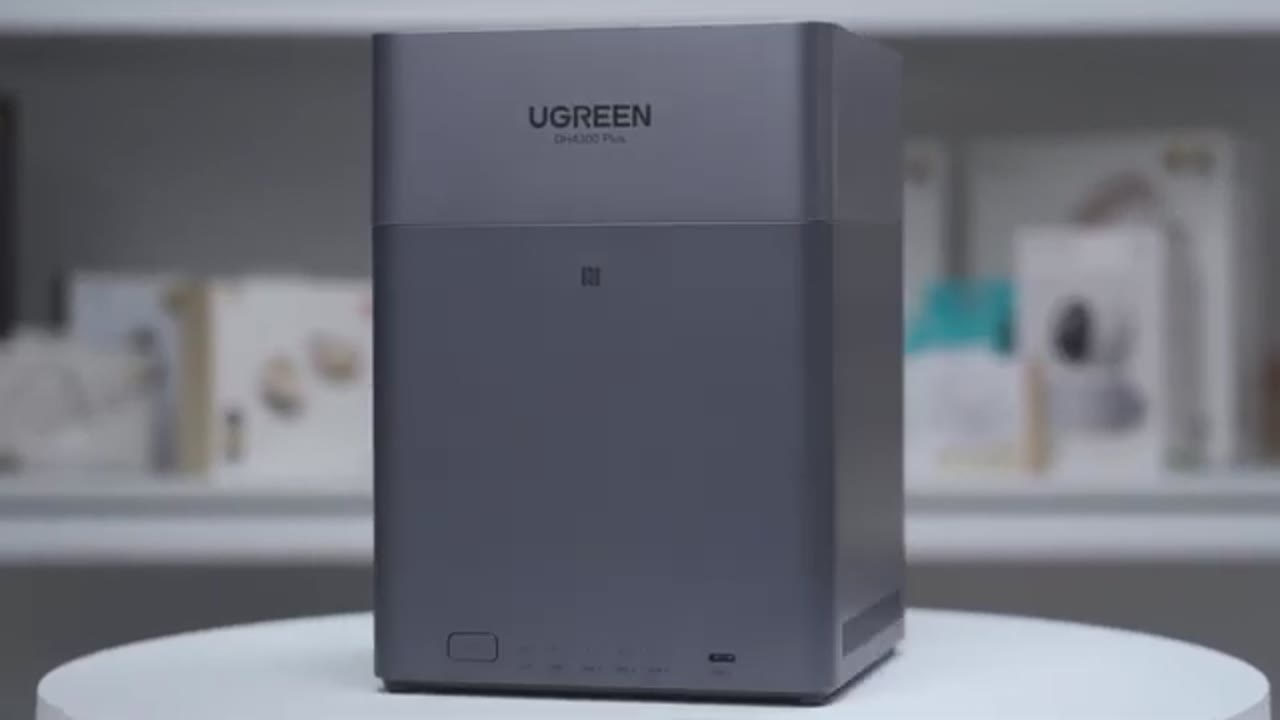
Design
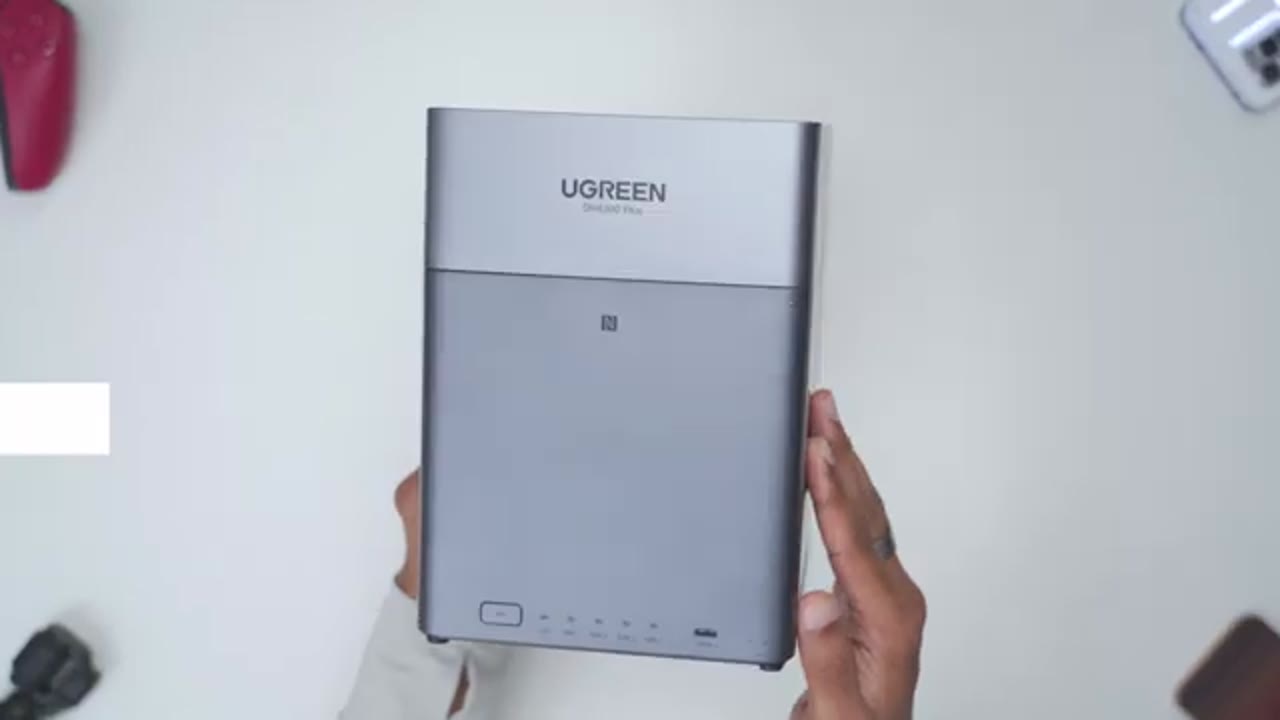
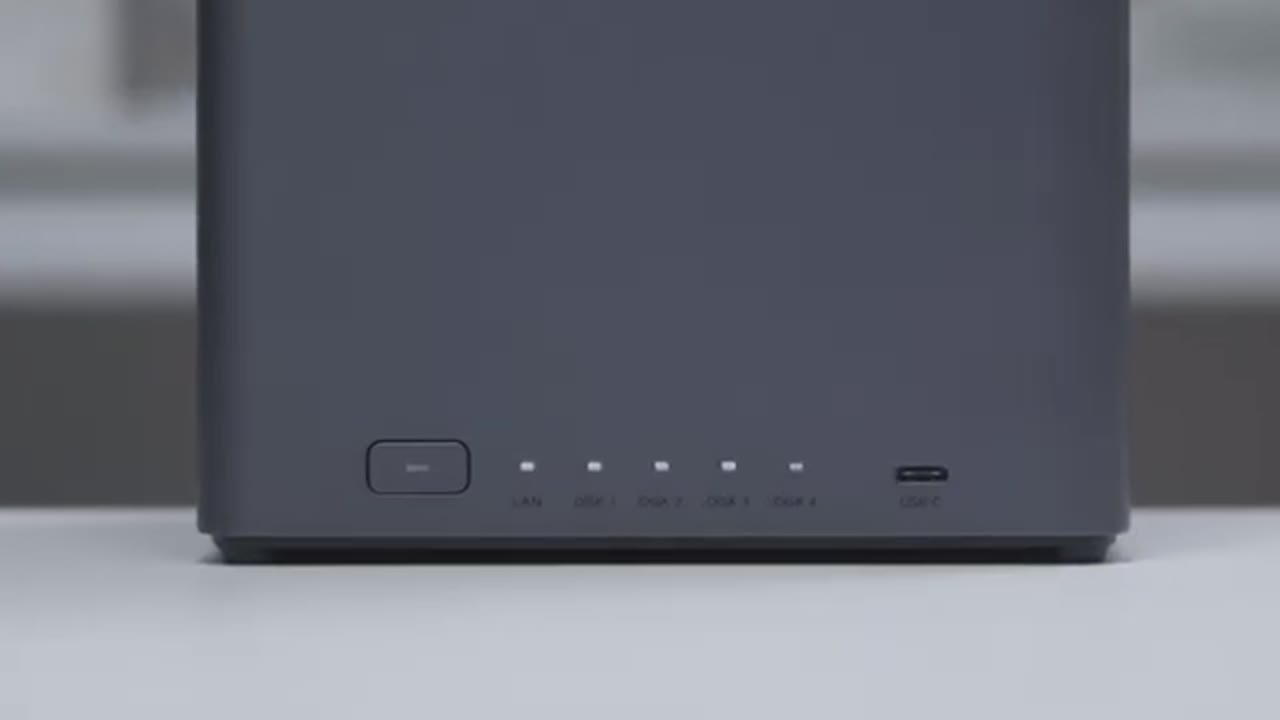
The DH4300 Plus comes in at around 1.5 kg or about 3.3 lbs. Now, we have an NFC tap area here, and this can be used to set up everything on your phone. I’ll demo that later. At the very bottom left, we have a power button with an LED indicator light. And we also have indicator lights for the LAN port and all of the four discs. There’s also a USB type-C port right there. On the rear, we have an HDMI 2.0 port along with two type A ports. These are also USB 3.2 Gen1. There’s also a 2.5 GB Ethernet port, a reset port, and the power input. There’s a huge ventilation grill at the very top and on the right and left sides. And we also have a massive ventilation grill at the very bottom as well. Getting access to the four drive bays is really easy.
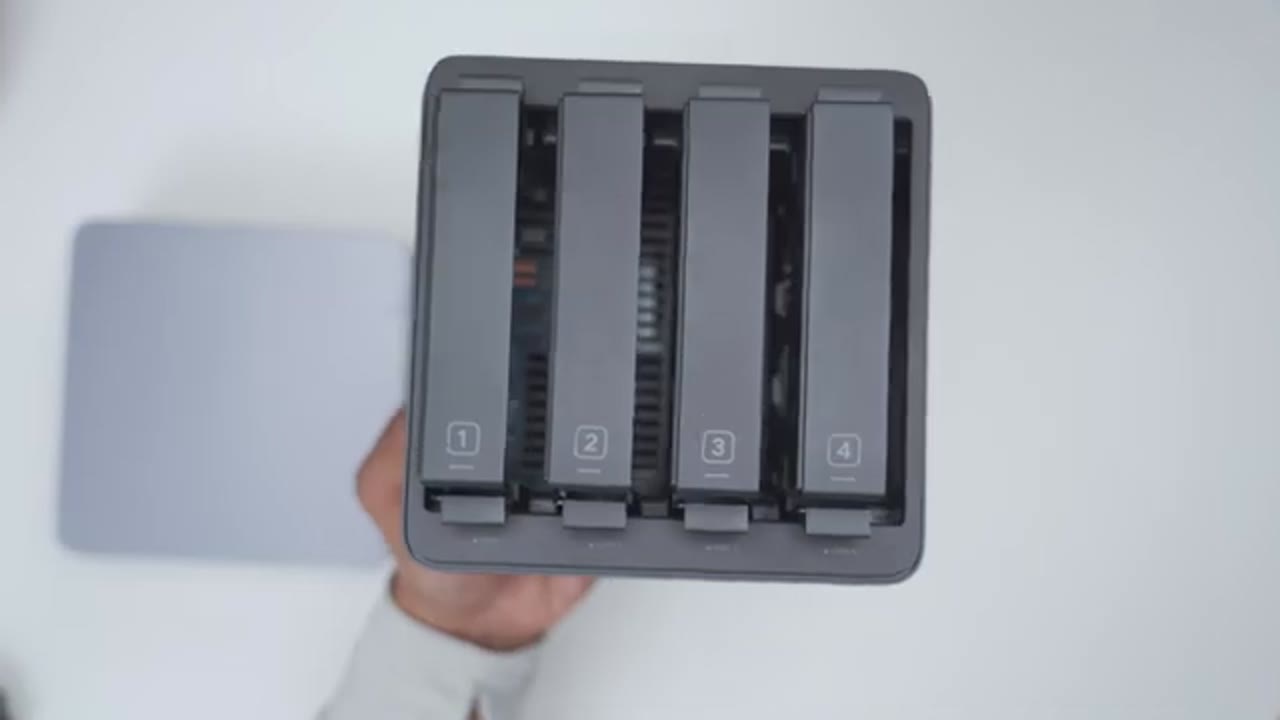
You’re just going to lift up from the top and that’s because it’s magnetically held in place. You could see the magnetic buttons. There’s one on every corner. Once the top lid is removed, we have access to the four drive base. In terms
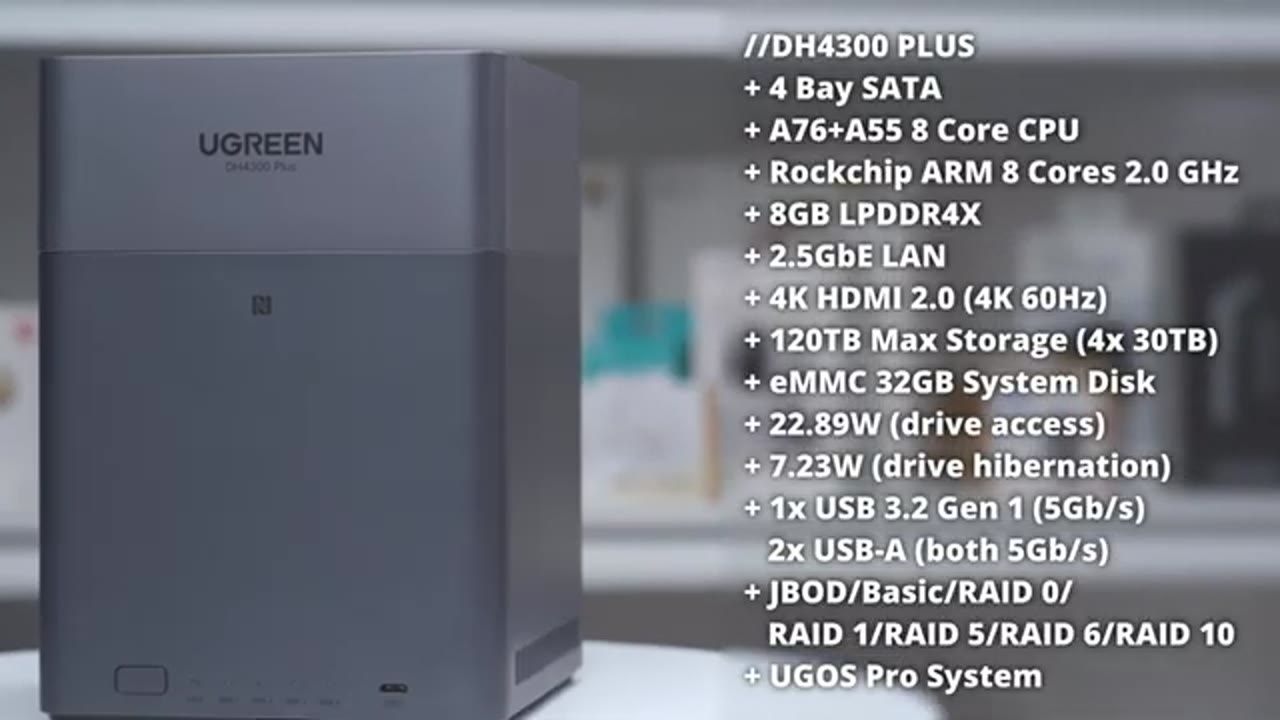
Specs
of specs, so this is a Disla system, but you can add up to 120 TB of storage. Now, it’s running a 64bit 8 core ARM processor and has 8 gigs of RAM. But here’s a quick look at the specs. Feel free to pause and review or jump ahead
Installing Drives
to the next section. To install the drives, we’ll first remove the magnetic top lid. Once the lid is removed, we have access to all four drive trays. So, what I’ll do is I’ll just press in on the retention clips here and slide out the hard drive tray. Now, I’ll take the hard drive and the way it’s going to go on here is just like so. So with the writing facing up and then the connector ports at the rear side here because this will interface down with the connectors on the inside. Now if we take a side view, you can see that we do have some area to line this up and to use the supplied screws that came in the box to secure it. So I’ll do that now.
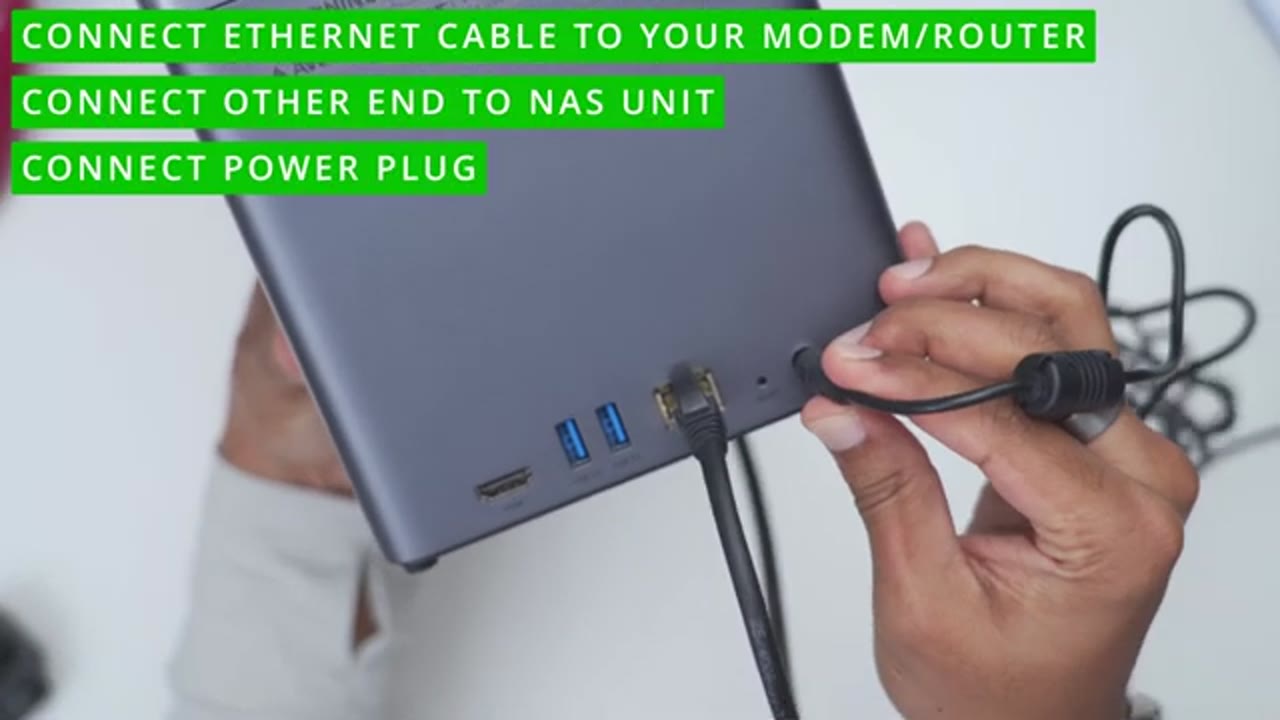
Once you’ve secured the hard drive to the hard drive tray using the supplied screws and screwdriver, gently slide it down till you hear a click just like so. And then repeat the same process for the rest of the disc. Next, I’ll plug in the Ethernet cable into the LAN port and the power cable into the power port. Once
First Time Setup
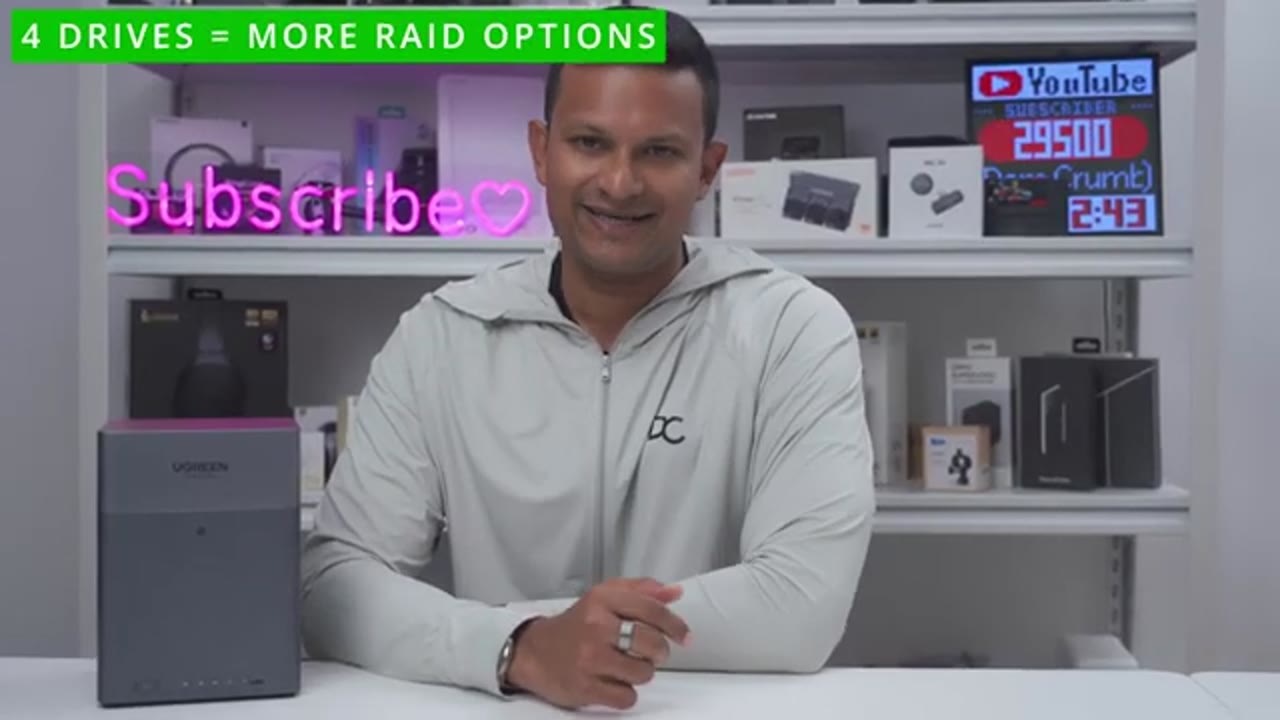
all of the hard drives are installed and you power everything on, you simply just have to tap the NFC area on the NAS with your phone, open up the UG Green app, create an account if you don’t already have one, and go through the setup process. It’s that simple. During the setup process, when I had to initialize the disc, I chose a RAID 5 setup. So, that’s going to use three of the hard drives for storage, giving me about 6 terb between them. And then one of the hard drives is going to be used for parody. But you can also set up a Jbot or just a bunch of discs. A basic setup, RAID zero, 1, five, six, or RAID 10. And while I set up the NAS with four drives since that gives the most versatility, in a pinch, you can set it up with one drive and then just add on as you go if you really need to.
But yeah, four is going to be best case scenario. And once
UGOS Pro
you get the DH4300 plus up and running, you’re going to be using UG’s UGOS Pro to manage everything. So there’s three ways to do that. One is using the Ug NAS app on your iPhone or Android phone. You can also access it through a web browser dashboard and you can install UGER’s own desktop software on your laptop or desktop to manage it that way as well. And once you’re in the UGOS Pro dashboard, there’s a ton of features to access. So, you can open up Task Manager. It’s going to give you a general overview of the system. You could take a look at the hard drive health, the temperatures on there, RAM utilization, CPU utilization, and more. You can also access the storage settings so you can prioritize read and write speeds over RAID syncing. You can also do hard drive tests as well.
And while the system does come with a bunch of handy pre-installed apps, you can also install apps such as Cubit Torrent and Firefox. You can use the photos app to easily browse your photos. And you can use the intelligent AI models on it to help with people detection, scene detection, and object recognition. And you can set the system to generate either standard or highresolution thumbnail previews. While I’m in photos, if I click into the people section, it’s accurately identified me and pulled all the images where I appear either by myself or in a group setting. And it’s also identified, you know, animals. And it does a pretty good job overall. With that, there’s also a universal search feature where you can search across all of your files, whether it’s apps, photos, videos, etc.
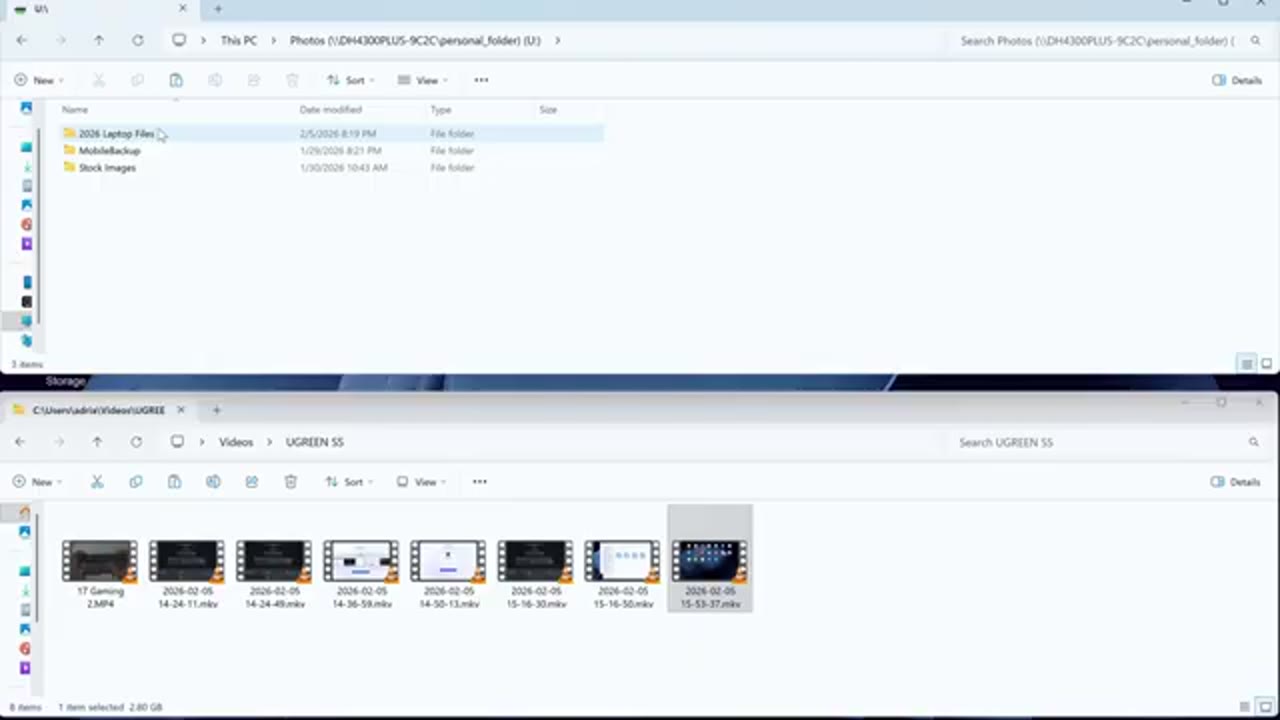
You can use the files app to browse all of the files synced from your phone or your desktop, laptop, tablet. And I’m actually impressed that it was able to handle a lot of files. So it was able to open MKV files, 4K video files, regular image files, and even Photoshop files as well. In the control panel, you can add users and set their permission. You can also go into file service to turn on SMB, FTP, and enable discovery services as well. Under hardware and power, you could turn the LED indicator lights on or off, and you can also set when the system is going to beep in terms of system issues. And you can also set the fan speed mode as well. You can also jump into security to enable security features and to enable two-factor authentication as well along with a firewall.
In terms of transfer speed, so
Transfer Speeds
on a RAID 5 setup, I was getting between 250 megabytes of 270 megabytes per second. And that works out to about 2.2 Gbits per second, which is very close to the max rated 2.5 Gbits per second transfer speed. And of course, when you’re transferring multiple files at once, you will see that transfer speed drop. So, I was seeing between 190 to 250 megabytes per second. Still plenty fast and good for just incremental backups or syncs. I transferred a 2.8 GB file from my computer to the NAS and it only took about 10 seconds to do so. Now, if I was to transfer that same file to an online cloud drive like a Google Drive, One Drive, Dropbox, it’ll easily take me about a minute or even more depending on my upload speed and just network traffic at the time. in terms of
Data Backup
automating backups or scheduling file syncing. So, if you download the UG NAS app on your phone, you can have it sync your phone’s photo gallery. So, I set my S25 Ultra phone to just sync the photo gallery right to the NAS. And you could do that with your iPhone as well. When you want to back up your desktop or laptop files, so you could do a manual one-time kind of backup or you can create a task where it’s just going to do it on a schedule. So, you can set it up to back up specific file paths or folders. And you can set the type of sync, whether it’s a two-way sync or a
Online Cloud Sync

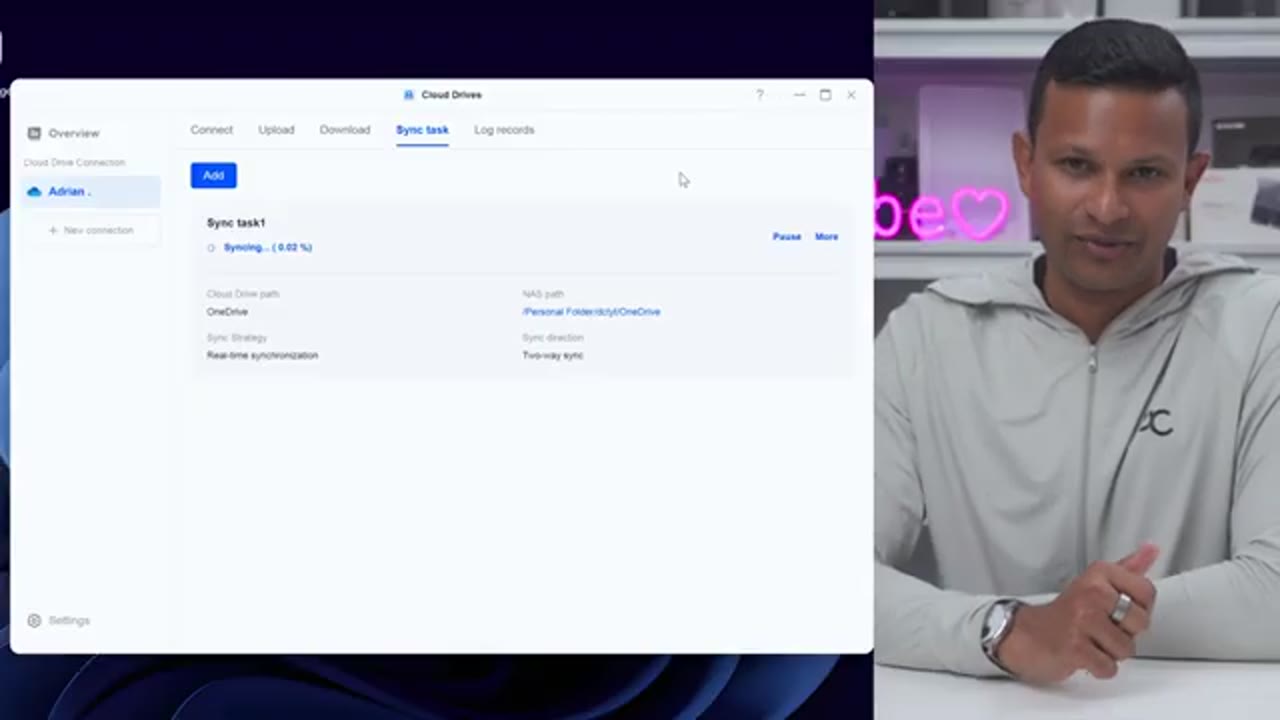
one-way sync. Let’s talk about syncing your online cloud drives because that is such a handy and convenient feature. So, what I did was I synced my Microsoft One Drive to the DH4300 Plus, but you can also do this for a Google Drive and Dropbox account as well. And with your cloud drive connected, you could set a polling interval to determine how often it’s going to push or pull data. What you can also do is you can upload files from the NAS directly to your cloud or you can download files from your cloud to the NAS. But what’s even better and what can actually save you a ton of money longterm is you can actually download all of the files from your NAS. You could just create a task to continually sync that. You could do a two-way sync or a one-way sync.
And you can set those parameters, but you could actually download all the files from your online cloud storage to the NAS. And then once you do that, you can delete those files out of your cloud storage and then just downgrade to the free or basic plan. Then just keep uploading to your cloud storage from your phone or whatever other device. Anytime it gets full, just download all of those files to the NAS. And in that way, you’re not paying for, you know, a costly monthly or annual plan. Now,
Online Vs Local Cloud
let’s talk about online cloud storage versus local cloud storage. So, with online cloud storage, the payments upfront are going to be cheaper because you’re just paying monthly or yearly. Now, another thing with those is that you’re usually going to be limited to like 1 TB, 2 TB. It’s kind of hard to see a lot of these cloud storage plans offering you like 6 terabytes, 8 tab, 10, 12 without the cost really ratcheting or skyrocketing. The other thing is, you know, there’s less privacy because it is online. If that gets hacked, that’s going to be a problem. Now, when you look at a system like this, the upfront cost is going to be more expensive to get the unit plus the drives depending on how much storage you need. But you maintain full local privacy even with the AI features on here.
That’s just done locally on here. There’s no actual connection made with UBrine service since we have a local NPU. The other thing is it’s going to be way faster using the local cloud storage because you’re just going over your local network versus with cloud storage when you’re uploading it can take quite a bit of time depending on your upload speeds. Another benefit of a local NAS like this is that you could share the storage on here with multiple users. Now, with something like Google Drive, if you’re on a one or two TBTE plan, I believe you could share it with up to five people at a time. So you get way more versatility with a system like this. So should you actually ditch your online cloud storage for a local cloud storage like this NAS?
Well, it’s really going to come down to your use case. For me personally, I like having a cloud storage option and a local NAS option. And the reason why is if my home has any type of fire or water damage and my NAS was affected, that data is likely gone. But if I have it both in the cloud and locally on the NAS, then I have two ways to get that data back. However, at the same time, I may have sensitive files that I don’t want hosted in the cloud if that ever gets hacked. And in that case, it makes sense to have it locally on the NAS. Another consideration is if you have kind of mission critical files, you may want that both in the cloud and locally.
And if you have other files, like you have a huge amount of files that you just need kind of cold storage for, then the local NAS makes sense versus paying for cloud storage. So, it’s really going to come down to your use case, but I hate paying more for online storage than I have to. So, I’m going to host most of my files locally on the NAS. There’s also a convenient
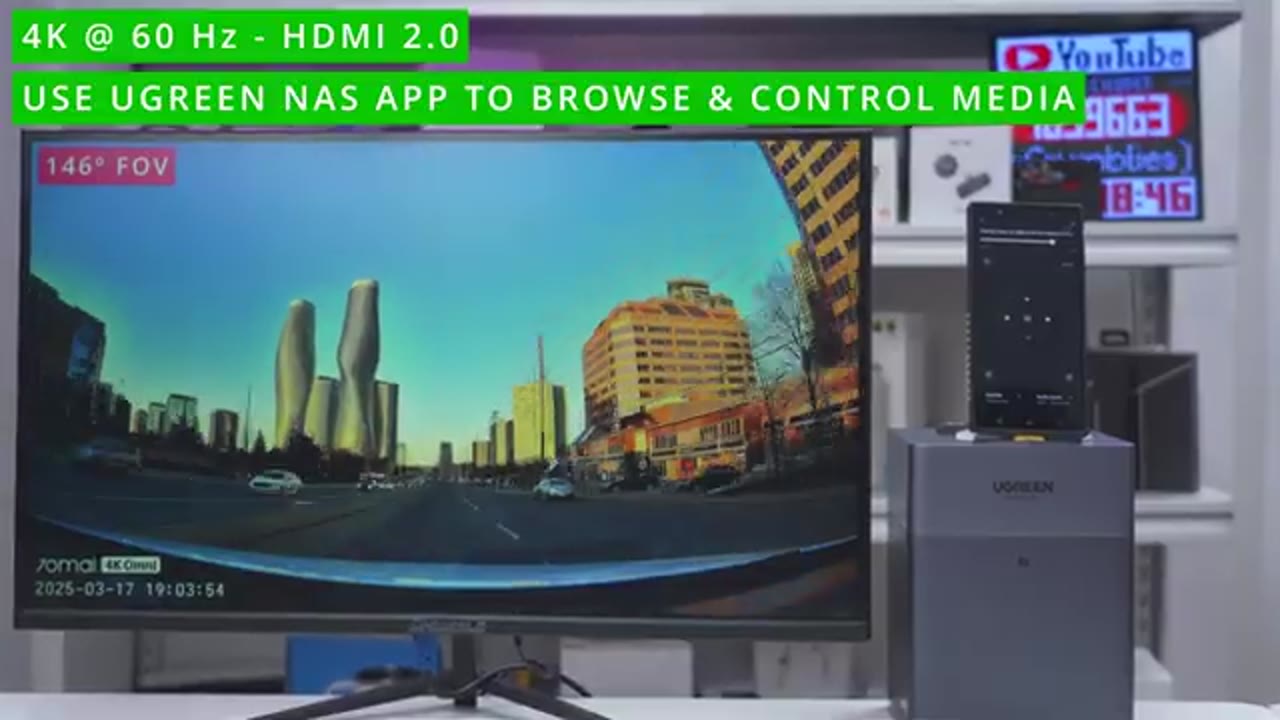
HDMI
HDMI 2.0 port here, so you can connect this to your TV, monitor, or any other type of display, and you could use the U green NAS app on your phone to manage
Considerations
the media controls. And while the DH4300 Plus has been solid for me so far, there’s a few considerations to keep in mind. We do have Docker support on the DH4300 Plus, but it’s limited to ARM compatible containers only. There’s no NVME caching if you need that type of feature. There’s also no ability to upgrade the RAM later if you need to, and there’s no virtual machine support. Now, if you need features like that, you’ll need to look at UG Green’s other
Recommended?
offerings. So, if you’re thinking of downsizing your online cloud storage or ditching it all together for local storage with local privacy, the UG Green Nassing DH4300 Plus is a great place to start. It’s easy to get set up with a quick NFC tap and the UG NAS app. It’s also easy to manage using the UG NAS app, their desktop software, or a web browser. You can install up to a massive 120 terabytes of storage and you have intelligent AI on board that runs locally for total privacy. So, if you want to get your very own DH4300 plus NAS system, I’m going to leave links down below in the video description and pin comments. And right now, UG has a 15% off sale that they’re running until February 22nd.
If you like this video, maybe consider checking out this video next and maybe even consider liking and subscribing. Outside of NAS systems, I also review mice, keyboards, monitors, speakers, headphones, laptops. Really something for everyone.
UGREEN NAS on Official Store(15% off)
Please note that some of the links in my video descriptions are affiliate links where I earn from qualifying purchases. As an Amazon Associate I earn from qualifying purchases.