Buy 1TB Drive for HomeBase on Amazon
Buy 2TB Drive for HomeBase on Amazon
Please note that some of the links in my video descriptions are affiliate links where I earn from qualifying purchases. As an Amazon Associate I earn from qualifying purchases.
Intro
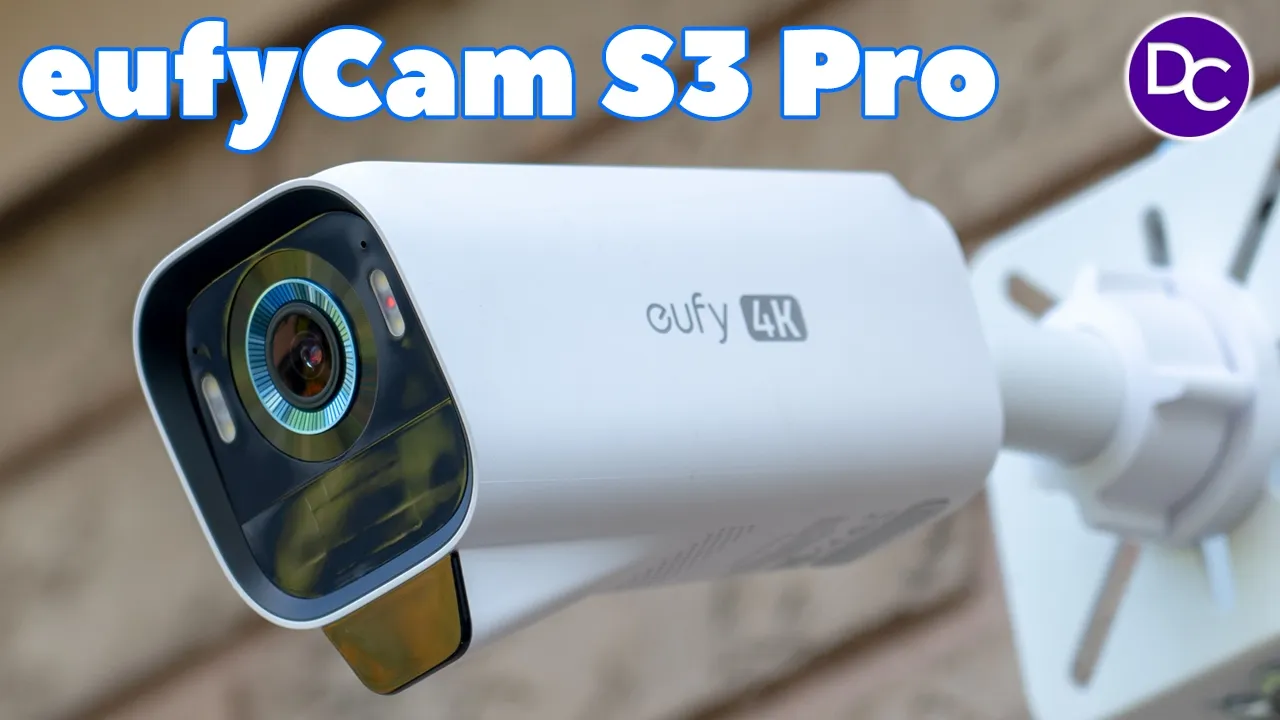
hey it’s Adrian and today I’m reviewing yui’s brand new yui cam S3 pro security camera system the S3 pro has 135° field of view with an f1.0 lens for great low light video thanks to yui’s Max color vision technology there’s also a larger and more efficient solar panel things consider solar plus 2.0 Tech in addition to P we now have radar detection for more accurate detections when it comes to humans Vehicles pet and of course there’s always great facial recognition too recordings are sharpen 4K quality but the most exciting news is that we now have the option to have 24/7 continuous recording When the camera is permanently wired and of course there’s zero monthly fees so let’s take a closer look at how it performs and a big thanks to yui for sending this out for a
Package Contents
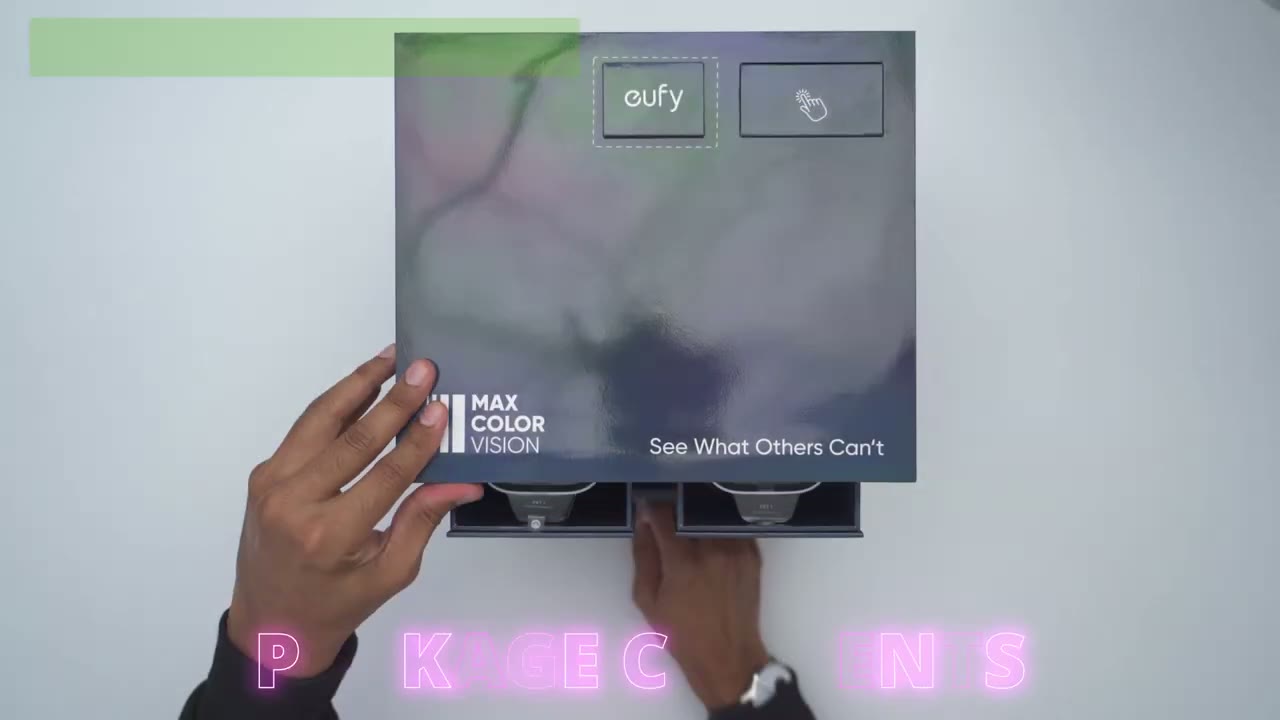
review in the box we have the brand new S3 Pro cameras along with the home base and an optional backup solar panel if you can’t install one of the cameras where it’s going to get adequate sunlight there’s also a power adapter for the Homebase 3 positioning stickers mounting scre screws and Hardware along with a charging cable USB a to type- c to just top the cameras up before you mount them manual security sticker mounts and an ethernet cable to connect the home base to your modem or router there’s also some additional screws if you’re going to be adding an optional hard drive to the home base 3 which I highly recommend and I will demo how to do that later the design of the brand
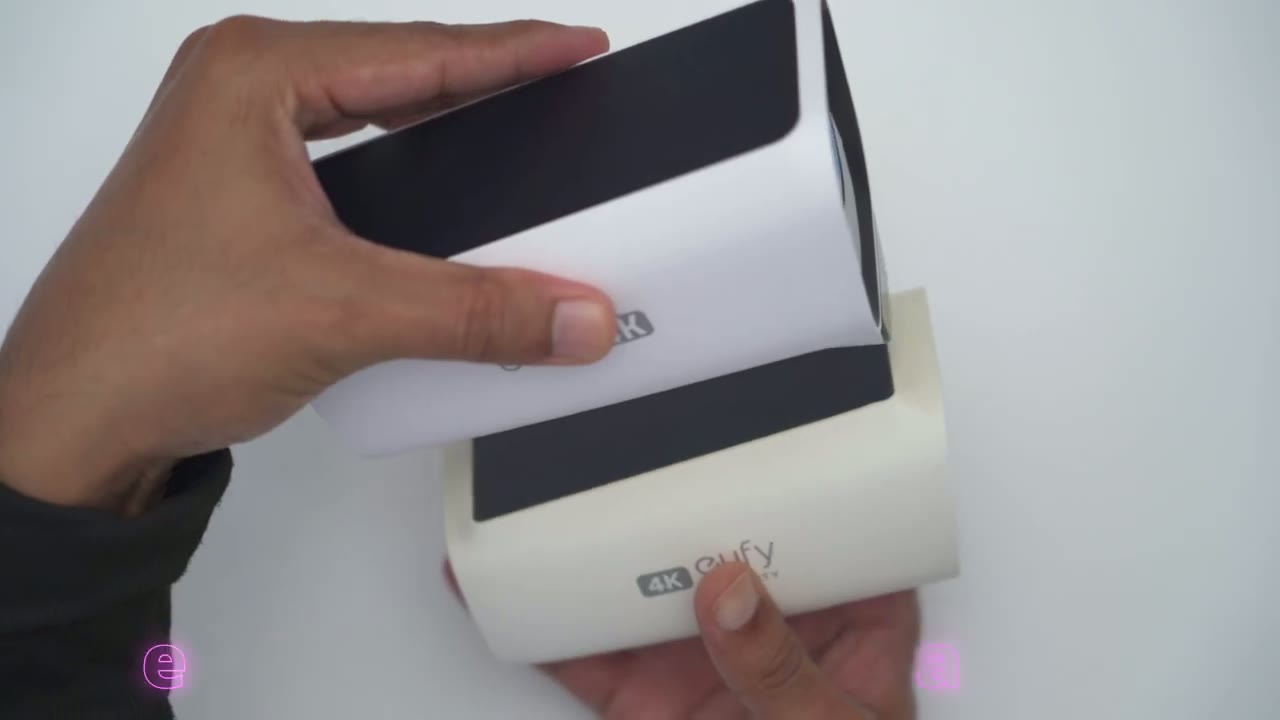
Design

new yuy cam S3 Pro looks really sharp so we have the yui logo on the right and left side and it shows that it is capable of 4K recording so on the front we have that beautiful 4k camera lens surrounded by that blue ring there’s also two of the adjustable spotlights which I’ll demo later and we have a bunch of different sensors in the front here now there’s also this new addition at the front here and I believe this is for the radar sensors since this does have p and radar at the very top there’s a really large solar panel and I’ve noticed um UI solar panels have become better in terms of the efficiency with solar charging even if it’s kind of in a shaded area so I’ll see how that goes these coming days there’s also a thread mount in the back there and at the very bottom we have the sink button and then we also have this sealed area here which gives access to the USB type-c port just to initially top this up before you install it or if you’re going to run that optional uh solar panel if you can’t Mount this somewhere where it’s easily going to get sunlight there’s also a speaker Grill here at the bottom and this comes in at a hefty 536 G which is much more than on the previous model so I have the previous model here this is the yui cam 3 or the s330 this comes in at 420 G and this is coming in at 536 G and here’s just a size comparison of the two of these so you could see just how much larger the newer model is that same with the solar panel at the top it’s a far larger solar panel as well and let’s take a look at the front view so you can see it looks much sharper and we have two spotlights versus the one on the older model and then the speaker Grill is larger as well so yeah I’m expecting a lot of great things with the S3 Pro so this one solar panel that comes in the box is completely optional to use but it is a very nice touch if you can’t Mount one of the cameras where it’s going to get optimal sunlight we have a mounting uh thread at the back there and then the connector and it’s designed to maintain the IP67 rating when you plug it into the S3 Pro here’s a quick look at some
Specs

of the specs feel free to pause or jump ahead to the next section the first
Install Harddrive

thing I’m going to do is to add this 1 TB hard drive to the home base 3 which is completely optional so if you do want to expand your storage I recommend doing this now and I’ll leave links down below to some hard drives that you could pick up that will be compatible with this so the first thing we’re going to need to do is to just press down on this toplet and you could see it lifts up and you can remove it out of the way and there is one screw to gain access to the slot so I’ll remove that right now with the screw out of the way you’re just going to use this pull area here put your finger under and you now have the hard drive tray slot the next thing we’re going to do is to seat the hard drive in the tray now this is really easy you’re just going to take a look at the bottom of your hard drive and where you see the metal contacts you’re just going to make sure they’re facing away from this ventilation slot so I’m just going to slot it in and you can see it sits nice and flush all the way around and now that it is we can go ahead and use the four supplied screws to tighten the hard drive into place and with the hard drive securely seated in the slot we’re just going to slide it back in so again we’re going to make sure that this pull area here sits at the bottom slide it in and we’re just going to replace that one screw that we used to remove the hard drive slot and you’re done so you can see everything is nice and flush again so don’t force anything it should seat properly by itself and replace the top cover now we’re ready to add
eufy App Setup
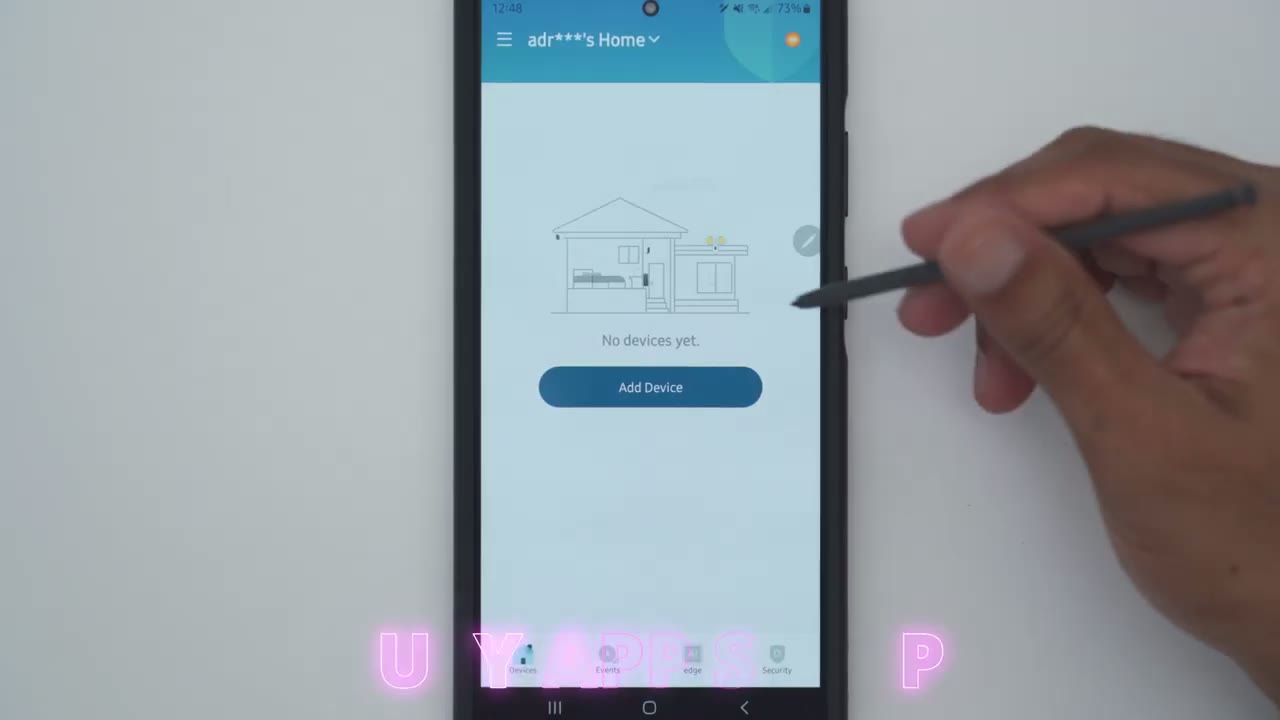
everything to the yui app so I’ve plugged in the home base to my modem and I’ve also connected the power cable so first I’m going to click on ADD device and the first thing we want to add is the home base so you’re going to pick the home base 3 or the s380 here and if you don’t have a home go ahead and create it I already have one so I’ll click on next and it shows to connect everything which I’ve already done so I’ll click on next again and it says connect your phone to the same Wi-Fi router that the home base is connected to that is already done and it says wait 1 minute until the home bases LED turns from red to blue and I know it is blue so I click next and now it wants me to scan the QR code at the bottom of the home base so I’m going to do that right [Music] now so the home base is now added you can see you have to scan the QR code and then press the SN button so that no one can just scan your QR code and here is where you could choose if you want the facial recognition to be added and I’ll go ahead and use that because I do find this feature um very handy or you could just go ahead and Skip and and I’ll update the firmware now that the home base 3 is added don’t forget to go into it tap on the storage for the hard drive and click on format so that you can actually record to it now it’s time to add the S3 Pro so I’ll click on the plus sign here click on battery camera and then click on S3 Pro add it to the same home as the homeon until you hear the beep and I’m going to press and hold the sync button now I’m not within 1 meter so once I hear the beep I’m going to take this close to my home base upstairs so I’ll go ahead and tap this here all right so the camera’s now been added to the home base 3 so let’s go ahead we’ll click next and it does say to charge it before mounting so I’m already close to 100% And to close the USB port all of that is done now I’m just going to skip testing the signal for now because I’m not going to mount it right now so the first camera is added I’ll just go through the same step and add the second camera
Installation
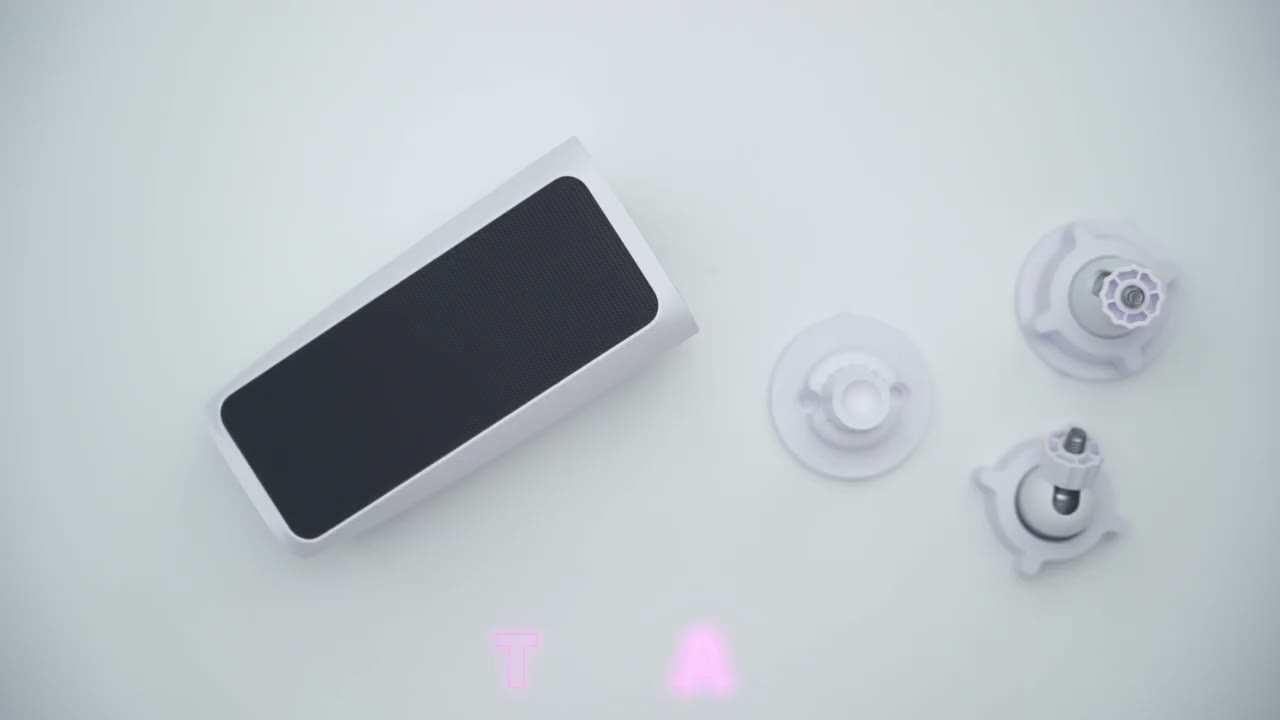
installation is super simple so first you’re going to unscrew the top portion of the mount here so you have these two separate pieces then you’ll just line this up with your wall or whichever surface you’re going to mount it on drill in the two holes here and of course you could use the positioning sticker to help you out with that and then once this is securely attached to a wall you’re just going to screw this back in and rotate this knob here till it locks into place and then finally you’re going to connect uh the thread here with the thread at the rear of the camera and then you can kind of angulate everything however you like and you’re good to go let’s take a look at the full
App Settings

app settings in the U security app now I’m on the Beta app but you know for the most part it should look the same the first thing I want to do is to take a look at live view so let’s go and look at my garage camera you can see I’ve called it garage up there and it’s now streaming in 4k so the pullup time is actually pretty good now you can see just how sharp that is so I could see you know the this uh car I can take a look at the rims and I can see the cars across the street and here is my neighbor’s car with the red trim so that works really well and of course you could go into full screen view um just to see things a little bit clearer and you still retain access to most of the controls if you weren’t in full screen now when you are in this uh vertical mode you could go ahead trigger the alarm manually so you can have camera sound uh camera sound and Spotlight and the home based sound and you can also jump into the full options from here which I’ll get into later and then the other thing that we could do is actually tap on 4K and set it to Auto streaming if you have limited bandwidth now we can also go ahead and hit record and really important so if you’re streaming in 4k it’s going to record in 4k so um it’s you’re basically going to record in whatever your uh format or resolution you’re streaming in you can also go ahead turn on sound so you can hear what’s going on outside and then we can initiate to a talk we could also turn the spotlight on on manually uh on or off of course you’re not going to see a difference during the daytime you can also jump into playback into events but let’s go into night vision because this is really handy we could switch from standard daylight uh spotlights and infrared without jumping into the full settings which is so handy and of course we can always take a screenshot I’m going to jump into my backyard camera and once that loads up again in 4k I’ll jump into the full options so we could see it a it’s actively being charged and you can also turn the camera on or off right from here let’s go to motion detection so right now it is on you do have the option to set activity zones and you can set up to two activity zones like you see there I don’t generally use these um so they are there if you need to use them though you can set detection sensitivity from 1 to 7 and I’ve just updated the default of four and you could set what type of detection you like if it’s you know facial or human recognition uh human detection vehicle detection pet detection and all other motions under power manager I can see that the camera is being actively charged and in the last three working days there’s been 333 detected events and 240 recorded events now under working mode it’s set the optimal battery life so video clip lengths are going to be a maximum of 20 seconds and if it detects the same subject you know kind of twice in a short period it may not record it a second time optimal surveillance is going to give you video clip lengths up to 60 seconds and under customized recording you could set the clip length up to 2 minutes with a 5sec trigger or cooldown time in between clips and you can enable the option or disable it to end the clip early if the camera detects that you know there’s no more motion going on let’s tap into the charging data and I could see so for the last 7 days or 30 days but I’ve only had this for about say 4 days this is where I started so I didn’t start at 100% I installed this at around 90% And this is kind of the uation of the battery life now important to note is I’ve been playing around and testing these cameras a lot with the motion detection the spotlight night vision so you know this is going to kind of Flatline out later once I dial in my settings so it’s showing that it’s only dropped by about 4% which is a light drop over the last 7 days and because of where I have this place with like an a gutter overhang it’s not getting optimal charging so that’s another Factor if I go into solar charging I could see on 916 this is how much uh kind of a charging uh milliamp hours I received and then on 917 this is when I added the optional solar panel just directly on top of the camera to you know kind of show what it looks like and I could see that the external solar power contributed a little bit of charging but most of it still came from the built-in solar panel um just because of when I installed it during that day it was already a little bit overcast already um now the carbon emission you could see that data at the bottom here and consumption you could see just how much uh the the camera is using in terms of motion activations whenever you manually control it or other activities so yeah really a lot of data to go through on this under anti- theft I’m going to turn this on so once you have your camera kind of situated exactly where you want and someone tries to remove it well it’s going to sound the alarm and we also have this feature called snapshot so capture images at regular intervals to monitor what happens between events so you can set this um the default I believe is 30 minutes you can set it to every hour 15 minutes 5 minutes 3 minutes now take a look at what happens if I set it to 3 minutes it’s going to kind of warn me that you know short intervals will shorten battery life and at 3 minutes I’ll be using um 0.62% so I’ll just put this back at 30 minutes so this is a feature you don’t have to use it was turned off uh by default I just turned it on now we can also go into video settings into Watermark so you could just have the time stamp and logo or nothing at all or just a time stamp streaming quality I have it set to 4K automatically but you can set it to Auto if your internet’s a little bit weaker or your connection is a bit weaker and then recording quality so of course this is a 4k camera system I just want it in 4k but you do have the option of 2K uh or 1080p and if you added the optional hard drive to the home base like I showed earlier you know I would just recommend keeping it at 4K night vision I have it set to Daylight and I’ve set this as the default M A now you can switch it to standard uh with Spotlight and then infrared or black and white but they’ve done a fantastic job with the daylight setting so I’ve just left it on there because that saves battery without the spotlight going on and I’m happy with the quality you can also add privacy zones if you need to to say block out you know your neighbor’s area so for the most part I angled mine down so it’s just capturing my backyard and not really much of uh the neighbors I can’t really see into their backyard so no need for that really and then if we go into audio settings you can turn the microphone on you can set audio recordings on and the speaker on or off now I’ll demo the two-way talk later and the alarms and it was demoed with this at 70% and it is extraordinarily loud so at 100% this gets super loud but you know even at 70 I’m really happy with it so yeah really happy about the sound um or the speaker performance there under notifications so you you can set to get the most uh efficient notification so you’ll just get it ASAP as soon as motion’s detected it’s going to send you a notification now full effect is you’ll get a text notification first then a thumbnail or if you want you can get a thumbnail with the text so it’ll say you know Adrien was detected or whoever of your family was detected and you’ll get an accompanying thumbnail this is what I have it set to um and that’s been working pretty well but if you want just the fastest notifications leave it on M most efficient now let’s go into general and this is where you could name it you could turn on the status LED I like having this on so people know the camera is actually powered and it is recording them and then you can also go into storage and we do have options for rtsb and Nas if you’re interested in that but for now I’ll just leave it recording to the home base 3 and then we you can also go back into the Moun guide you could also take a look at the device you know kind of update the firmware Etc and that’s really about it now you can also share the device with family and friends if you need to if we tap on home base 3 this is where we could see you know which faces the system has and which are not familiar with and you could add faces you also have the option to add AI empowerment to cameras that you know don’t have a lot of that so if I had more U cameras here I could go ahead and add those if they’re compatible with the home base 3 and the 1 terab hard drive that I installed I have 99% uh storage available so that’s working pretty well now if I set this to 24/7 recording then yes this will get eaten up or utilized a bit more you can also archive video just plug in a USB drive to the home base if you need to keep uh footage for a while now let’s go into the full settings we can see the cameras that are connected to home base 3 and under audio settings so this is the alarm volume that will play in your home if you have the home base um set to kind of trigger alarms you can also change your alarm tone you have two options here and then the prompt volume as well from the home base if we go under our notification these are the different types of notifications you can receive or you could just say you want to ignore all notifications and under General this is where we could see the name and it’s right now it’s connected by ethernet but actually if you click on here there is an option to set it up by Wi-Fi so it says if the ethernet Cable’s ever pulled out it’ll automatically switch to Wi-Fi so that’s something NE to have and then under working mode um by default it was set the performance so I’ve just left it there you can also change the time settings from 12 hours to 24 now let’s
Video Playback
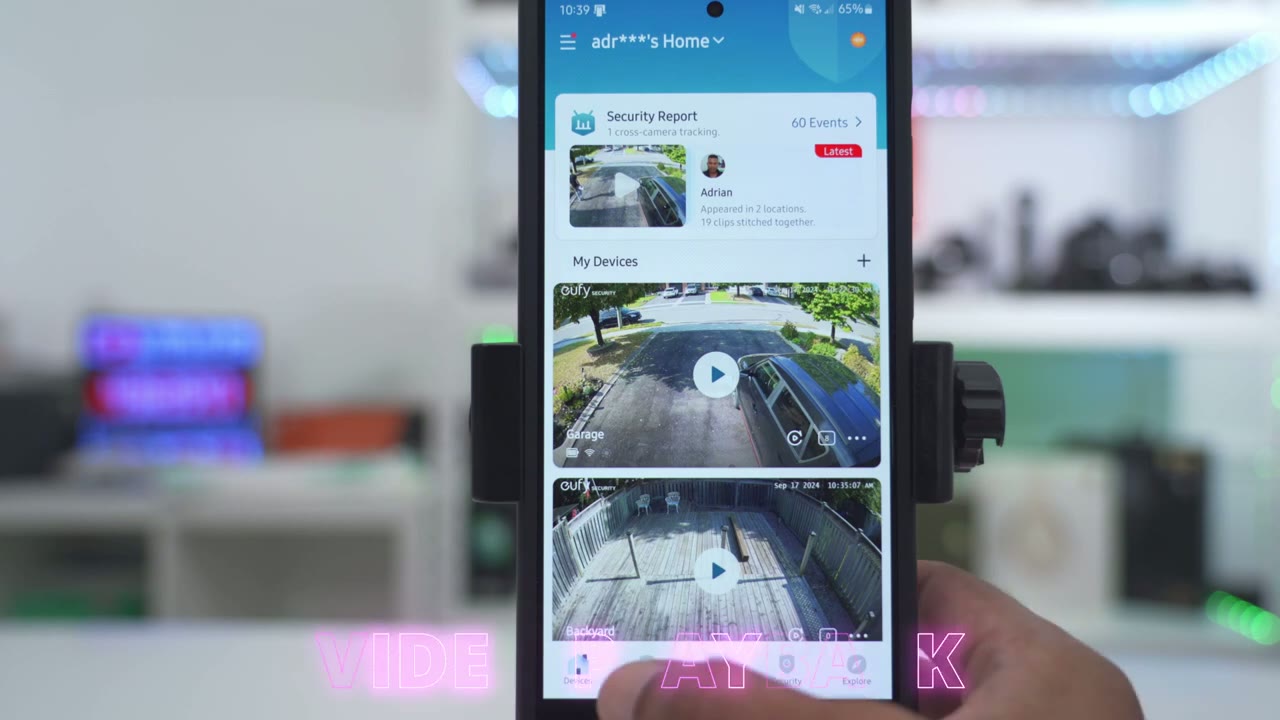
take a look at the events so you can see it has me tagged here and it shows garage now I can go ahead and filter to say hey I want to only see you know humans and I want it for both the garage and backyard and the home base 3 and then I can click on confirm and it’s going to show me you know when humans were detected in the garage and uh backyard so you can kind of fine-tune that how you like but I’m just going to clear these filters for now and I’ll go ahead and tap on the first one here so you can see it’s detected by local AI let me cut the volume so you can hear the microphone pick up is fantastic so it did correctly identify the car and you know you can kind of teach the system you know if it ever misidentifies something you can kind of correct it but let’s go to something else so this is one with me again and even from far away you know it’s accurately ident identified it’s me so are these the same person and you can say yes to just kind of help it learn um completely optional of course and right from here you can click download to download the clip and it downloads super fast much faster than I remember with the previous system you can also share the clip uh donate it to UI to help them learn you can delete it or add it to your favorite so fairly standard here and then of course you can click on the date you have and then just you know go through and play any type of video and you can see the pullup is really quick as well and if there’s any Clips you don’t want you always have the option to manually delete them another way to review footage is to just hit this little playback icon here and you may find this uh more preferable because it does break it down by if it was a vehicle or if it was a person that was detected so depending on your preference you could just use this kind of horizontal timeline or the vertically stack timeline the next thing I want to
Cross Tracking
look at is cross camera tracking and it works fantastic on here so I amable the feature and right now for today it’s showing that there were 60 events and I appeared in two locations with 19 clip stitch together so if I tap on that it’s showing me in the garage or in front of my garage and then I went to the backyard so you can kind of see that timeline and it’s just going to jump ahead and play at 4X speed to show you know kind of movement or subject trajectory and even though I have one camera pointing directly in the front of the house one all the way in the back you know it’s still intelligent enough to you know kind of figure that out under AI Edge this is where we can manage faces so this is a familiar face you can add unfamiliar faces or tag them or just you know pick faces from your phone’s album as a familiar face but cross camera tracking this is what I had to set up to get that feature so it is currently turned on and you can pick which cameras that are going to be you know kind of involved with that of course if you have multiple uy cameras say you know a doorbell a wall light Etc you have that option to add those in there and then the continuous tracking time can be from 2 minutes to 30 minutes I just left it at 2 minutes that’s been working great for me and then we also have tracking assistance under the
Security Modes
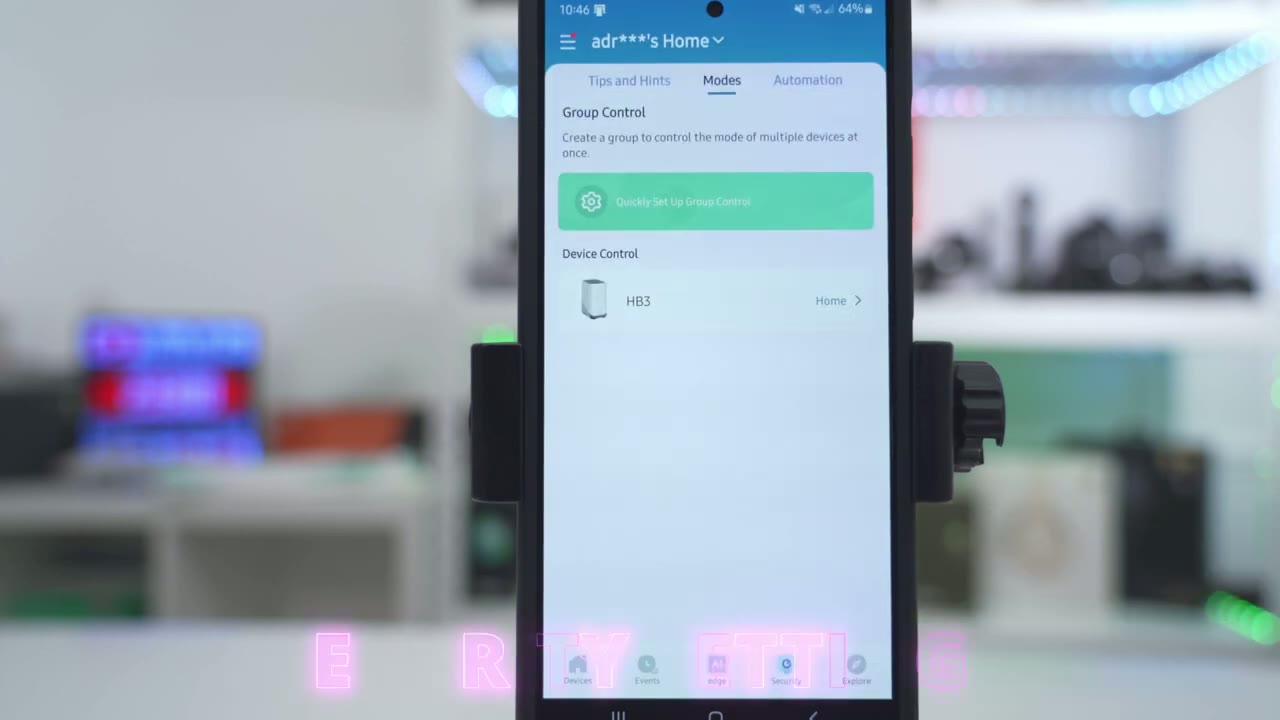
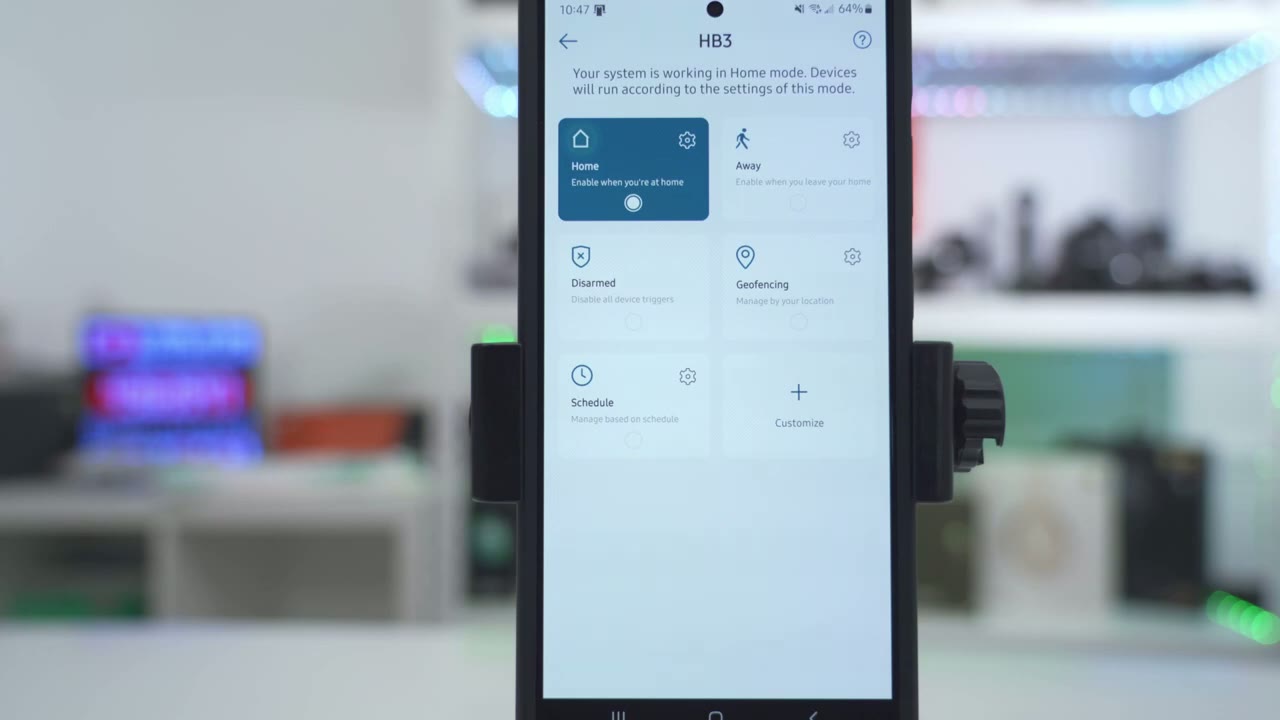
security tab we get tap into the home base while we’re under modes and you can see it’s set to home mode right now if I tap on the gear icon I can see there’s an alarm delay of 0 seconds leaving the Late 0 seconds and then for each of the cameras they’re going to record and send notifications but they’re not going to trigger any type of alarms for the camera or the home base or the light however if you went into something like a way you could tap on that your icon and now you do want the camera alarm or maybe you want the camera alarm and the light alarm and the home base alarm so you have options there home away disarm to disable everything say you have a lot of people coming and going for a party or an event you have Geo fencing options here and a schedule as well and you can also create your own custom uh
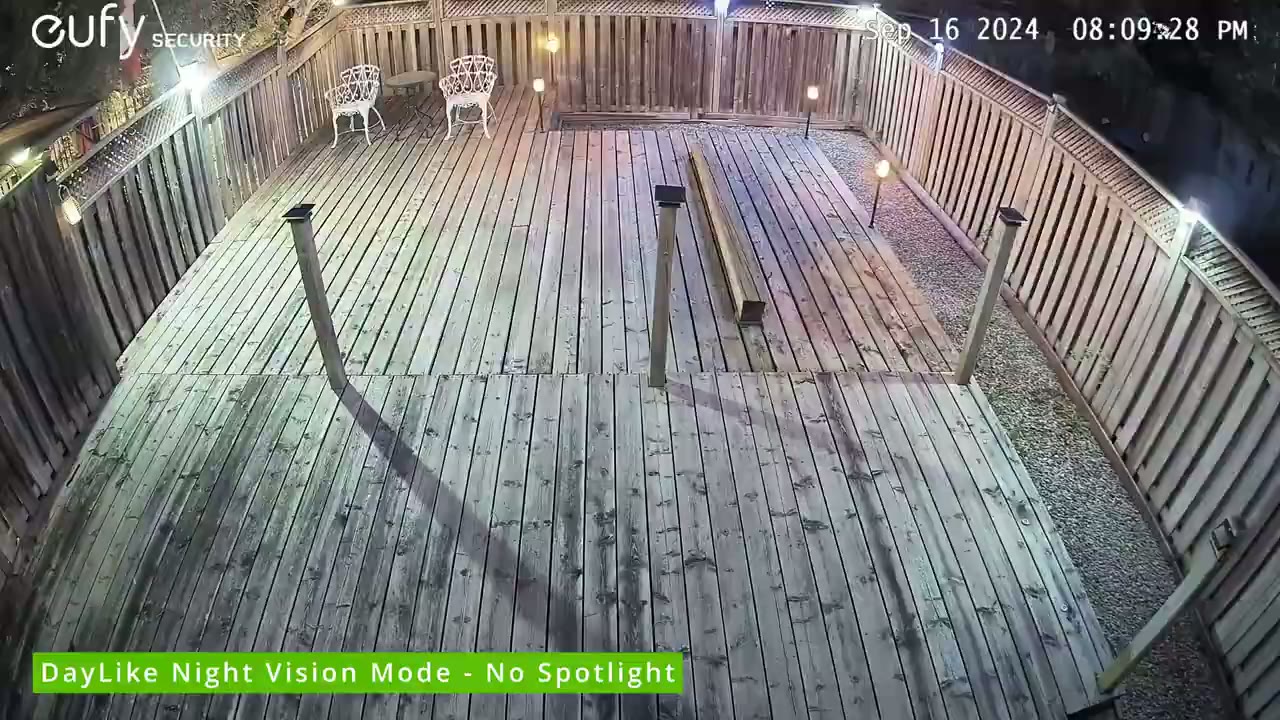
Video Quality
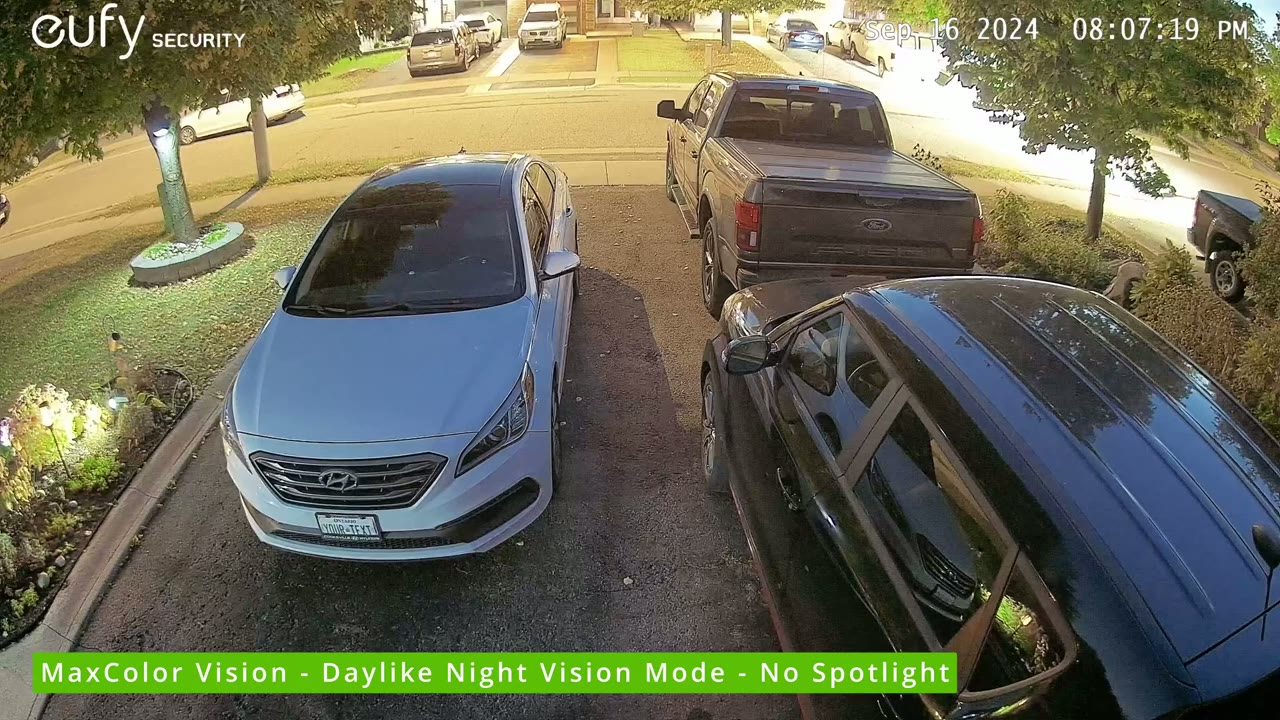
mode videos also look good in 4k during the day and at night and it’s easy to make out faces and details pretty much any time of the day you’ll also probably be able to make make out most license plates at a distance of about 30 ft to 9 M away and at 135° field of view you could pretty much see everything going on so you’re not missing much but the standout feature is definitely the night vision video thanks to the max color vision technology on here paired with the 4K recordings and that super low f1.0 aperture low light or dark scenes look almost as good as daytime video so they’ve done a good job of boosting the video brightness without making it too washed out like I’ve seen with other camera systems now there’s four night vision modes that you could switch between so there’s a standard mode a daylight mode which is where it’s going to kind of enhance the overall brightness there’s a spotlight mode and of course an infrared or black and white mode and this is all powered by their AI image signal processing technology with most camera systems I will have the spotlight come on anytime videos are being recorded but that daylight mode looks so great on here that I’ve actually just left the spotlight off just to help also save on battery life because night vision video just looks fantastic on here motion detection Works
Motion Detection
fantastic on here and it’s super quick usually within 2 to 3 seconds the camera is able to pick me up whether it’s day or night and once motion is detected app alerts are sent quickly as well now the range is about 39 ft to 12 M away in terms of motion detection and you also have the option to get those quick app alerts either just a text app alert or you can get a text app alert with a thumbnail company too and now that we also have radar detection in addition to P there’s way less false alerts so you can easily get accurate identifications of humans or vehicles and pets the
Adaptive Spotlight

spotlight performance has also been upgraded thanks to their adaptive Spotlight technology which automatically adjusts to help keep subjects nicely exposed without you know kind of blowing out the highlights based on their distance to the camera so I’d say that the spotlight is great for Illuminating subjects that are you know close to the camera or a medium distance away but it won’t fully illuminate your driveway or yard but it’s not really necessary because the max color vision technology on here is so good during night vision or low light video that you don’t even need the spotlight turn on the alarm
Alarm Siren
also gets super loud even at 70% volume so you can have the camera light up or the camera and sound going or just sound and you can also have the home base go off and here’s a demo of that 2ay talk also comes through nice
2 Way Talk
clear and loud thanks to the AI noise reduction technology but here’s a demo of that here’s what two-way talk audio sounds like on the S3 Pro thanks to the
Battery

solar plus 2.0 technology and the 50% larger solar panel when looking at the previous model battery life has been great for me so far so even on my garage camera that I have installed kind of under my gutter that overhangs and blocks a lot of sunlight during certain times of today it still stays pretty much stable in terms of the battery life 1 hour of solid charging every day is usually good enough to keep it topped up but it’s really going to depend on your settings whether you’re recording in 4k your motion detection settings whether you’re taking snapshots or you have the spotlight on so keep that in mind the built-in 13,000 mAh battery is great to help you Coast by anytime you go through a batch of you know overcast days now there is also an optional solar panel that you can connect at a camera if you can’t mount it somewhere ideal since the
HomeBase 3

cameras record locally to the home base 3 there’s no need to pay for any type of monthly fees if you don’t want to so you have added peace of mind and privacy you can also upgrade the storage from 16 GB all the way up to 16 tab if you need to and that would come in handy for the 24/7 recording and of course you get other benefits like the cross camera tracking between various yui cameras and the ability to empower other yui cameras that don’t have some of these AI features thanks to the bionic mine AI so
Upgrade?
should you upgrade to the S3 Pro if you already own the UI cam 3 or the s330 and I think it’s a definite yes and here is why both cameras record in 4k at 135° fill of view but the new f1.0 lens paired with the max color vision technology just gives you way better night vision performance the solar panel is also 50% larger on the new model and with the solar plus 2.0 technology it’s even more efficient at charging there’s also now radar sensor on here so you can get way more accurate motion detection alerts and notifications the Adaptive Spotlight features also a nice bonus but the biggest change is that you now have the ability to have 24/7 recordings if you choose to permanently wire the camera the 24/7 continuous video
Wired Mode

recording is what I’m most excited about when it comes to this new camera system now at the time of this review since I’m on a Beta app of the yui security app this feature is not available on there but when this camera officially launches you will have the option to do that so
Recommended?
the brand new yui cam S3 Pro is a definite upgrade over the previous model in pretty much every single area you now have the ability to have 24/7 recordings in wired mode there’s better solar charging thanks to the solar plus 2.0 technology and 50% larger solar panel and night vision video is greatly enhanced in low light conditions thanks to the max color vision technology and the Adaptive Spotlight motion detection and alerts are super quick thanks to the p and radar sensors and the cross camera tracking allows you to easily monitor all activity going on around your home and you get all of those features for zero monthly fees now there’s other camera brands out there you buy the hardware but you’re paying monthly to unlock a lot of the functionality it doesn’t work like that with these systems you just buy it once there’s not going to be any surprises and you get full functionality the whole way through so if you’re interested in picking yui’s brand new yui cam S3 Pro I’m going to leave links down below so you could learn more or to pick one up for yourself don’t forget to check out some of the other reviews on my channel I review a bunch of different Tech I’m sure you’ll find something you like and if I can ask a huge favor would you mind liking and subscribing if this video was helpful to you it truly does help me out a a lot as a small and growing Channel and I’ll see you in the next one soon
Buy 1TB Drive for HomeBase on Amazon
Buy 2TB Drive for HomeBase on Amazon
Please note that some of the links in my video descriptions are affiliate links where I earn from qualifying purchases. As an Amazon Associate I earn from qualifying purchases.