☑️ Legion 7i with 3080TI & 64GB RAM USA
Please note that some of the links in my video descriptions are affiliate links where I earn from qualifying purchases. As an Amazon Associate I earn from qualifying purchases.
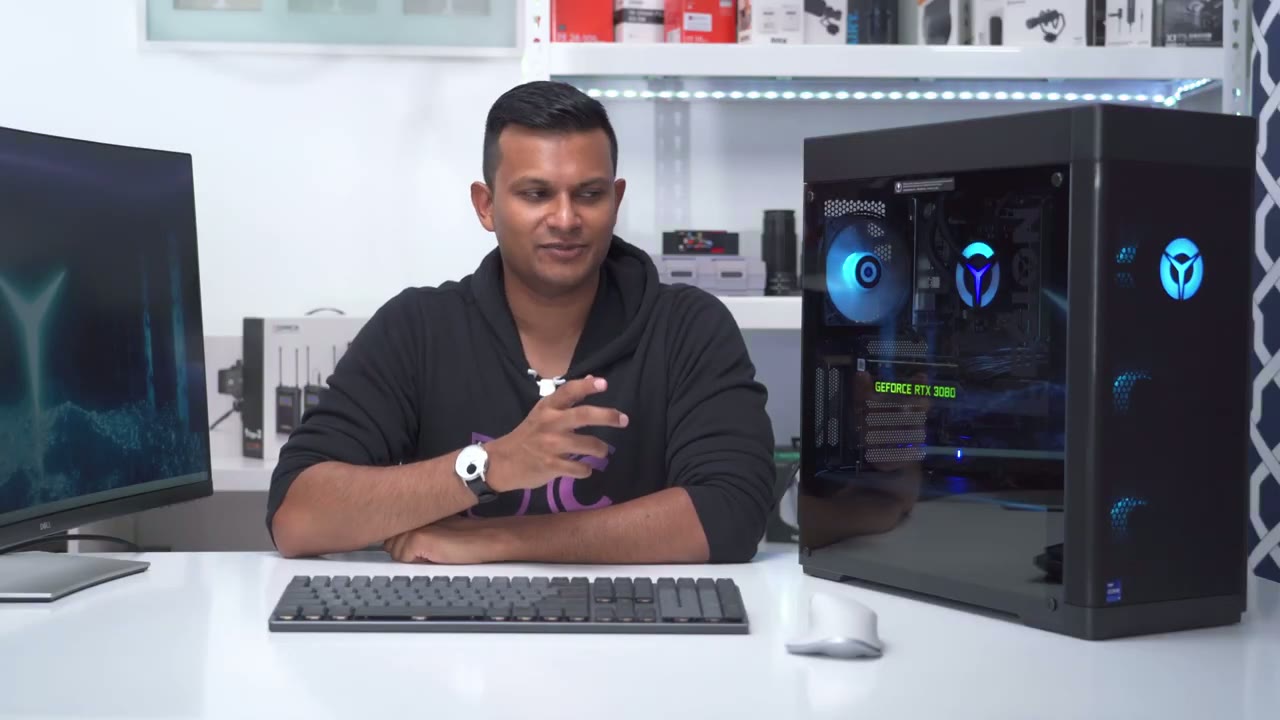
Intro

hey it’s Adrian and today I’m really excited I’m going to be reviewing this Lenovo Legion t7i gaming desktop now this one in particular comes with an Intel I9 12900k and RTX 3080 with 10 gigs of RAM 32 gigs of ddr5 4800 megahertz and an all-in-one liquid cooler so in this review I’m going to cover you know just the general overall performance gaming performance a little bit of you know rendering test to see how well it does with video rendering and you know noise levels and things like that so if you’re interested in buying this computer stick around all
Pricing

right so before I get into the rest of the review I just want to mention that I bought this with my own money it’s not a sponsored video it wasn’t sent by Lenovo and this particular configuration comes in around 2400 us or 3100 Canadian of course taxes aren’t included and I think it’s actually still a pretty decent value and I’ll get into that later in the video in terms of specs so you get a
Specs

34 liter case and that weighs about 38 pounds or 17 kilograms and it comes with an I9 12900k so that’s the 16 core 8 performance cores eight efficiency cores it’s on a z690 motherboard there’s an RTX 3080 lhr with 10 gigs of vram one terabyte Gen4 SSD and a one terabyte 7200 RPM 3.5 inch hard drive there’s 32 gigs of ddr5 RAM at 4 800 megahertz and there’s two 16 gigabyte sticks and the Max Capacity is 128 gigabytes there’s also an 850 watt gold rated power supply and you also have pcie 5.0 pcie 4.0 and two pcie 3.0 slot there’s also m.2 slots it’s a 360 millimeter AIO with addressable rgbs and the case dimensions are 8.3 inches by 17.7 inches by 19 inches in terms of the overall case
Case Design

design it looks really nice I wasn’t too sure when I saw it on the site but in person it does look really nice the build quality is also excellent but let’s take a look at the details on the back of the case you’re going to find standard USB 2.0 ports there there is a small light switch iridelity cycle through some preset lighting modes there’s also some USB 3.2 ports there and one type c Port you also have an rj45k connector if you want to hardwire it you have your audio ports and spdif and then finally on the graphics card you have three display ports and one HDMI on top of the case you have two USB 2.0 ports two USB 3.2 ports headphone jack microphone Jack power button but there is no type c Port anywhere to the top you also have this removable dust filter here which I’ve loosened and there’s two 120 millimeter fans as well so you’re not going to want to leave anything on here to restrict airflow the left side of the case is where you’re going to find this very thick glass panel and the only way to remove it is to remove these four screws so let me just go ahead and drill that so I just want to show how thick this glass panel is and because it’s so thick it’s pretty heavy too so you can see that’s about how thick it is hopefully I can get that in Focus so it’s pretty thick so these four areas where the screws were they do have like a rubber fitting around here to minimize vibration with the glass and at the bottom here you have a shroud and the power supplies in there there’s also two standoffs if you want to mount the GPU vertically taking a look at the inside of the case so you can see this is the RTX 3080 and here’s the radiator for the all-in-one cooler and you can see there’s only a couple of inches there so if you’re planning on upgrading this card later that’s something to be mindful of that it’s almost the entire length of the case Insight now one thing I want to point out is you can see there’s kind of like a brace right there or a bracket and that’s screwed into the graphics card and it actually did a pretty good job because this was shipped without any type of packing foam and the graphics card stayed you know nice and tight in there no sagging or anything like that so here’s the 3080 removed so you can see it’s a triple fan design not a bad looking card and of course for the inputs you have HDMI and three display ports cabling wise everything looks pretty good A lot of stuff is zip tied and kind of routed out of the way and here is where you’ll find the one terabyte Gen4 nvme drive so if you do want to upgrade that you’ll have to remove the graphics card to get access to that and we have the two sticks of 16 gig ddr5 ram here the cabling job is still really nice at the back everything’s out of the way now this did come with a 3.5 inch hard drive but you also have the option to add in a second one and you have the power cable and Sata cable they’re already pre-wired now you you can also put the 2.5 inch ssds there however there’s no wiring there that’s pre-ran but it does come with a bunch of cables to add to the power supply and you know you have some SATA cables and things like that here so in terms of fan placement the three in the front are the intake fans to pull in cooler and then the two in the top and the one in the rear are going to be the exhaust fans to vent out the hot air at the bottom of the computer there’s four rubber feet just to again minimize vibrations and there is a removable dust filter not secured by a screw down here the front of the case has this perforated mesh just to let air flow in to the intake fans and you have an I9 sticker here and of course the Legion logo up there here’s an example of what
RGB Case Switch

happens when you press the lighting switch so when I press that all the lights are cut except the Legion logo and the GPU light again everything shuts off except the GPU light and then finally one more press that turns everything on okay let’s take a look at
RGB Lights & Vantage Settings

the Lenovo vanted software so this is the software that comes with lenovo’s Legion computers or laptops to control everything so you can see on the dashboard here you can see CPU utilization mine is really high because I’m running Ops and it’s recording um 4K lossless now you can also see GPU utilization and vram and you also can see your hard drive space and if you click into info you know you have your serial number and a bit more info you could do um system updates here Hardware scans and things like that now the most important area I think in this is up here which is thermal mode so you can see there’s a performance mode balance mode in quiet mode and you can pick whatever suits you realistically I’m just going to keep it on performance mode because I want the maximum performance whenever possible it’ll be higher fan speeds but so far it hasn’t been loud enough where I think I need to be out of this mode and I’ll test that later for you now you also have an option here for Network boost and Auto closing this is just when you’re gaming you can kind of cut different software so that you have most resources dedicated to gaming now most importantly probably is going to be lighting so you can see there’s different profiles here so if I click on number two and you look at the computer you can see all the lights change to blue and then if I hit three it’s pretty much dark except for the Legion logo at the front and the graphics card I’m going to put it back to one and also you could just turn it off completely so you have no lights but that GPU light always stays on but if you go into customize you can see here are the three profiles we were cycling through and you can just customize however you like so take for example profile one you can see right now it says Legion icon lighting front so I have options for static Flickr where it’s going to just flash and breathe where it’s going to slowly fade in and out I’m just going to leave it on static but you can cycle through here and you can change the ambient lighting again so some of these lights they’re kind of locked to a specific color but as you get deeper into here you can see now I can pick a different type of effect so there’s a rainbow effect there’s CPU temperature which is pretty neat if your CPU is cool it’s going to be blue if it gets hot it’s going to be red and you know you could just play around with these different modes now you can also change the brightness or you know intensity of the light and the speed so you can see if I pick something like four and I go to let’s say meteor you can see that light is rotating pretty quickly now so I go to number four speed is at four again and and here is where you have some customizability so I could change the color on the back then there’s a green you know red pink Etc then finally you have the front fan lightings set the blue right now but again you can change these and you can change the speed of them as well so you can see see it right there and then last is the top fan lighting I can’t get that in this shot unfortunately but again you have the same type of options
Warzone Gaming

so when it comes to gaming performance and Warzone if I go to the options you can see it’s up to full screen and the resolution is at 4K right now now you can see frame rate is set to unlimited if I go to Quality pretty much everything is on the highest settings that it could be and then if you go all the way down you can see the dlss is on and I have it set to the 4K mode not the 8K mode and that’s about the frames per second I’m getting right now if you look at the top left now if I switch that to 1440p for those of you who are going to game in 1440p you can see that’s the FPS that I’m getting right now for those of you who are going to be gaming in 1080 so I’ll switch that right now and you can see that the frames for a second have jumped a little just keep looking in the top left corner there so overall gaming performance and Warzone it’s pretty smooth again I have everything set to Max and I was running OBS in the background and it’s capturing this at 4K resolution that’s using a good chunk of the graphics cards resources so obviously when you’re playing you can expect better performance than I’m
Fortnite Gaming

getting playing fortnite with the 3080 was even better than our Warzone of course so I was getting around the high 90s in terms of FPS and that’s based on it being at a 4K resolution unlimited frames per second full screen now at 1440p the frames per second were even better so I was averaging around 160 around that range and you can see gameplay is quite smooth there’s really no hiccups no problems at all for those of you who are going to be gaming in 1080P so applying 1080p resolution with the 3080 the frames per second were pretty much in the 200 series so you know having it at an unlimited FPS or frame cap it’s a really smooth really food experience you’re going to have no problems running fortnite on this playing Microsoft
Flight Simulator

flight simulator on 4K was not something that I think was going to be possible with a 3080 but you can see when I launched a game it actually recommended ultra settings by default now I obviously have no experience with this simulator and one of the viewers had asked that I test this just so they could see how the computer handles it on Ultra quality and I can say that it handles it effortlessly it’s very smooth I did forget to enable the frames per second unfortunately but you can see it’s a really smooth type of experience there’s no lags hiccups or anything like that and the computer wasn’t you know overly loud or overheating like crazy so it handled it really fine even at a 4K resolution
3D Mark Score

when it came to 3D Mark the computer got a pretty good score so it got 17 087 and I had to run this without OBS because when I ran it with OBS I was getting around the 15 000 to 16 000 range so turning off screen recording definitely helped so you can see that it puts at about you know 93 to 94 better than other similar benchmarks cinebench
Cinebench Score

scores were pretty respectable too so for multi-core performance it had 26 153 points and that puts it above a threadripper 1950 X which is also a 16 core processor and then single core performance was 2009 and it was at the top of the list so I have the free
Rendering Performance

version I don’t have the paid version which uses you know most of your GPU so keep that in mind what I’m going to do is I’m going to drag this almost 20 gigabyte file so it’s a 21 minute clip bring it into resolve and just go ahead change the frame rate and let me let that load up so that’s quite a large file you can see the timeline resolution is set to 4K and then playback quality it’s up to full now if I go ahead and hit play you can see there’s not really any drop frames it’s perfectly fine now I’m just going to scrub through really quickly and see what happens foreign seconds to catch up but then it goes right on playing so there’s not really any problems so even with a 20 gig near 20 gigabyte 4K file and this has 4k on a 4K timeline there’s really no problem here so for an 18 minute 4K clip that’s around 20 Gigabytes in size it took about 10 minutes to render and again it wasn’t using as much of the GPU as possible because I’m using the free version of resolve which mostly relies on the CPU in terms of overall
Overall Performance

performance everything is really Snappy like I have a bunch of stuff open I can go ahead open the Lenovo Vantage software you know that pops up really quick so right now I have a browser open I have OBS recording in 4k quality almost lost less quality I have a 4K video playing and that’s a resolution that’s set right here and keep in mind this is all on a 4k monitor so it takes a bit of resources from the graphics card to drive that type of resolution I can also have you know work in resolve going and I can tab over to Call of Duty and see I’m still getting great frame rates so you know most people aren’t going to have all this stuff open so for General use or even you know a bit more advanced use this is way more than capable so right now I have nothing open
Noise Levels

on the computer so it’s just sitting on the desktop and you can see I have a sound meter at the bottom there and it’s just monitoring the audio levels okay so I’m rendering a 4K file in resolve and it’s almost 20 Gigabytes and we have about six minutes left to go
Temperature Levels

looking at the ambient temperature so you can see right now the computer gives you a couple options in the Lenovo Vantage software so you have performance mode where it boosts the computers performance with higher speed and power consumption there’s a balance mode in keep quiet mode I’m realistically always going to have it here because I want the max performance that I can get now it’s only going to really kick in if I’m doing something strenuous or you know resource intensive so right now it’s very very quiet but if I go into a hardware monitor we can take a look at the ambient temperatures and the only thing I have going on in the background is I’m downloading Microsoft flight simulator so here’s the overall temperatures in the case and the fan speeds looking at the I9 here’s the temperature so the AIO is doing a pretty good job of keeping that in check now scrolling down here’s the temperature for the memory modules and then for the SSD now keep in mind the SSD is writing data to because it’s downloading microphone Microsoft flight simulator now looking at the 3080 here’s the temperatures and here’s the fan speed so you can see right now it’s not under any type of load it’s not doing anything and overall the computer is just really quiet gaming under a full load at 4K resolution and running OBS at 4K temperatures are pretty reasonable so the I9 is fluctuating from about you know 63 to 70 degrees and the GPU is at around 71 degrees and that’s Celsius and under 97 full load all right so earlier
Buy or Build?

that I mentioned that the Lenovo Legion was a pretty good value and I know I might cut some heat for that because building it yourself is usually cheaper but let me explain so right now this is on sale for 2400 and here are the specs so what I did was I went on NewEgg and I tried to match the parts as close as I could obviously some of the parts in here are not branded but I tried to match it based on specs so here we go the I9 is the exact same across both systems the motherboard I picked this motherboard because it had the same type of features as on the Lenovo motherboard and the ram is exactly the the same type of spec so 32 gigs ddr5 4800 which you can see here I also picked the cheapest 3080 that I could find and it’s a 10 gig lhr same as on the Lenovo now the cases where I did cheap out a lot on because the legion case is much better quality the build quality is excellent the side panel glass is really thick really heavy so I did cheap out of it here for the power supply I picked an 850 which is what this comes with it hasn’t mentioned it here but I checked the specs and it is 850.
now the SSD here is a one terabyte gen 3 but on the Lenovo it’s a one terabyte Gen4 so again I did cheap out a bit there but it comes with a one terabyte hard drive and that’s what I have here cheapest option so for cooling the Lenovo comes with a 360 ml AIO and I just picked a 240 because that’s all I could find at the time of this video so I did cheap out a bit here so the only things I haven’t included are fans I’m not sure how many fans comes with the fantech system and obviously thermal paste is not in here as well the other thing to note is that the windows 11 license so that’s kind of pricey obviously you can use a reseller site or just install Windows 10 since Windows 11 has been horrible so far since I’ve been using it but taking a look at the price it’s 2 300 versus says two thousand four hundred so you can say it’s about a hundred dollar difference and perhaps you know 200 250 difference if you don’t go with the windows 11 uh
BIOS Settings

key all right so I just want to show the bias options so when you boot into the bias the first time you just hit F1 to get here you can see it’s pretty basic on this first screen so you can just set the CPU performance there’s like no changes that you can make in terms of the RAM and then you can have LEDs on or off but if you go into more settings down here that’s where you can see a bit more information so you know what you have going on in your system uh set the date and time and things like that now going into the devices you can go into the lighting setup and you can change the brightness of the lights so like for the logo and different areas and you can set colors and things like that here so you don’t need to do it with events it’s offer you could do it here or this case and then you have you know other basic type of stuff that you’d expect on any type of motherboard now going into advanced there are some CPU settings here but again there’s no settings that I could find where I could change voltage or anything like that to overclock which is disappointing if you’re planning on doing that now it does have this option here for restore default overclocking so it says if it’s on yes CPU and GPU overclocking will be disabled and if you put it to no it says it’ll keep the setting I’ve played with this on or off and I haven’t seen a difference anywhere so um you know I don’t have any faith in that now going into Power you have you know regular power stuff and there’s nothing in here regarding overclocking or changing voltages so that’s about all you can change in the Bios unfortunately now
Deal Breakers

there are some deal breakers with this system I didn’t find any options in the Bios to overclock the CPU or the ram maybe that’ll come later but I’m not holding my breath the other thing is the Ram from what I’ve seen online the ram compatibility with this board is super picky so I don’t think you could just buy any type of ddr5 module and just slot it in and it’ll accept it so can I
Recommended?
recommend this computer and it’s an easy ask for me because everything I’ve thrown at it so far has been able to handle I’ve been able to game even at 4K I’ve been able to do my editing and it handles the timelines no problem 4K timelines thermals are great noise levels super manageable and just general overall productivity launching apps having many things open which is what I normally have it’s been able to handle all that no crashes no sluggishness nothing like that no overheating shutoffs none of that stuff now could you build this cheaper the answer is usually always yes especially not a graphics card prices are starting to decline a bit maybe you can save a bit more now I did show on NewEgg when I priced it out they were pretty similar in price maybe a hundred dollars difference and if you didn’t get a Windows 11 license and you just use your Windows 10 one again maybe 200 difference now at the time of this video those specs you know it’s still 100 to 200 difference I know graphics cards prices are declining currently so maybe you can pick it up for a little bit cheaper if you try to do it yourself however you know you’re going to save a lot of time because you’re not the one building it if there’s a problem with a park you’re not going to the store to return it if you have a problem you know after 30 days you’re not contacting separate manufacturers for rmas you’re just dealing with Lenovo directly and so far I’ve had to contact them I contacted them about that bent back panel earlier and they’re going to ship me out like a completely new unit I just asked for the panel they said they couldn’t do that they’ll just send me a new unit so I mean the customer service so far has been pretty good so overall I think this is a great option for those of you who want something powerful but you don’t want to spend all the time you know getting part of the building with yourself and you know worrying about potential returns and things like if something’s not compatible you can just buy this it comes to you and it’s pretty much ready to go now if you are interested I’m going to leave an affiliate link down below but I highly recommend you know do what I did go on UA go on Microcenter Amazon you know kind of create like a part list or a wish list add in all the parts and see what the price difference is and you know you can decide if it’s really worth getting this or if you want to try to do it by yourself well I hope this review was helpful you know I really did try to focus on the things that I would want to know as a consumer before I bought a pre-built computer and it’s possible that I did miss something since you guys have different use cases than me and if that’s the case you know please leave a question down in the comments down below and I’ll do my best to get back to you and as always if you found this video helpful please consider liking and subscribing you know I’m a growing Channel it really helps me out a lot and I’ll see in the next one bye foreign
☑️ Legion 7i with 3080TI & 64GB RAM USA
Please note that some of the links in my video descriptions are affiliate links where I earn from qualifying purchases. As an Amazon Associate I earn from qualifying purchases.