Buy New Ring Pan-Tilt Indoor Cam on Amazon
Please note that some of the links in my video descriptions are affiliate links where I earn from qualifying purchases. As an Amazon Associate I earn from qualifying purchases.
Intro

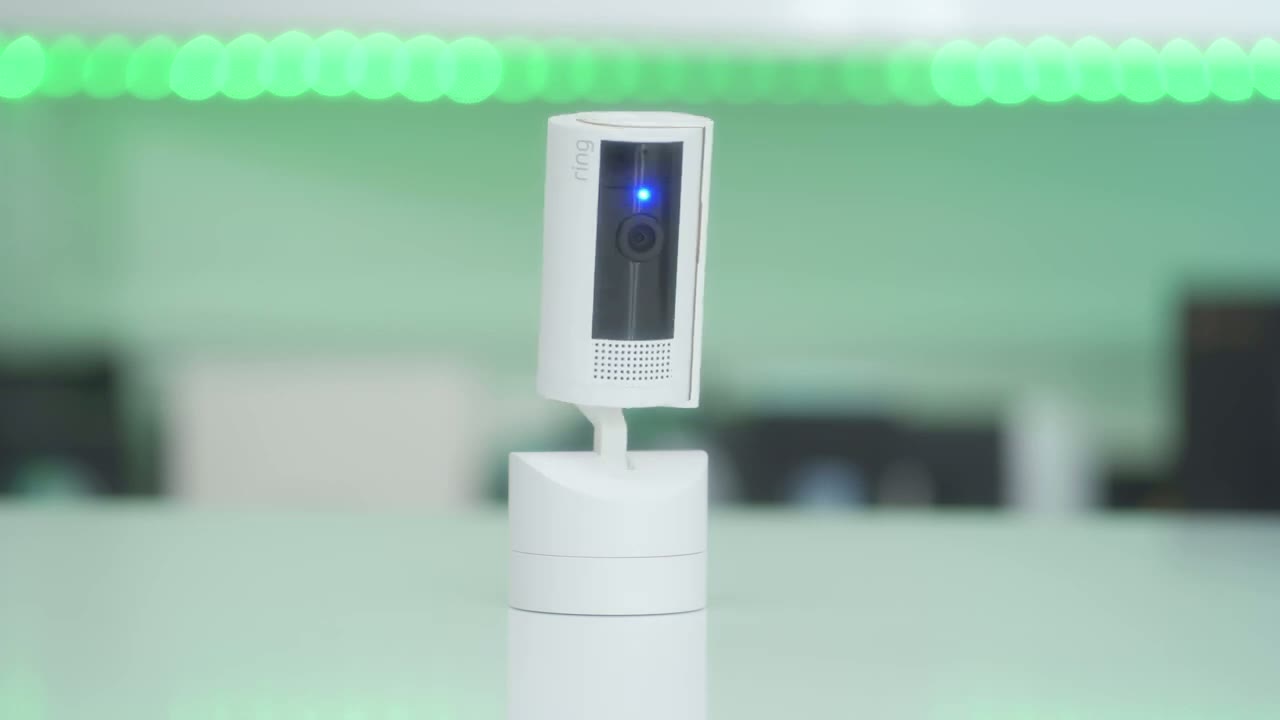
hey it’s Adrian and today I have the brand new ring pan and tilt indoor camera now we have 1080p video we have 360° pan coverage and 169° tilt coverage letting you see the entire room there’s also 143° field of view in static shots which is quite wide we also have a manual privacy cover color night vision two-way talk and more now all that sounds really good and there are some definite upgrades from the previous model but I think there’s a major issue with this camera that will be a deal breaker for a lot of you I know it is for me so let’s take a closer look at how it performs and you can decide if this is worth it for you or if you have to look at other options in the box we
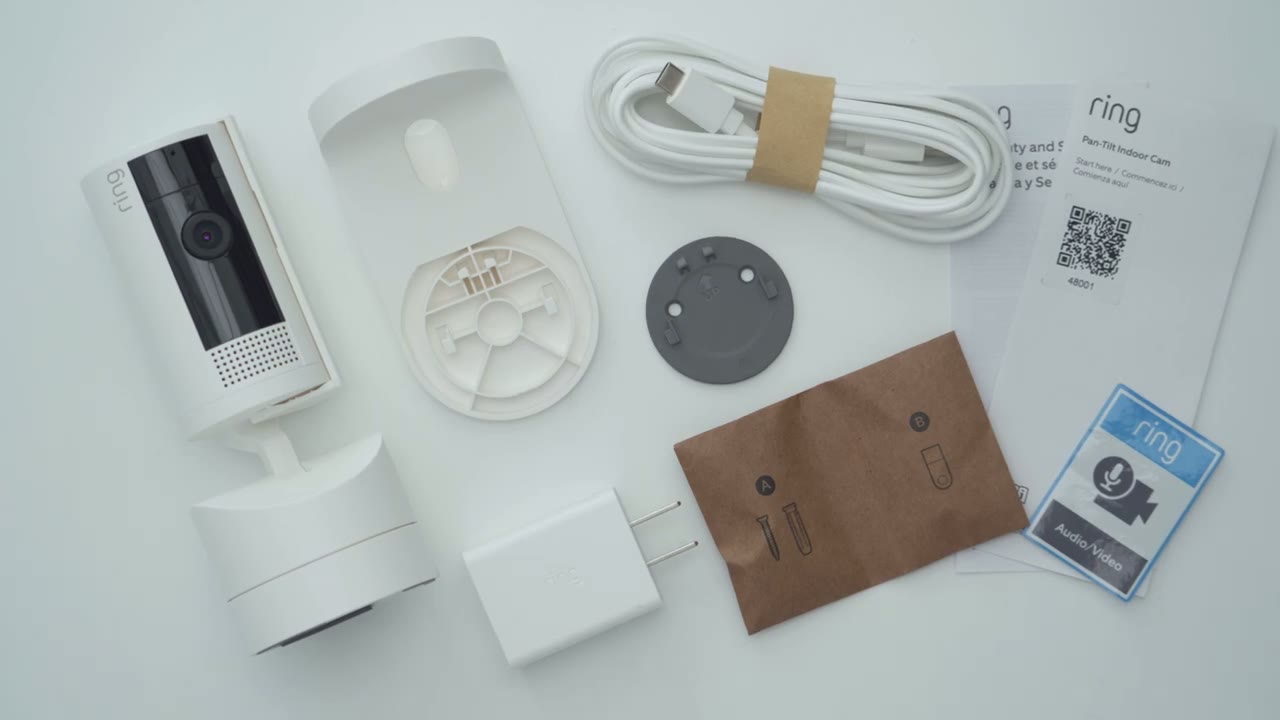
Package Contents
have the pen and tilt indoor camera brackets for wall mounting and ceiling mounting USB a to type-c Cable manual sticker mounting hardware and power
Design
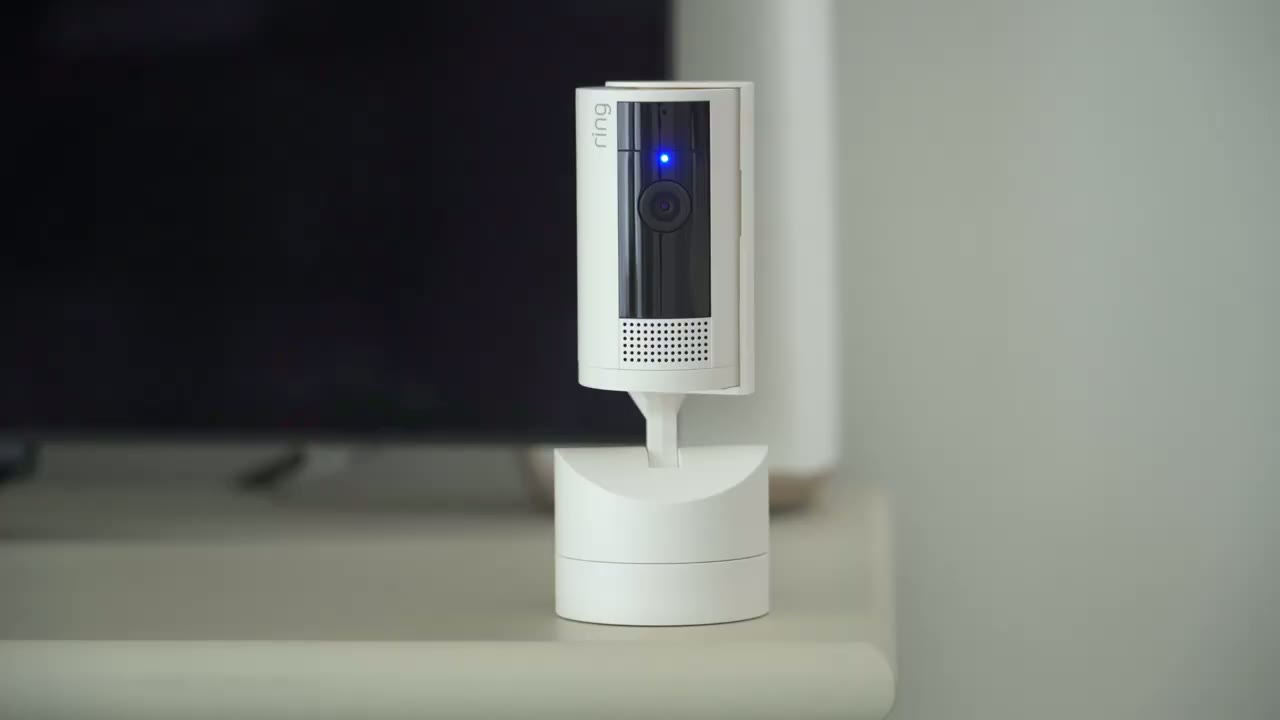
adapter the design is fairly simple and it should fit in anywhere so it’s pretty much an allh build and there’s a good amount of plastic on here it comes in at 234 G or about half of a pound so it’s still heavy enough that you know you can place it somewhere it should kind of stay in place now looking at the front we have the camera module a speaker Grill and we have a privacy cover here that you have to activate manually now you can see at the top it shows the lock and unlock position and when you unlock it it kind of slides out of the way pretty quickly and then we have the ring logo on the side now on the rear is a QR code we’re going to use for setup and then we have the USB type-c port and this is what we’re going to use to keep it permanently powered in and then taking a look at at the bottom we have rubber feet to kind of keep it planted on whatever surface and then we do have cutouts here or indentations to fit in these type of brackets here if you want to mount it kind of upside down or if you want to wall mount it we do have 360° pan coverage so you can see it articulates pretty much all the way around and then we do have up to a 169° of tilt functionality so a pretty wide range I’m going to be setting my up
Installation
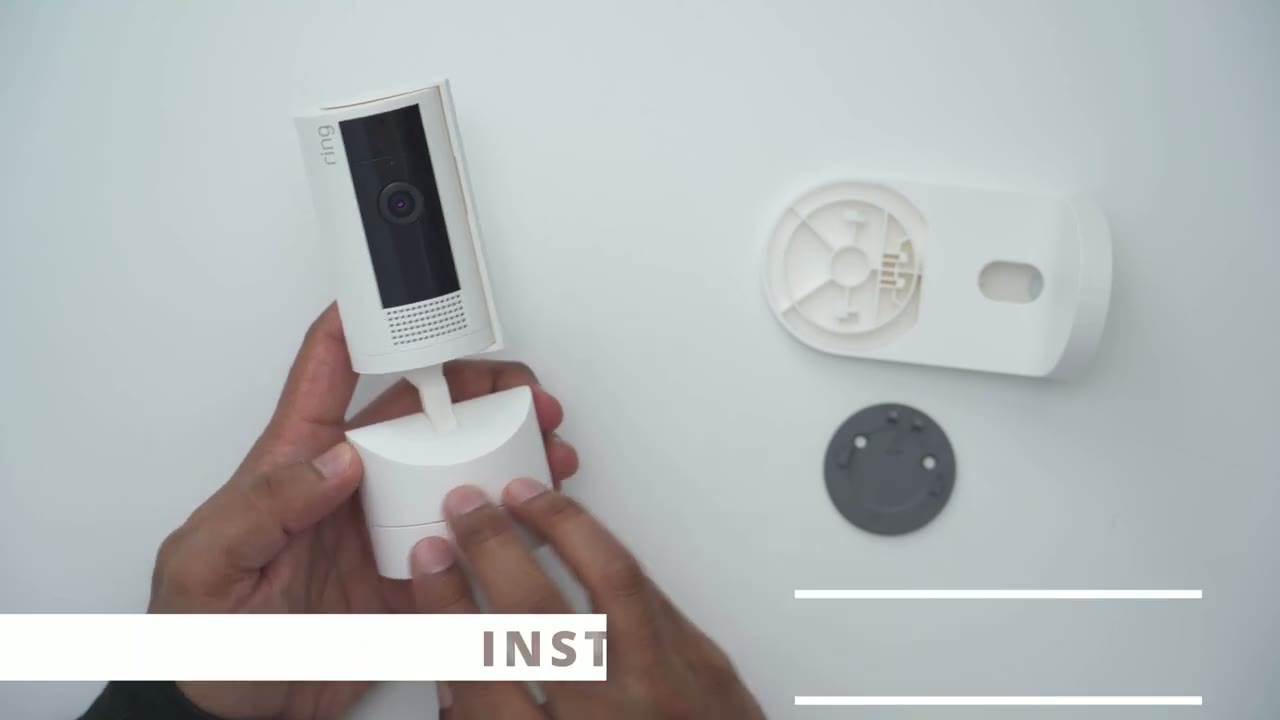
by just plugging it in with the USB type-c port and just putting it on a flat surface however you do have two other options one of them is to use uh this bracket here so basically you just secure this into the ceiling and then just kind of slide this here slide it up when it’s in place just like so and then you could just use the camera while it’s ceiling mounted the other option is to wall mount it so you would just affix the base here and slide it till you hear it click just like so then you would take that bracket from before slide it into here and of course you’re just going to screw all of these in and then you could have it wall mounted as well and you can see you have a good amount of range so yeah a lot of Versatility for mounting I’m now going to add the
Ring App Setup
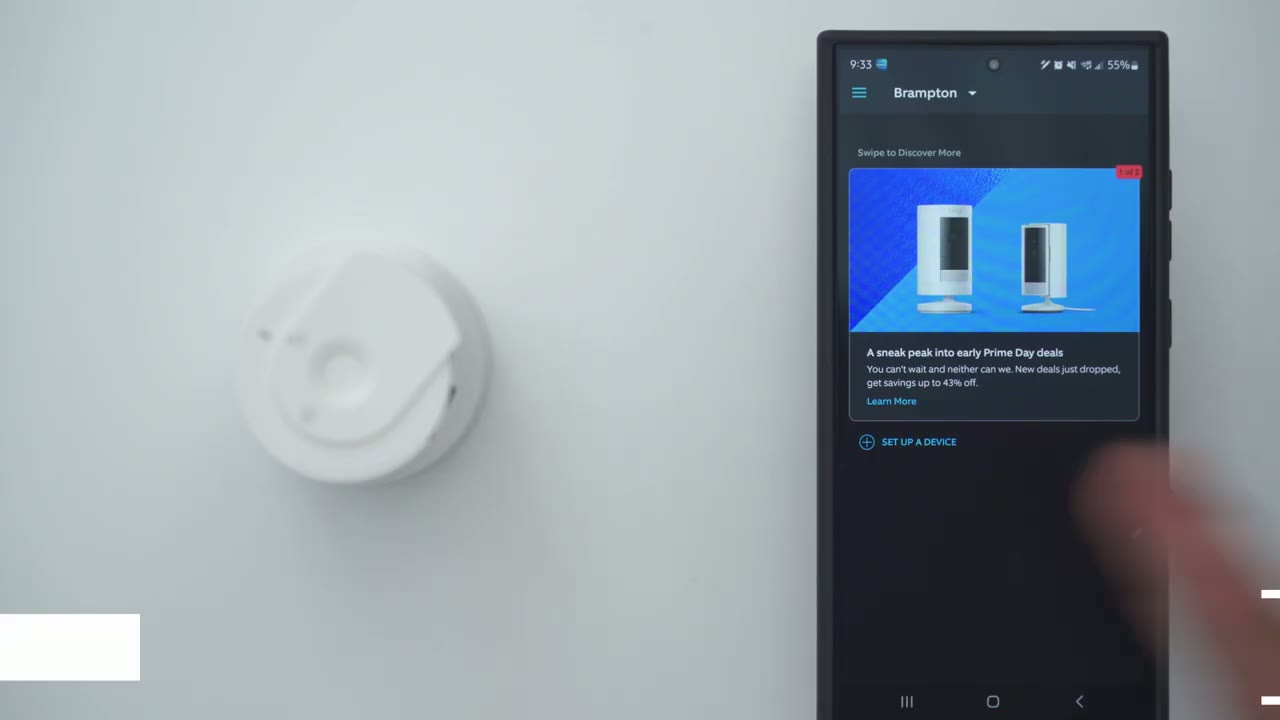
ring penil indoor camera to the Ring app so the first thing I’m going to do is to supply it with power by plugging it in via USB type-c port and what it’s going to do is it’s going to self-calibrate so just give it enough space to kind of do what it needs to do until it goes into pairing mode so here we go so it’s just going to pan all the way through and it’s going to tilt um to the maximum range so just make sure you know it’s not going to snag on anything while you’re doing this and you’ll have to make sure you’re connected to a 2.4 gig Wi-Fi network as well so there is a flashing blue light it is in pairing mode so I’m going to click on set up a device we’re going to go into security cams and now it’s ready to scan the QR code which I showed earlier on the rear of the camera body so I’m just going to scan that right now there we go and if you don’t have a location already go ahead and create a new location but I’ll click on continue I’ll say this is downstairs and my privacy cover is already open so I’m going to say cover is open and where will this camera be pointed I’ll say into the house instead of into the window and then find a power outlet near a Wi-Fi router I’m just going to chance it camera is on and I know my Wi-Fi password already so I’m going to go ahead and agree to everything here so I’m near the device now connected to the Ring app okay so what we’re going to do now is to pick our Wi-Fi network and again make sure you pick one that’s a 2.4 GHz band if you don’t know what that means you’ll have to log into your router and split the band or ask your ISP to help you whether that be to Wii Verizon Sprint Etc set up success
Video Quality

successful the 1080p video performance on here is decent of course when you’re looking at on a phone it’s a much smaller screen it looks very sharp however when you’re looking at it on a larger screen you definitely notice it’s not the sharpest 1080p video out there now can you see the entire room clear enough yes can you make out faces up close and far away yes you can so in that aspect the video quality is passable it’s decent just nothing to write home about I was impressed with the nighttime video because I had this in a pretty much pitch black room and it was able to pick up a lot of detail this is with the color Knight Vision option turned on and the IR LEDs turned on the only time you would turn off the IR LED is if you have it placed up against a window and you want to see kind of outside I don’t recommend that for any type of indoor camera it’s best to just get an outdoor camera so you don’t have to deal with those type of issues because if you turn off the IR LED function or if you disable a color KN Vision the nighttime video is not really usable here’s example footage of what the camera looks like right up against a window pane so you can see the reflection of the camera on the left side there if you place the camera up against your window looking out at night this is what you can expect here’s an example of what 2ay
2 Way Talk
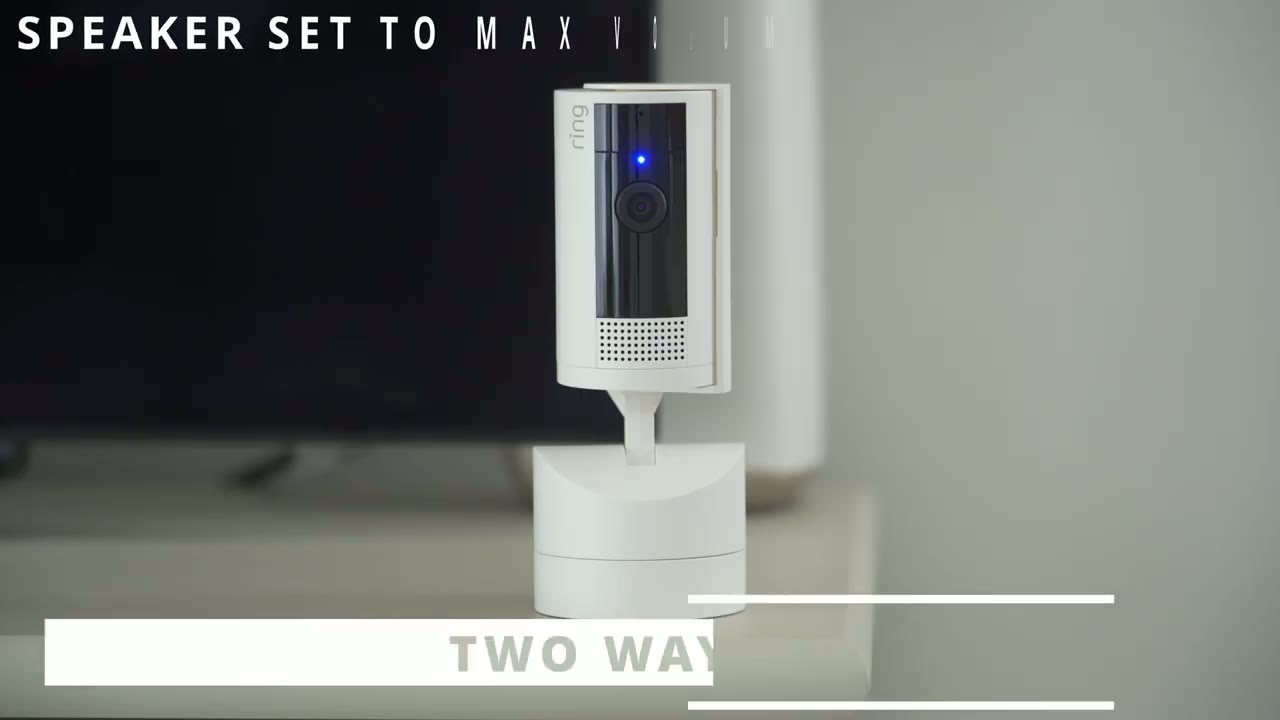
talk sounds like on the ring pan and tilt indoor camera the pan and tilt
Pan & Tilt
functionality is really wide on here so 360° of panning is fairly standard on a lot of indoor cameras but having 169 degrees field of view for a tilt range that’s something that kind of sets this camera apart compared to a lot of other cameras that I review however the camera mostly stays in a static position you don’t have the option to kind of set like preset positions for it to cycle through or Patrol through which is a pretty big Miss opportunity so why would
Potential Dealbreaker
I be talking about preset zones or patrol zones on a camera that has such wide range of movement well that brings me to the major deal breaker that I mentioned and that is that this camera has no automatic motion tracking or subject tracking and on a lot of other indoor cameras that i r that is basic functionality it’s what you expect on a camera that has such wide range of motion yes the 140° field of view is nice you do see a lot at once but if someone exits that frame I would like to be able to see what’s going on so if you’re looking for something that has automatic motion tracking and panning this is not it but stay tuned to the end of the video I will have some recommendations for cameras that are I
Motion Detection & Alerts

had my camera set to the maximum sensitivity and I’m happy to say that the motion detection is quite responsive on here same with how quickly you get the app alerts and then you can just drag down from your notifications you get to see that thumbnail preview and you can also um just press down especially on Android phones and you can see a larger thumbnail preview to the side is it worth clicking into or not
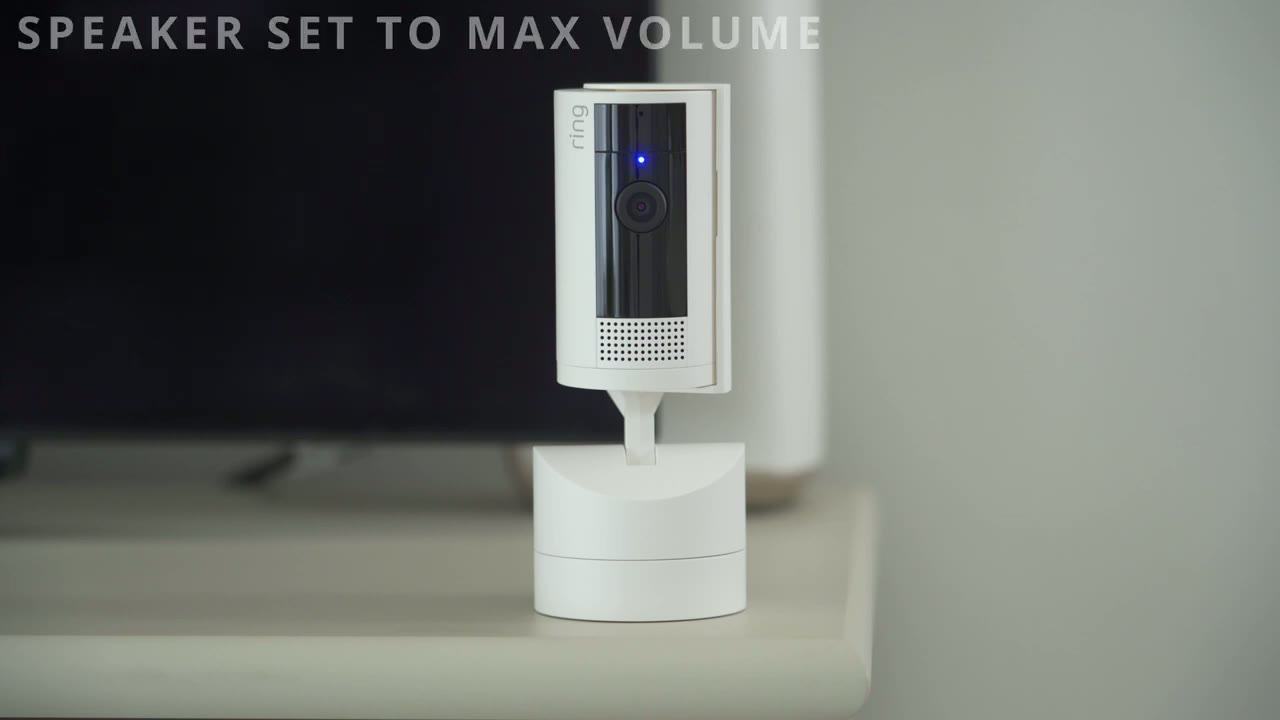
Siren / Alarm
here’s what the siren sounds like at the max volume the camera does have a built-in siren but it’s something that you have to manually trigger in the Ring app so if you got an alert of someone suspicious or if you were looking at live you saw something suspicious you could press press the button in the app and it’ll trigger the siren now the siren is fairly loud but it’s not loud enough for my liking I would like it to be you know two or three times louder if possible but the strange thing is that this actually doesn’t trigger the siren automatically ever what the camera does have is something called motion warning so anytime it detects a person not movement in general it has to be a person identified it will play an audible alert letting them know they’re being recorded here’s what that sounds like hi you are currently being recorded
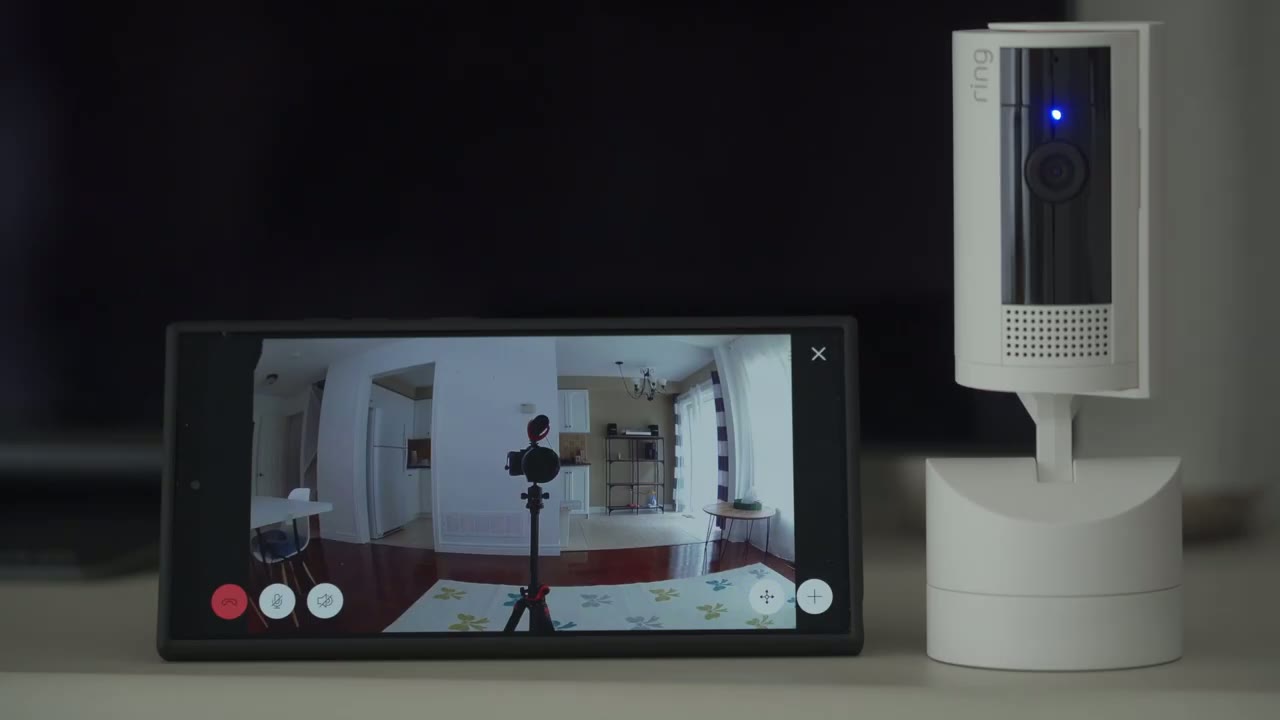
Live View
the live view pulls up really quickly on here and I’m a big fan of the pitcher and picture feature because you could just kind of minimize that live view feed into like a little mini player that you can drag around on your phone screen while you’re texting reading news Etc however if you plan on monitoring live view like for most of the day say you want to take a look at your kids or pets it has a roughly 10minute timeout so after 10 minutes it’s going to automatically disconnect live vi from the camera you have to reenable it if you currently have the stickup cam
Stick Up Cam?

version and you’re considering this camera well one of the major upgrades is the 143° field of view up 13 from 130 on the stickup cam the other thing is that this has a manual privacy cover that you could just rotate to just block all types of recording video and audio but one downside to this camera is that it’s for indoor use only whereas the other model is rated for outdoor
Privacy Cover
use let’s take a look at the full
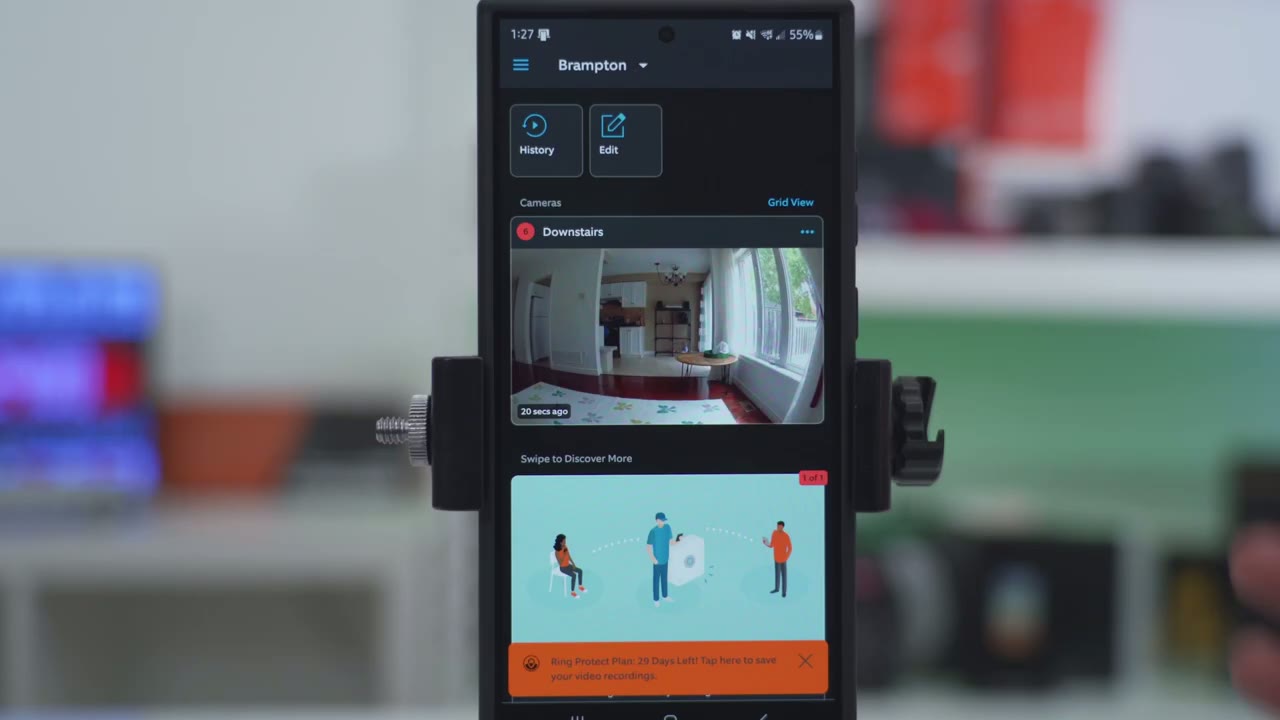
App Settings
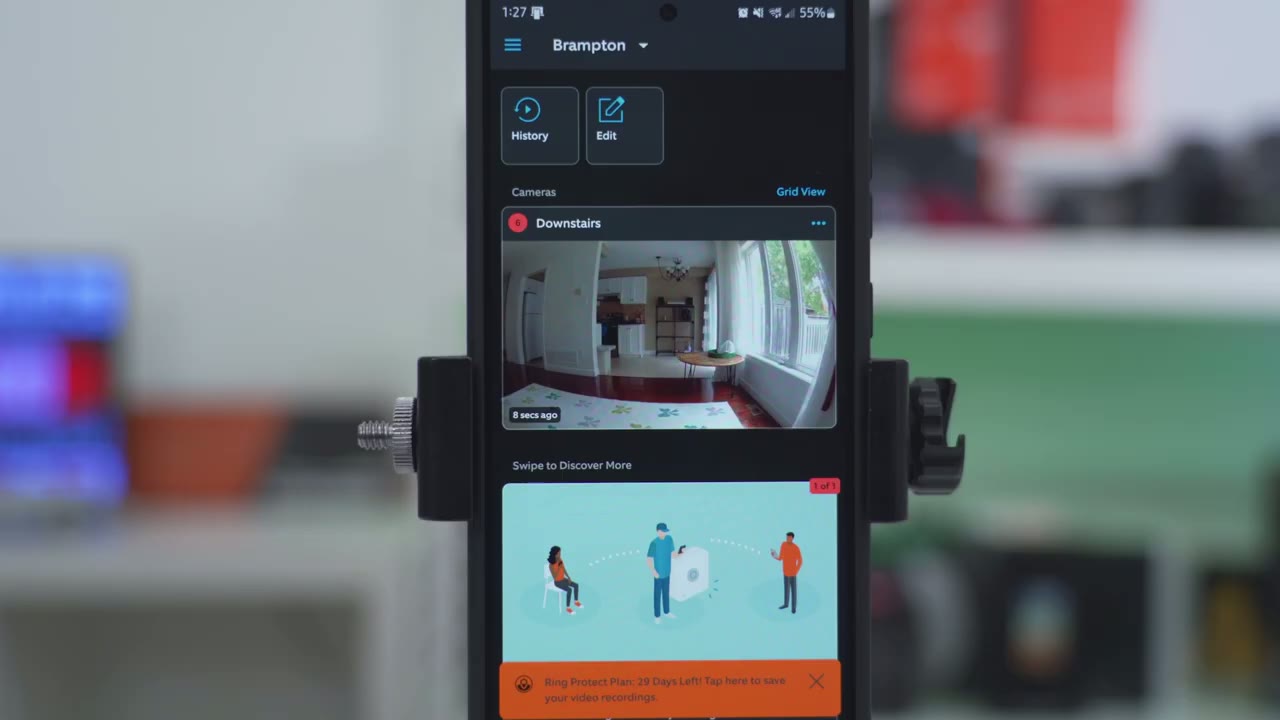
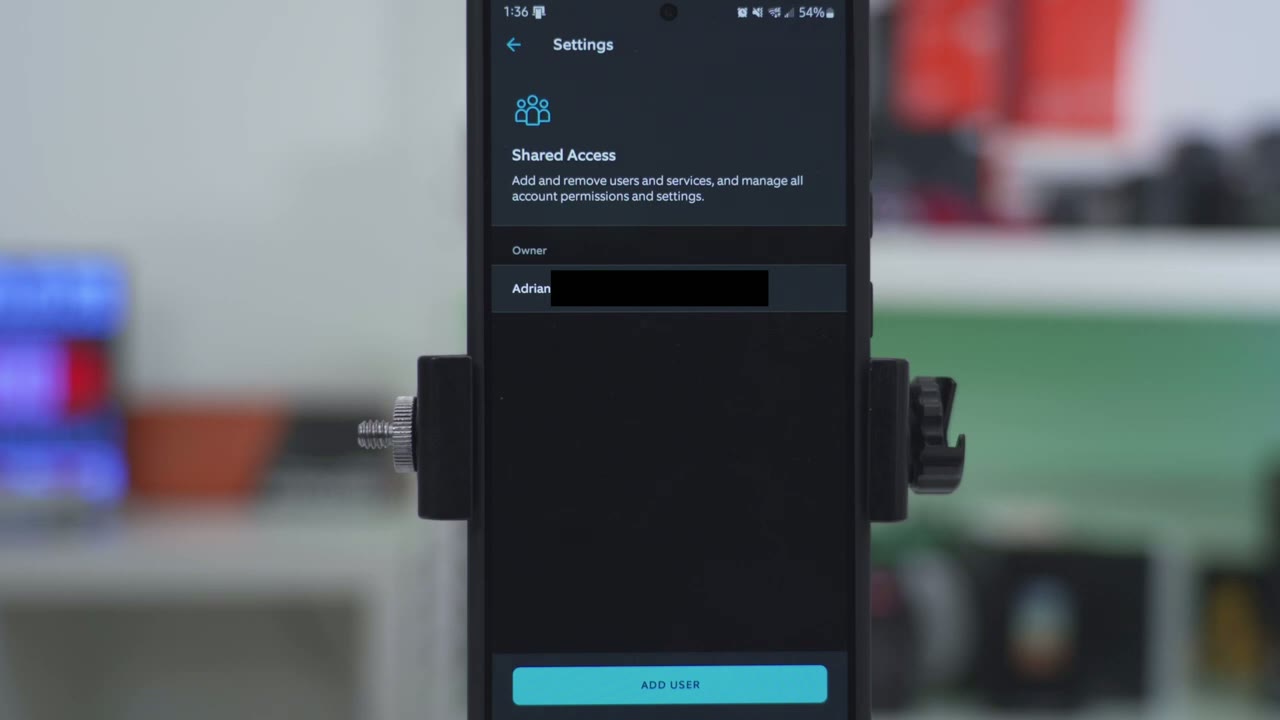
settings in the Ring app so as soon as you open it up you can see a thumbnail of what the camera last saw you can you can also go into this quick menu here disable motion alerts activate the siren or go into the full settings but let’s go into the live view right now and that pulls up very quickly and you could see basically from one end of the room all the way to the other end of the room so it’s a really wide field of view and the video quality is pretty good on here too now let’s go into the full screen and you can see everything a little bit easier and of course you could zoom in and take a look around to get a better idea of what’s going on of course from here you can manually pan and tilt the camera as you see fit so it’s very easy to do now you can’t just touch the screen and pan in it has to be done with those controls right there now from here we can also activate the siren here again we can also go into more and we do have this picture and picture option and you can see that when I disable sorry when I exit the app this can just live in the background and then I can open up the internet and you’ll go ahead and take a look at something else while this is just kind of going and the timeout time is about 10 minutes till this will just disconnect automatically but let’s go into the full settings now in the full settings we will have to close Live View to access it and we have quick toggles for motion detection motion alerts and motion warning motion warning plays an audible warning that you’re being recorded whenever it detects motion pretty neat feature now we also have the option to trigger the siren manually and we can jump back into live view let’s go into event history and this is where you can see everything that’s gone on now you can see have 29 days trial of the Ring protect plan now if you had more than one camera this is where you would cycle through the different type of cameras and then if you had cameras on various floors you could just filter Which floor you want to look at and of course you can filter by event so motion person detected live view now person detected this is only available if you have the monthly plan if you don’t have that you’re not going to be able to filter by that it’s just going to be General motion and you can see you have a thumbnail preview on each of these which is really handy and I think again this is something else you only get with the plan under preview you could set the thumbnails to be a bit larger to make it easier for you or you could just disable them completely if you want to see a little bit more like right here it shows person detected and we can also go into accessories if you have other things paired I do not you can also go into mode settings and just set like a disarm mode a home mode or a way mode I generally don’t use this setting but you can use it if you like it and if you have multiple cameras now under link devices I don’t have any Chimes or anything that link so I won’t go into that and then under snooze alert so you can go ahead and snooze this from 30 minutes up to 12 hours and if you have like a lot of people coming and going that day maybe you’re having a gathering or a party you don’t want to be alerted all the time you could just snooze it for the duration of your event then uh again nothing with link Chimes device help just shows the Wi-Fi signal strength and if the camera’s online everything’s good there under motion settings so this is where you can edit zones now I’ve just drawn a huge blue box so everything in that blue box is going to be recorded and motion detection is going to take place now you can add additional zones so you know what if I wanted to drag this pink box over here and I could say okay this is for my kitchen View and then this is for the living room view that way when alerts come you know from which zone it’s actually coming from but I’m just going to get out of there I just use one zone motion sensitivity you can adjust this as you see to make the camera as sensitive as you like and then under smart alerts you can have a bit more fine control so you can say hey record people and send me notifications or just record them but don’t send me notifications or uh same with other motions that are not people maybe a pet or something like that you could say hey record and send me alerts or just record or you could just disable smart alerts completely if you like and then under motion schedules if you’re going to be at home say you’re getting ready in the morning for work you know you can just set a time where the alerts are not going to be active so you do have a lot of customizability there under device settings and video settings this is where we can activate color night vision I highly um suggest you leave that on and leave the infrared lights on for night vision the only time you should turn that off is if the camera is going to be near a window um also enable the tap camera preview for live view this is just quicker to get into live view if you mounted the camera upside down you’ll want to use the rotate video option and then recording length can be anywhere from 50 seconds up to 120 seconds or 2 minutes or you can tell the camera to automatically stop recordings whenever it detects that motion has stopped so you may have um shorter recordings right there now under snapshot capture the camera is going to capture snapshots every 3 minutes or every 15 seconds depending on what you like under notification settings Rich notifications this is what’s going to give you that thumbnail or um kind of snapshot preview of whatever is going on in the scene so you can decide if you want to click it or not now it does say you’re not going to see these if your device has a weak Wi-Fi signal and of course you could change the app alert tones and then under privacy settings you can disable audio recording so if you only want video recordings but no audio go ahead and toggle that and of course you could use the manual privacy cover if you want to just disable both video and audio recordings and under general settings you can go ahead and change the speaker volume here and you can also change the home position and the home position is basically after you’re done manually panning and tilting the camera the camera will just go back to a default home position so you always have you know a static look of a certain part of the room the camera can also be shared with other members of your family
Pricing
if we take a look at the protect plan details in the app it shows we get video history for up to 180 days for all cameras in one location person and package alerts enhanced notification features 24-hour event summary and multicam live view so can I recommend
Recommended?

the new ring pen and tilt indoor camera and I have two answers but I’m leaning towards no so if you already own ring cameras you’re in the ring ecosystem already you’re already used to paying monthly fees then it’s a decent enough addition the 1080p video is decent you have a wide field of view motion alerts are quick but the lack of automatic subject and motion tracking for me is a big deal breaker I don’t know why Rings engineering team would put such a great range of motion and movement in this camera body and not have it track automatically now if you’re looking for your first ever indoor camera I would stay away from ring especially if you don’t want to pay for monthly fees because there’s so many other camera brands out there that have more functionality than this and you have to pay nothing there’s zero monthly fees so I would look at brands from yui Nei easy Vis realink some of those I’ve reviewed personally some I have not I’ll leave links below to pick up the new ring pan and tilt indoor camera or any of the other cameras that I mentioned and I have a big favor to ask if you did find this video helpful or useful in any way please consider liking and subscribing it really and truly does help me out a lot and I do appreciate it and don’t forget to check out some of my other security related videos or other Tech videos in general I’m sure you’ll find something you like and I’ll see you in the next one soon
Buy New Ring Pan-Tilt Indoor Cam on Amazon
Please note that some of the links in my video descriptions are affiliate links where I earn from qualifying purchases. As an Amazon Associate I earn from qualifying purchases.